This post contains affiliate links. As an Amazon Associate I earn from qualifying purchases.
If you’ve always wanted to make grilled carrots but felt intimidated, this is your starting point. I’m going to walk you through every single detail—from choosing the right carrots at the market to nailing that perfect caramelized exterior. Grilled carrots sound fancy, but they’re genuinely one of the most forgiving dishes you can master on a grill. They taste like you spent hours in the kitchen, but you’ll be done in under 20 minutes. Pair this alongside proteins like Air Fryer Salmon Bites Bowl Recipe or my holiday turkey guide for a complete, restaurant-worthy meal at home.
How to Make Grilled Carrots for the First Time (You’ve Got This)
I’ll be completely honest with you—my first attempt at grilled carrots was a disaster. I was a chef apprentice working in Brooklyn, and I threw whole carrots on a screaming-hot grill without any prep. They burned on the outside while staying crunchy inside, and I was mortified. My mentor grabbed them, laughed, and showed me the secret: slice thick carrots lengthwise, coat them properly, and manage your heat zones. That single lesson changed everything. Now I make these at least once a week, and they’ve become my go-to side dish when I’m feeding clients or hosting dinner parties. The transformation from raw carrot to caramelized, tender perfection is genuinely magical.
What to Expect Before You Start
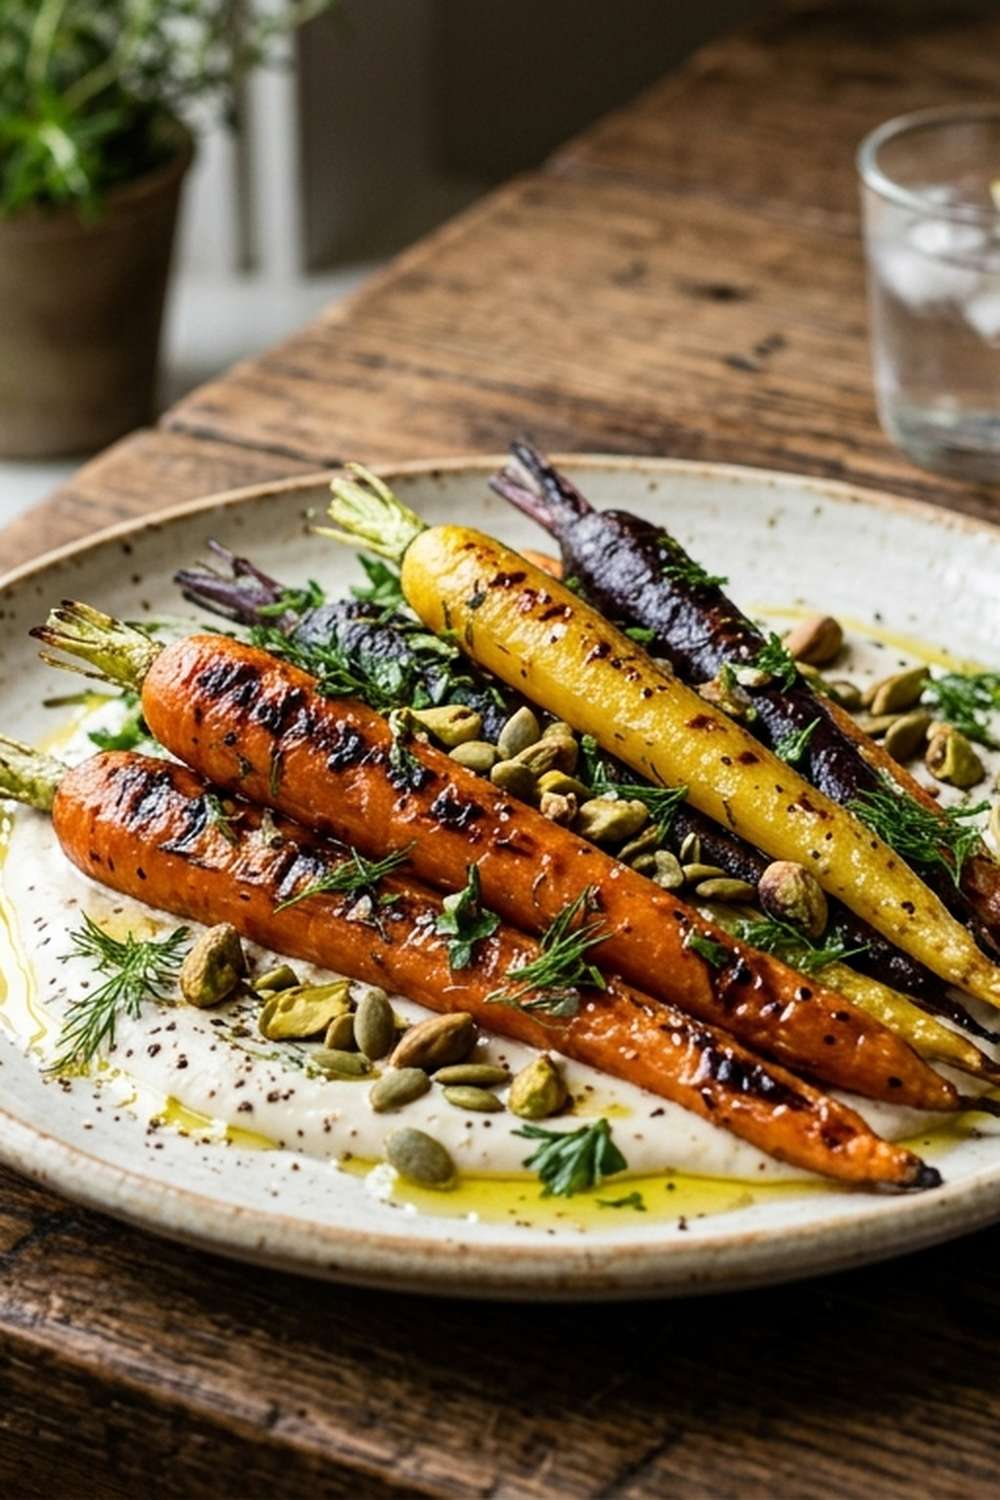
Grilled carrots are forgiving, but understanding what you’re aiming for matters. You’ll need a grill preheated to about 450 degrees (medium-high heat), and the total cooking time is 12 to 15 minutes from start to finish. The difficulty level is absolutely beginner-friendly—there’s no complex technique here, just attention and timing. Success looks like carrots that are tender enough to pierce with a fork while having charred, caramelized edges that taste like pure sweetness.
- Char marks are your friend, not a failure – Those dark golden or light brown marks on the carrots mean the natural sugars are caramelizing. It’s not burning; it’s flavor development. This is exactly what you want.
- Grill temperature is the only thing that needs monitoring – Many beginners worry their grill isn’t hot enough or is too hot. The truth? If your grill reaches 450 degrees and you can hold your hand over it for about 2-3 seconds before pulling away, you’re perfect. Don’t second-guess yourself here.
Equipment You’ll Need (And What You Can Skip)
Here’s what I love about grilled carrots—you literally need almost nothing special. No fancy gadgets, no expensive tools. I’ve made these over a campfire, on a portable charcoal grill, and on a high-end gas grill in Manhattan kitchens. The results are always stellar because the technique matters far more than the equipment.
- Grill (gas or charcoal) – This is non-negotiable. You can’t make grilled carrots without heat, but any functioning grill works perfectly. No outdoor grill? A grill pan on your stovetop over medium-high heat works surprisingly well as a backup.
- Long-handled tongs – Essential for flipping and rotating without burning your fingers. Budget-friendly option: regular kitchen tongs work fine if they’re at least 10 inches long.
- Small mixing bowl – You’ll use this to toss your carrots with oil before grilling. Any bowl in your kitchen works.
- Small brush or spoon for glazing – A silicone brush is nice but completely optional. I often use the back of a spoon to apply the glaze in a pinch.
- Meat thermometer (optional) – Not necessary, but some people like checking internal temperature. Fork-tender is your real test.
The Ingredients – A Beginner’s Shopping Guide
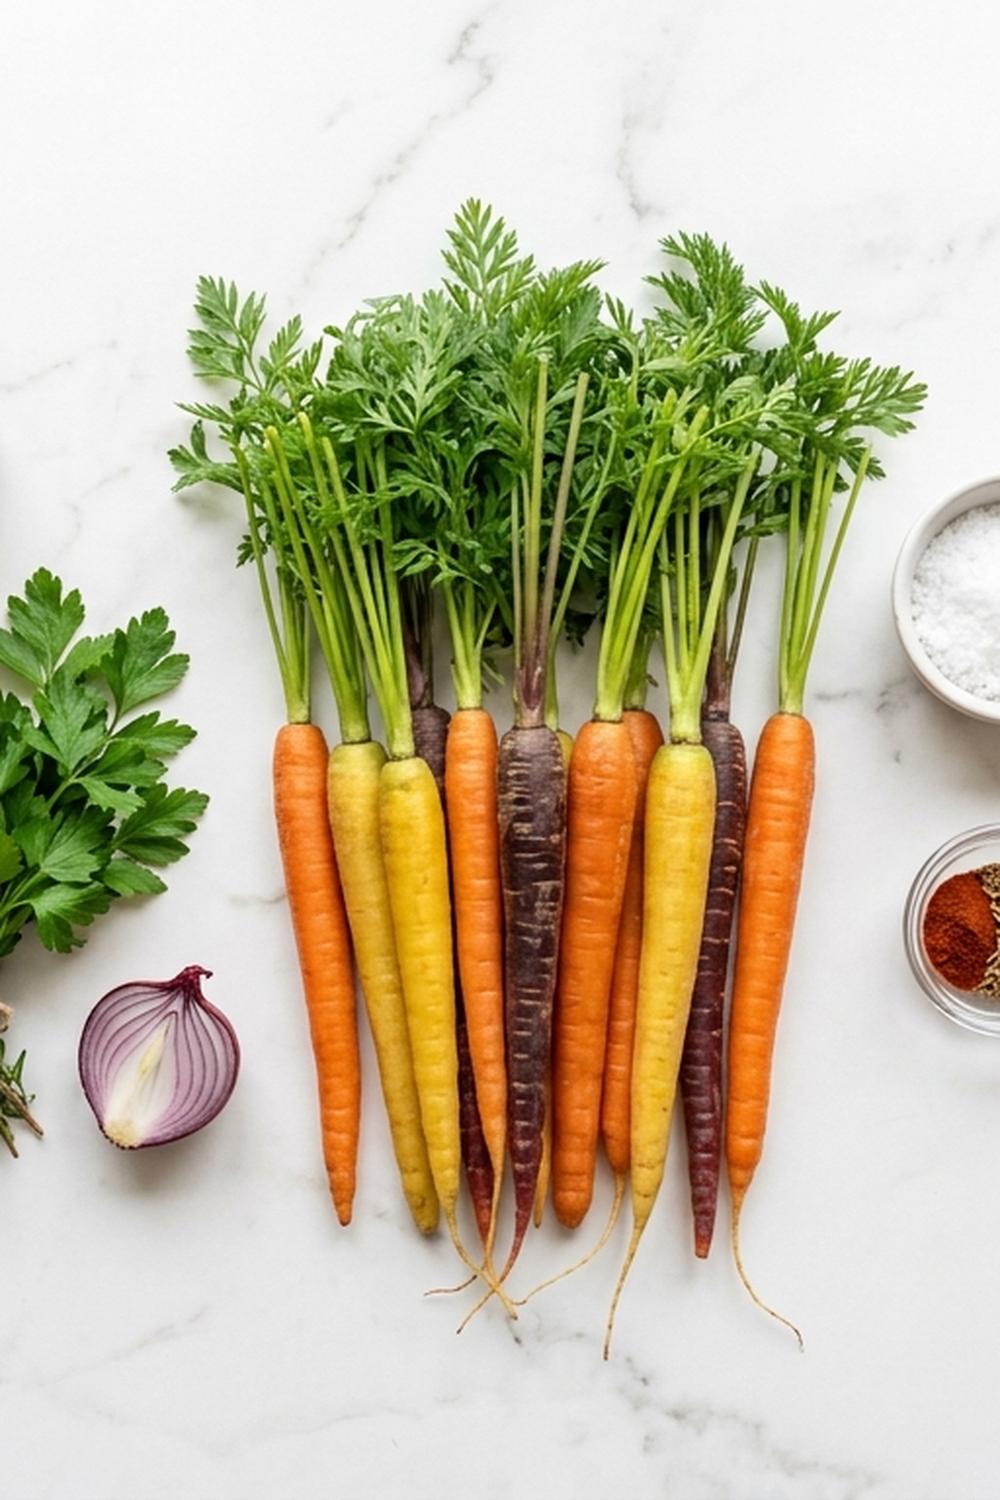
Shopping for grilled carrots is refreshingly simple. You’re looking at ingredients you probably already have in your pantry, plus fresh carrots. Let me break down exactly what to grab and what to look for when you’re standing in the produce section feeling overwhelmed.
- ¼ teaspoon ground cinnamon (optional but highly recommended; adds warmth and complexity)
- ¼ cup honey (raw or processed both work; check that it pours easily at room temperature)
- 1 tablespoon fresh orange juice (bottled works if you don’t have fresh; adds brightness and prevents the glaze from being one-note sweet)
- ¼ cup brown sugar (packed lightly in your measuring cup; dark or light brown sugar are equally good)
- 1 pound carrots (choose medium to large carrots; thinner ones under ½ inch diameter can skip the lengthwise slicing, while thick carrots need to be halved lengthwise to cook evenly)
- 1 tablespoon extra virgin olive oil (cold-pressed gives better flavor, but regular olive oil works fine too)
- ⅛ teaspoon sea salt or kosher salt (just a pinch to balance sweetness)
- 2 tablespoons unsalted butter (or salted if that’s what you have; room temperature makes glazing easier)
Pro shopping tip: Choose carrots that feel firm, not bendy or soft. Look for ones without cracks or weird sprouts. Rainbow carrots are beautiful and taste identical to orange ones, so grab whatever speaks to you. At the farmers market, ask the vendor which carrots are sweetest—they always know.
Step-by-Step: Your First Grilled Carrots
You’ve got this. I’m going to walk you through every single step with the detail usually reserved for culinary school. There are no shortcuts, but there are also no tricks. Just solid technique that works every single time.
Step 1: Prep Your Carrots and Your Grill
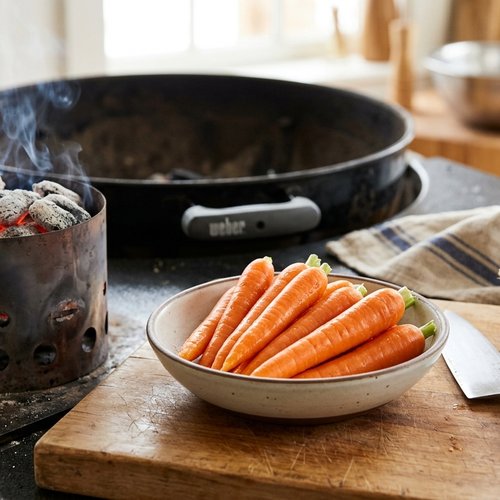
For the carrots: Rinse them under cool running water and scrub away any dirt with your fingers or a soft vegetable brush. You don’t need to peel them—the skin adds nutrients and flavor. If your carrots are thin (less than half an inch in diameter), leave them whole. If they’re thick, place one on your cutting board and carefully cut it in half lengthwise, creating two long, flat pieces. The flat side will make direct contact with the grill, creating those gorgeous char marks. This step is crucial for even cooking.
For the grill: Turn your grill to medium-high heat (aiming for 450 degrees). If you have a gas grill, light it up and let it preheat for about 10 minutes. If you’re using charcoal, get your coals burning until they’re mostly white-gray on the surface (about 15-20 minutes). Once your grill is hot, lightly oil the grates using a folded paper towel dipped in oil. This prevents sticking and makes flipping infinitely easier.
Step 2: Oil Your Carrots (This Makes All the Difference)
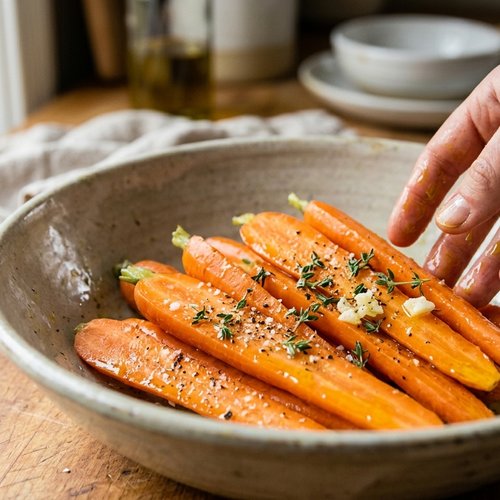
Place your prepped carrots in a mixing bowl. Drizzle the tablespoon of olive oil over them, then use your hands or two spoons to toss until every piece is lightly coated. This thin layer of oil prevents sticking, helps create char marks, and conducts heat evenly. You’re not trying to soak them—just a light, even coating. If carrots look dry or dusty, add another few drops of oil. This is one of those steps that separates perfectly grilled carrots from mediocre ones.
Step 3: Place Carrots on the Grill Over Direct Heat
Working with the flat side down first (if you cut them lengthwise), carefully place each carrot directly over the hottest part of your grill. You’ll hear a satisfying sizzle. Don’t move them immediately. Let them sit undisturbed for about 2-3 minutes so they can develop color. You’re creating the Maillard reaction—that’s the magical chemistry that makes grilled food taste incredible. If you’ve cut them in half lengthwise, the flat side gets 2-3 minutes first.
Step 4: Rotate and Create Even Char Marks
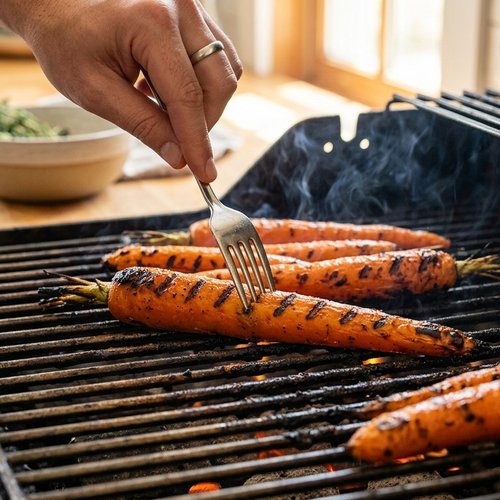
Using your long-handled tongs, carefully rotate each carrot 90 degrees (a quarter turn). This creates a crosshatch pattern of char marks that looks absolutely professional. Let them sit for another 2-3 minutes. You’ll see beautiful brown marks appearing. This is exactly what you want. Next, flip the carrots over to the other cut side (or the other flat surface), and repeat the rotation process on that side. Your total time so far should be around 8-10 minutes.
Step 5: Move to Indirect Heat and Check Tenderness
After both sides have char marks, move the carrots to the cooler side of your grill (indirect heat zone). If your grill doesn’t have a cool zone, reduce your heat to medium. This is where they finish cooking without burning. Let them cook for another 4-5 minutes, checking tenderness by piercing one carrot with a fork. Fork-tender is your target—it should slide through with almost no resistance, but still have some structure (not mushy). Total cooking time is typically 12-15 minutes from when they first hit the grill.
Step 6: Make Your Glaze While Carrots Cook
While carrots are on indirect heat, prepare your glaze. In a small bowl, combine the softened butter, brown sugar, honey, orange juice (if using), cinnamon (if using), and salt. Stir vigorously until everything is well combined—you’re creating an emulsion where the butter and honey blend together. The mixture should look creamy and caramel-colored. If your glaze is too thick, add another teaspoon of orange juice. If it’s too thin, let it sit for a minute—honey thickens as it cools slightly.
Step 7: Glaze Your Carrots (The Grand Finale)
Here’s where the magic happens and why people think you’ve been cooking for hours. When your carrots are fork-tender, bring them back over direct heat for just 30-60 seconds. Using a brush or the back of a spoon, generously apply your glaze to the top of each carrot. Let it cook on direct heat for exactly 1 minute—the sugars caramelize and create a glossy, sticky coating. Remove the carrots from the grill.
Now here’s the pro move: immediately brush a second coat of glaze onto the warm carrots while they’re still on the grill or right after you remove them. This creates a double-layer glaze that’s restaurant-quality. The heat from the carrots warms the glaze, creating that luxurious mouthfeel.
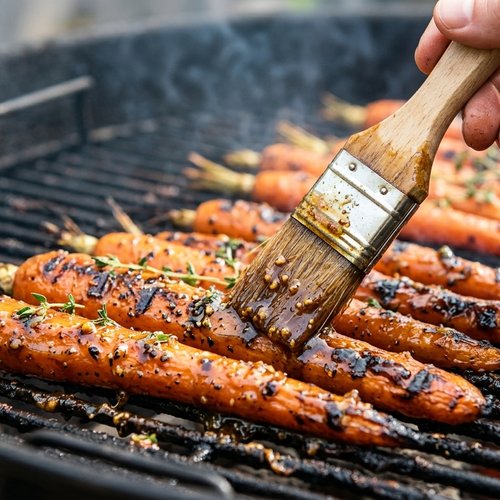
Step 8: Serve Immediately
Transfer your carrots to a serving platter right away. They’re best eaten warm, when the glaze is still slightly sticky and the carrots are tender. Any delay, and the glaze sets up and becomes less luscious. Arrange them in a visually appealing way—remember, we eat with our eyes first.
How to Tell If You Did It Right
Success tastes incredible, but it also looks and feels specific. Here’s what you’re aiming for at each stage so you know you’re nailing it.
- Char marks are golden to medium-brown, not black or burnt – If they’re purely black, your heat was too high. Next time, use medium heat or move to indirect heat sooner. Light golden marks mean perfect caramelization and sweet flavor development.
- Carrots are fork-tender with slight resistance – Push a fork through and it should go through with gentle pressure, but the carrot shouldn’t fall apart. If it’s still crunchy, you need more time. If it’s mushy, you’ve overcooked it (though honestly, overcooked grilled carrots still taste good).
- The glaze is glossy, sticky, and slightly caramelized – It should coat the carrot completely and look like amber or light caramel. If it’s thin and runny, your glaze might be too warm. If it’s hard and crystallized, you might have used too much heat on the final glaze step.
- The aroma is sweet, slightly charred, and aromatic – You should smell honey, butter, and that distinctive grilled vegetable scent. If you smell only burning, pull them off immediately.
What Went Wrong? Beginner Fixes
- Carrots are still crunchy after 15 minutes – Your grill temperature was too low, or you spent too much time over direct heat without moving to indirect heat to finish. Fix it: Cut them thinner next time, and make sure your grill reaches 450 degrees before you start. Alternatively, cut carrots into thinner pieces so they cook faster.
- One side is burnt while the other is barely cooked – Uneven heat zones or inconsistent rotation. Fix it: Make sure you’re rotating every 2-3 minutes, not longer. If your grill has hot spots, move carrots away from those areas sooner.
- The glaze slid off or didn’t stick – The carrots were too cool when you applied it, or you used too much liquid in your glaze. Fix it: Apply glaze while carrots are still hot from the grill. Make sure your glaze is the consistency of thick honey, not thin syrup.
- The glaze is grainy or crystallized – You likely cooked the sugars too long on high direct heat. Fix it: Apply glaze during the last minute of cooking only, not before. Keep heat at medium or move to indirect heat after glazing.
- Carrots taste one-note sweet with no complexity – You skipped the optional orange juice and cinnamon, or didn’t use salt. Fix it: Always use at least a pinch of salt to balance sweetness. Add the orange juice—it brightens everything. Consider cinnamon, which adds warmth.
Expert’s Nutritional Tip
Here’s something most recipes won’t tell you: the longer you cook carrots, the more bioavailable the beta-carotene becomes. That means your body can actually absorb and use the nutrients better. Grilling brings out natural sugars while the heat breaks down cell walls, making the carrot’s nutrients more accessible. The charring also triggers the formation of additional antioxidants. This is one of the few cooking methods where more heat actually increases nutritional value. Plus, you’re using minimal added fat (just 1 tablespoon oil) and controlling the sugar with that small pinch of salt, making this genuinely balanced.
Your Next Steps After Mastering This
Once you’ve nailed grilled carrots, you’ve unlocked a whole category of grilling skills. You now understand heat management, char development, and how to finish a dish with a glaze—skills that directly transfer to proteins. Try grilling other root vegetables like beets or parsnips using the exact same method. You can also apply this glazing technique to Air Fryer Zucchini Bites for the same caramelized effect in your air fryer, or expand to grilled proteins with compound butters. The confidence you build with vegetables translates beautifully to cooking everything else.
Seasonal Variations
Spring: Use young, thin carrots and finish with fresh mint leaves and lemon juice instead of orange juice. The brightness of spring calls for it.
Summer: Add a pinch of cumin and lime juice to your glaze instead of cinnamon and orange. Pair with grilled chicken or fish.
Fall: Use the recipe as written—honey, cinnamon, and brown sugar are quintessential fall flavors. Add a pinch of nutmeg if you love warm spices.
Winter: Try substituting maple syrup for half the honey and adding crystallized ginger to your glaze. The depth of maple pairs gorgeously with darker carrots like purple varieties.
Make-Ahead Guide
One of the best things about this recipe is how well it stores and reheats. You can prep carrots up to 2 days ahead. Wash, trim, and cut them the night before, storing in an airtight container in the crisper drawer. You can even make your glaze up to 5 days in advance and store it in a sealed container in the fridge.
For serving the next day: Grill carrots completely, let them cool, and store in an airtight container in the refrigerator for up to 4 days. When you’re ready to eat, reheat them on the grill for 2-3 minutes over medium heat (just enough to warm through and reactivate the glaze), or pop them in a 375-degree oven for 5 minutes. The texture stays firm and the flavor remains excellent.
For meal prep: I grill a big batch on Sunday and portion them into containers. They’re perfect for lunch bowls all week. They work cold (if that’s your preference), room temperature, or reheated. This makes them infinitely more practical than most vegetable sides.
Can I Store Grilled Carrots?
Yes, and they store beautifully. Refrigerate in an airtight container for up to 4 days. The glaze will set as it cools, creating a more solid coating, but it still tastes fantastic. You can reheat them on the grill, in a 375-degree oven for 5 minutes, or even eat them cold straight from the fridge (they’re genuinely good this way as a snack).
Freezing is not recommended. The texture changes significantly once frozen and thawed, becoming mushy rather than tender-firm. Fresh or refrigerated is always best.
Leftover glaze can be stored separately for up to a week and used on other grilled vegetables, drizzled over ice cream, or swirled into yogurt.
Nutrition Information
This recipe makes approximately 4 servings as a side dish (about 4 ounces of carrots per serving, plus glaze).
Per serving: Approximately 180 calories, 4g protein, 8g total fat (3g saturated fat), 26g carbohydrates, 4g dietary fiber, 18g sugar, 95mg sodium, and 380 IU vitamin A (beta-carotene).
Based on USDA FoodData Central, carrots are nutritional superstars—rich in beta-carotene, vitamin K, and potassium. The grilling process makes these nutrients more bioavailable. The honey and brown sugar add quick carbohydrates, making this an excellent post-workout side. The butter provides fat-soluble vitamin absorption, helping your body actually use all that vitamin A from the carrots.
What Can I Serve With Grilled Carrots?
These carrots are endlessly versatile and work with nearly any protein. They’re sweet enough to balance savory proteins, but structured enough to stand up to rich dishes. Here are my favorite pairings from my professional kitchen experience:
- Grilled fish or salmon – The sweetness of the glaze brightens up rich fish beautifully. Try them with Air Fryer Salmon Bites Bowl Recipe for a complete, restaurant-quality meal.
- Roasted chicken or turkey – These carrots are the perfect side for Baked Turkey Loin or any poultry. The honey-cinnamon glaze complements chicken beautifully.
- Grilled steak or beef – Try pairing with Air Fry Steak Bites Recipe. The sweetness cuts through the richness of beef perfectly.
- Vegetarian grain bowls – Serve over quinoa, farro, or wild rice with roasted chickpeas and a tahini dressing for a complete plant-based meal.
- Alongside creamy sides – Pair with Creamy Tuna Broccoli Casserole or mashed potatoes. The glaze provides brightness to balance creaminess.
- Asian-inspired meals – These work surprisingly well with Teriyaki Chicken and Broccoli if you reduce the honey glaze and add soy sauce instead.
Carrots Grilled Recipe

Ingredients
- ¼ teaspoon ground cinnamon optional but highly recommended; adds warmth and complexity
- ¼ cup honey raw or processed both work; check that it pours easily at room temperature
- 1 tablespoon fresh orange juice bottled works if you don't have fresh; adds brightness and prevents the glaze from being one-note sweet
- ¼ cup brown sugar packed lightly in your measuring cup; dark or light brown sugar are equally good
- 1 pound carrots choose medium to large carrots; thinner ones under ½ inch diameter can skip the lengthwise slicing, while thick carrots need to be halved lengthwise to cook evenly
- 1 tablespoon extra virgin olive oil cold-pressed gives better flavor, but regular olive oil works fine too
- ⅛ teaspoon sea salt or kosher salt just a pinch to balance sweetness
- 2 tablespoon unsalted butter or salted if that's what you have; room temperature makes glazing easier
Instructions
Step 1: Prep Your Carrots and Your Grill
- For the carrots: Rinse them under cool running water and scrub away any dirt with your fingers or a soft vegetable brush. You don't need to peel them—the skin adds nutrients and flavor. If your carrots are thin (less than half an inch in diameter), leave them whole. If they're thick, place one on your cutting board and carefully cut it in half lengthwise, creating two long, flat pieces. The flat side will make direct contact with the grill, creating those gorgeous char marks. This step is crucial for even cooking. For the grill: Turn your grill to medium-high heat (aiming for 450 degrees). If you have a gas grill, light it up and let it preheat for about 10 minutes. If you're using charcoal, get your coals burning until they're mostly white-gray on the surface (about 15-20 minutes). Once your grill is hot, lightly oil the grates using a folded paper towel dipped in oil. This prevents sticking and makes flipping infinitely easier.
Step 2: Oil Your Carrots (This Makes All the Difference)
- Place your prepped carrots in a mixing bowl. Drizzle the tablespoon of olive oil over them, then use your hands or two spoons to toss until every piece is lightly coated. This thin layer of oil prevents sticking, helps create char marks, and conducts heat evenly. You're not trying to soak them—just a light, even coating. If carrots look dry or dusty, add another few drops of oil. This is one of those steps that separates perfectly grilled carrots from mediocre ones.
Step 3: Place Carrots on the Grill Over Direct Heat
- Working with the flat side down first (if you cut them lengthwise), carefully place each carrot directly over the hottest part of your grill. You'll hear a satisfying sizzle. Don't move them immediately. Let them sit undisturbed for about 2-3 minutes so they can develop color. You're creating the Maillard reaction—that's the magical chemistry that makes grilled food taste incredible. If you've cut them in half lengthwise, the flat side gets 2-3 minutes first.
Step 4: Rotate and Create Even Char Marks
- Using your long-handled tongs, carefully rotate each carrot 90 degrees (a quarter turn). This creates a crosshatch pattern of char marks that looks absolutely professional. Let them sit for another 2-3 minutes. You'll see beautiful brown marks appearing. This is exactly what you want. Next, flip the carrots over to the other cut side (or the other flat surface), and repeat the rotation process on that side. Your total time so far should be around 8-10 minutes.
Step 5: Move to Indirect Heat and Check Tenderness
- After both sides have char marks, move the carrots to the cooler side of your grill (indirect heat zone). If your grill doesn't have a cool zone, reduce your heat to medium. This is where they finish cooking without burning. Let them cook for another 4-5 minutes, checking tenderness by piercing one carrot with a fork. Fork-tender is your target—it should slide through with almost no resistance, but still have some structure (not mushy). Total cooking time is typically 12-15 minutes from when they first hit the grill.
Step 6: Make Your Glaze While Carrots Cook
- While carrots are on indirect heat, prepare your glaze. In a small bowl, combine the softened butter, brown sugar, honey, orange juice (if using), cinnamon (if using), and salt. Stir vigorously until everything is well combined—you're creating an emulsion where the butter and honey blend together. The mixture should look creamy and caramel-colored. If your glaze is too thick, add another teaspoon of orange juice. If it's too thin, let it sit for a minute—honey thickens as it cools slightly.
Step 7: Glaze Your Carrots (The Grand Finale)
- Here's where the magic happens and why people think you've been cooking for hours. When your carrots are fork-tender, bring them back over direct heat for just 30-60 seconds. Using a brush or the back of a spoon, generously apply your glaze to the top of each carrot. Let it cook on direct heat for exactly 1 minute—the sugars caramelize and create a glossy, sticky coating. Remove the carrots from the grill. Now here's the pro move: immediately brush a second coat of glaze onto the warm carrots while they're still on the grill or right after you remove them. This creates a double-layer glaze that's restaurant-quality. The heat from the carrots warms the glaze, creating that luxurious mouthfeel.
Step 8: Serve Immediately
- Transfer your carrots to a serving platter right away. They're best eaten warm, when the glaze is still slightly sticky and the carrots are tender. Any delay, and the glaze sets up and becomes less luscious. Arrange them in a visually appealing way—remember, we eat with our eyes first.
Notes
Nutrition
FAQs
Can I make these on a grill pan inside on my stovetop?
Absolutely yes. Heat a cast-iron grill pan or regular skillet to medium-high over your stove. Follow all the same steps—oil the pan, place oiled carrots on it flat-side down, rotate after 2-3 minutes, and manage timing the same way. You’ll create beautiful char marks just like on an outdoor grill. The carrots will take about the same time, but you might need to cover the pan with foil for the last few minutes to ensure they cook through. The glaze step is identical.
Do I have to use honey and brown sugar, or can I just use one?
You can experiment, but I recommend keeping both if possible. Here’s why: honey provides moisture and shine, while brown sugar adds a deeper molasses flavor and helps with caramelization. If you only have honey, use ½ cup total honey (skip the brown sugar). If you only have brown sugar, use ½ cup brown sugar and skip the honey. Neither alone creates quite the same luxurious texture, but both will still taste delicious. You could also use maple syrup, agave, or even coconut sugar as substitutes.
What if my grill doesn’t have a high enough temperature?
You can absolutely make these on a medium-temperature grill (around 375-400 degrees). You’ll just need more time—probably 18-20 minutes total instead of 12-15. They’ll still develop beautiful flavor; it’ll just happen more gradually. Cut your carrots slightly thinner so they cook evenly. You might skip the char marks if your grill can’t reach higher temperatures, but they’ll still taste great.
Are these better hot or cold?
I prefer them warm or room temperature, when the glaze is still slightly sticky and the carrots are at their most tender. That said, they’re genuinely delicious cold straight from the fridge as a snack or salad topper. Some people love them chilled the next day. There’s no “wrong” temperature—it’s entirely about your preference. Warm brings out the aromatic qualities; cold creates a firmer texture that’s nice in salads.
Can I prep these ahead and glaze them right before serving?
Yes, this is actually a smart strategy for meal prep or entertaining. Grill the carrots completely without the glaze and store them in the fridge. When you’re ready to serve, reheat them briefly on the grill or in the oven, then apply the glaze in the final minute. This way you can prepare the glaze fresh, and everything comes together quickly during dinner service. I do this all the time when I’m cooking for clients.
More Beginner-Friendly Recipes
- Air Fry Chicken Legs And Thighs Recipe – Master another versatile cooking method with this beginner-friendly chicken recipe
- Air Fryer Asian Chicken Recipe – Once you nail glazes with carrots, tackle this Asian-inspired dish
You just learned to make restaurant-quality grilled carrots from scratch. That’s not a small thing. You understand heat management, flavor development, and how to create a glaze that tastes like you’ve been cooking professionally for years. The skills you’ve built here—rotating vegetables, managing heat zones, creating balance between sweet and savory—transfer directly to every other dish you’ll ever make. Whether you’re grilling vegetables, fish, or meat, you now have confidence and technique.
The most important thing? You did it. You made something delicious with your own hands. You managed a grill, timed a dish perfectly, and created food that tastes incredible. That’s exactly the kind of confidence that builds a lifelong love of cooking. Make these carrots again next week. Make them again next month. Experiment with seasonal variations. Invite people over specifically to eat them. Let this be the moment you realized home cooking isn’t intimidating—it’s empowering.
Celebrate your flavorful adventure!