This post contains affiliate links. As an Amazon Associate I earn from qualifying purchases.
Whether you’re keto, vegan, or gluten-free, you don’t have to miss out on a stunning breakfast that tastes like you spent hours in the kitchen. I created this overnight French toast bake specifically to work across multiple dietary needs—because breakfast shouldn’t require three different recipes. This make-ahead casserole is my secret weapon for stress-free mornings, and I’m sharing exactly how to adapt it to your lifestyle.
The Ultimate Overnight French Toast Bake Recipe for Every Diet (Keto, Vegan, Gluten-Free)
I’ll never forget the morning my sister called me in a panic. She’d just gone vegan, her partner was strict keto, and their kids needed gluten-free options. She asked me, “Kimberly, how am I supposed to make one breakfast that works for everyone?” That’s when I stopped treating dietary restrictions as obstacles and started seeing them as creative flavor challenges. This overnight bake was born from that exact moment—a foundation recipe flexible enough to feed an entire table of people with different needs, all eating the same dish.
As a registered dietitian who also trained as a chef, I’ve learned that the best recipes aren’t rigid—they’re blueprints. This casserole proves you can honor your body’s needs without sacrificing that custard-soaked, caramelized-topped indulgence that makes breakfast feel special.
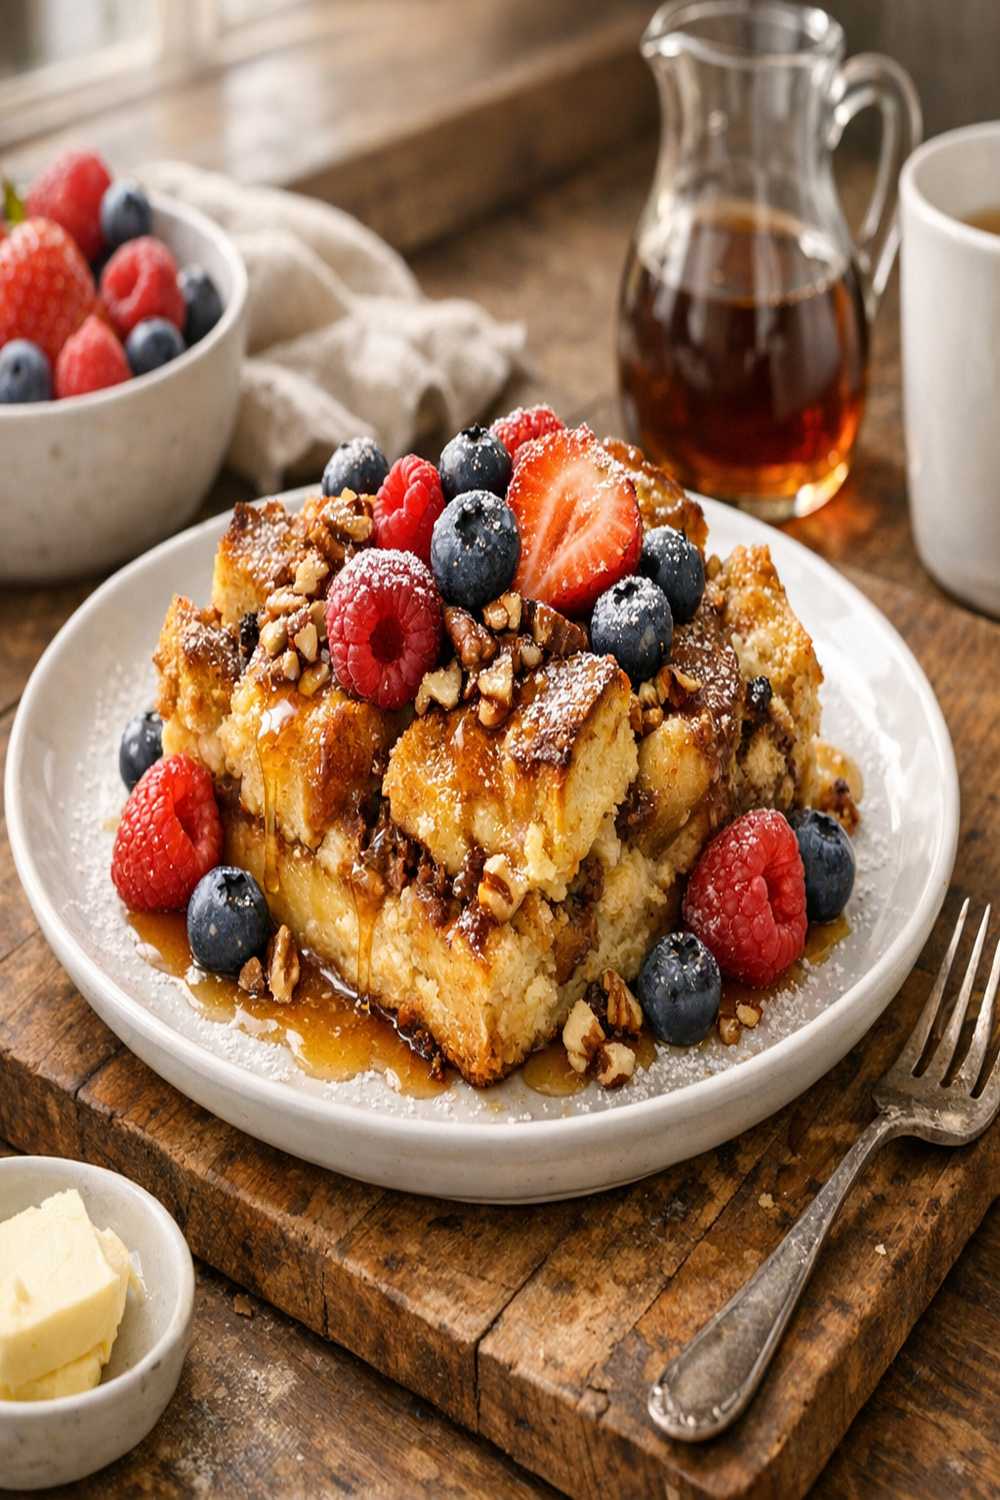
Which Version Is Right for You?
Let me break down what makes each version shine and help you pick the one that fits your life right now. Remember, these aren’t compromises—they’re intentional variations that taste incredible in their own way.
- Standard Version – This is your golden baseline. Rich, custardy, and approachable. Perfect if you’re cooking for a mixed group or just want the classic French toast experience without modification.
- Keto Version – We’re swapping out bread for a lower-carb alternative and using monk fruit sweetener instead of brown sugar. You’ll get that same breakfast-for-dinner vibe with zero guilt. Expect 3-5g net carbs per serving instead of 35+g.
- Vegan Version – Aquafaba replaces eggs, coconut cream stands in for heavy cream, and almond milk becomes your base. The texture stays creamy and custardy. Honestly, vegan guests often can’t tell the difference.
- Gluten-Free Version – High-quality GF bread is your foundation. The custard doesn’t change, so you get all the comfort without the gluten. Choose a bread with good structure—Udi’s or Canyon Bakehouse work beautifully.
- Dairy-Free Version – Oat cream or cashew cream replaces dairy entirely. This works wonderfully for those with lactose sensitivity or anyone avoiding dairy for ethical reasons. The flavor stays buttery and rich.
The Base Ingredients (Works for All Versions)
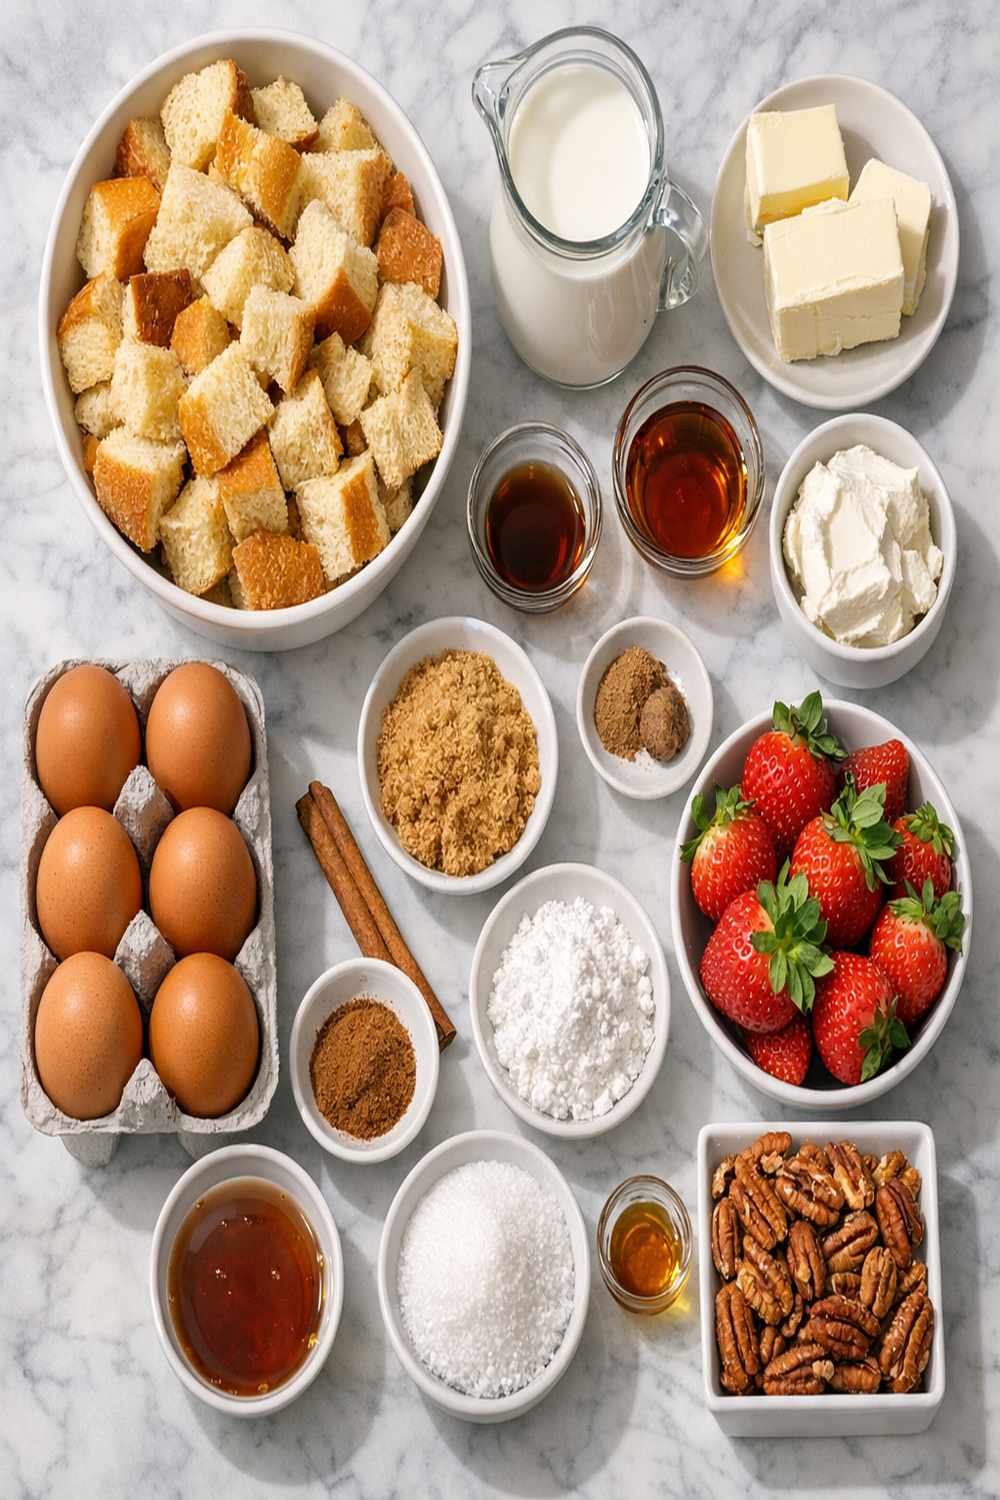
These ingredients form the foundation of every version. Some stay exactly the same across all dietary needs, while others get strategic swaps. I’ve broken down which versions use what—this makes shopping and prepping infinitely easier.
For the Custard Base
- 2 cups whole milk (full-fat creates that rich, custardy texture)
- 2 teaspoons ground cinnamon (freshly ground if possible—it makes a noticeable difference)
- 1 tablespoon pure vanilla extract (not imitation—the quality matters here)
- 1 cup heavy cream (adds silky richness—this is where dairy versions shine)
- ¼ cup light brown sugar (packed, provides moisture and deep caramel notes)
- 8 large eggs (room temperature, acts as your binding agent in the standard version)
- ½ teaspoon kosher salt (balances sweetness and enhances all other flavors)
For the Bread
- 1 pound loaf of brioche, challah, or thick-cut white bread (standard version—choose bread with tight crumb structure)
For the Crispy Topping
- 3 tablespoons light brown sugar (packed)
- 2 tablespoons cold unsalted butter (cut into small pieces, creates the crumbly topping)
- ½ teaspoon cardamom (optional but transforms the flavor profile seasonally)
- 3 tablespoons granulated sugar (creates textural contrast)
- 1 teaspoon ground cinnamon (this topping is where spice really shines)
- ¼ teaspoon ground nutmeg (freshly grated elevates everything)
Dietary Substitution Chart
This chart is your cheat sheet. Print it, bookmark it, tape it to your fridge. When you’re at the store or prepping, you’ll know exactly what swap to make without guessing.
- Butter (2 tablespoons) -> Keto: 2 tablespoons grass-fed butter (same) | Vegan: 2 tablespoons vegan butter (Earth Balance or Miyoko’s) | GF: 2 tablespoons butter (same) | Dairy-Free: 2 tablespoons vegan or coconut oil-based butter
- Eggs (8 large) -> Keto: 8 large eggs (same) | Vegan: 1 cup aquafaba (liquid from canned chickpeas, whisked until foamy) | GF: 8 large eggs (same) | Dairy-Free: 8 large eggs (same)
- Light Brown Sugar (¼ cup) -> Keto: 3 tablespoons monk fruit sweetener or erythritol | Vegan: ¼ cup light brown sugar (same) | GF: ¼ cup light brown sugar (same) | Dairy-Free: ¼ cup light brown sugar (same)
- Heavy Cream (1 cup) -> Keto: ¾ cup heavy cream + ¼ cup coconut cream | Vegan: 1 cup full-fat coconut cream (canned, whisked smooth) | GF: 1 cup heavy cream (same) | Dairy-Free: 1 cup oat cream or coconut cream
- Whole Milk (2 cups) -> Keto: 1.5 cups unsweetened almond milk + ½ cup heavy cream | Vegan: 2 cups unsweetened oat or almond milk | GF: 2 cups whole milk (same) | Dairy-Free: 2 cups oat cream or cashew cream
- Bread (1 pound loaf) -> Keto: 1 pound keto bread or 8-10 slices of Aldi’s Keto bread | Vegan: 1 pound certified vegan bread (check labels—some contain dairy) | GF: 1 pound certified gluten-free bread | Dairy-Free: 1 pound dairy-free bread (most conventional breads are fine)
How to Make Overnight French Toast Bake Your Way
Here’s where the magic happens. I’m walking you through each step with dietary notes woven in naturally. You’ll understand not just what to do, but why each step matters for your specific version.
Step 1: Prepare Your Baking Dish and Bread
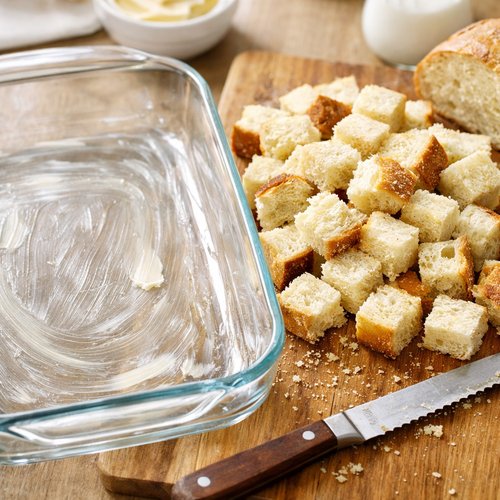
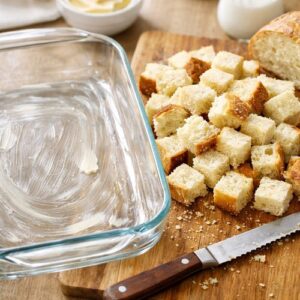
Grab a 9×13-inch baking dish and lightly butter or oil it. Cut your chosen bread into 1-inch cubes—this matters more than you’d think. Too small and the bread disintegrates; too large and the custard doesn’t penetrate evenly. Scatter the bread cubes across the bottom of your prepared dish in a single, slightly overlapping layer. For keto versions, your bread cubes will be smaller and denser, so pack them slightly tighter. For gluten-free bread, handle it gently—GF breads are more delicate and can crumble if you’re rough with them.
Step 2: Whisk Your Custard Base
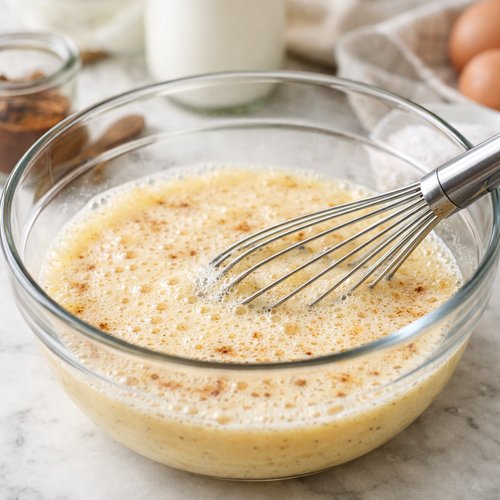
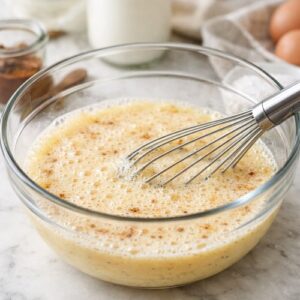
Pour your eggs into a large mixing bowl. If you’re making the vegan version, use aquafaba instead and whisk for about 30 seconds until it’s light and slightly foamy—this aerates the mixture and helps it set properly. Crack your eggs directly into the bowl and whisk them well, breaking up the yolks completely. Add your chosen milk and cream (or dairy-free alternatives), then add your sweetener, cinnamon, salt, and vanilla extract. Whisk for at least 60 seconds until everything is completely combined and the sweetener is fully dissolved. For keto versions using monk fruit or erythritol, whisk an extra 30 seconds—these sweeteners sometimes leave granules if you don’t fully incorporate them.
Step 3: Combine Bread and Custard
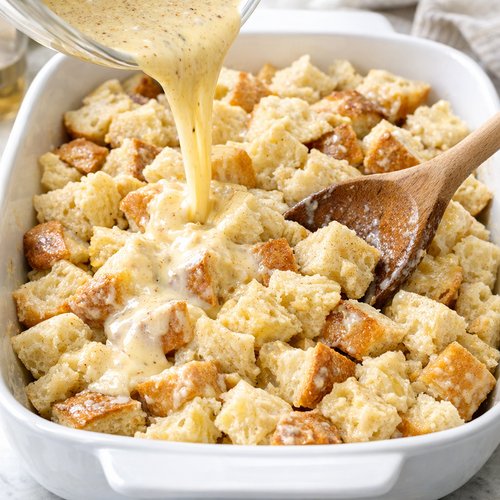
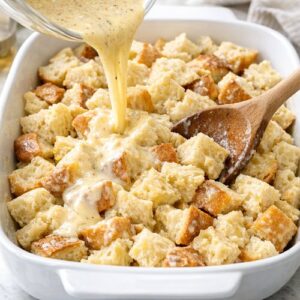
Pour your custard mixture evenly over the bread cubes. Gently toss the bread with a silicone spatula or wooden spoon—you want every piece to get coated, but you don’t want to demolish the bread. Work gently, especially with gluten-free or vegan breads. Spread everything into an even layer, pressing down just slightly so the bread sits snugly in the custard. The bread should be mostly submerged, with some pieces peeking through the top. This is where patience pays off—let it sit for 5 minutes, then give it one more gentle stir. This second toss helps the bottom pieces absorb custard too.
Step 4: Make and Apply Your Crumbly Topping
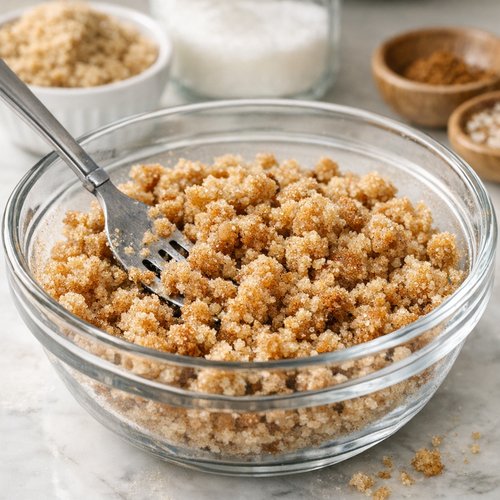
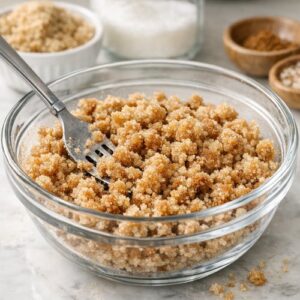
While your bread and custard are getting acquainted, prepare the topping. Combine your light brown sugar, granulated sugar, cinnamon, nutmeg, and cardamom (if using) in a small bowl. Stir everything together until the spices are evenly distributed—no clumps. Cut your cold butter into small pieces directly over the bowl. For vegan or dairy-free versions, cut your vegan butter the same way. Using a pastry blender, two forks, or your fingertips, work the butter into the sugar mixture until it resembles coarse breadcrumbs. You want some small pea-sized pieces and some finer crumbs—this creates textural contrast when it bakes. Cover this topping with plastic wrap and refrigerate.
Step 5: Cover and Refrigerate Overnight
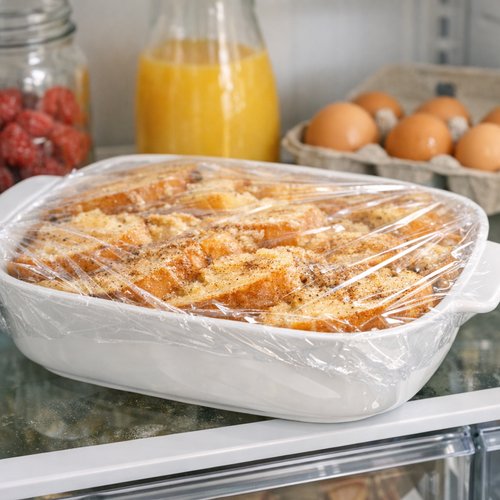
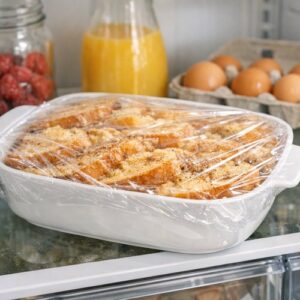
Cover your French toast casserole tightly with plastic wrap or aluminum foil. Place it in the refrigerator for at least 8 hours, ideally 12 hours. This time is critical—it allows the bread to fully absorb the custard. The longer it sits, the more custardy the interior becomes. Your topping stays cold and separated in its own container. You can prep this dish up to 24 hours ahead, making it perfect for holiday mornings or when you know your schedule will be chaotic.
Step 6: Bake Until Golden and Set
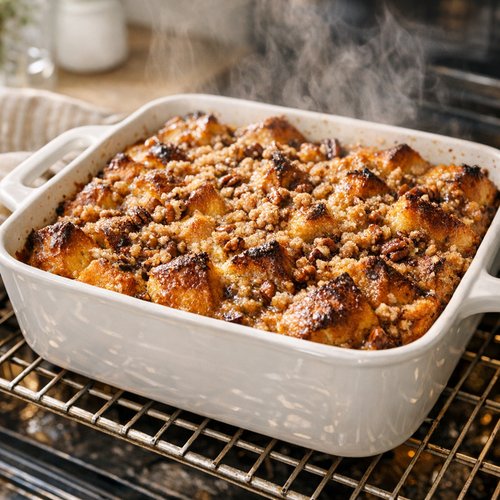
Preheat your oven to 350°F (175°C). Remove your French toast casserole and topping from the refrigerator about 10 minutes before baking—this helps it bake more evenly. Remove the plastic wrap and sprinkle your prepared topping evenly across the entire surface. Don’t press it down; let it sit naturally on top. Bake for 45-50 minutes. You’re looking for a golden-brown top and a casserole that jiggles just slightly in the center when you gently shake the pan. If your top is browning too quickly, tent it loosely with foil for the last 15 minutes. For vegan versions, you might need an extra 5-7 minutes since aquafaba takes slightly longer to set than eggs.
Step 7: Cool and Serve
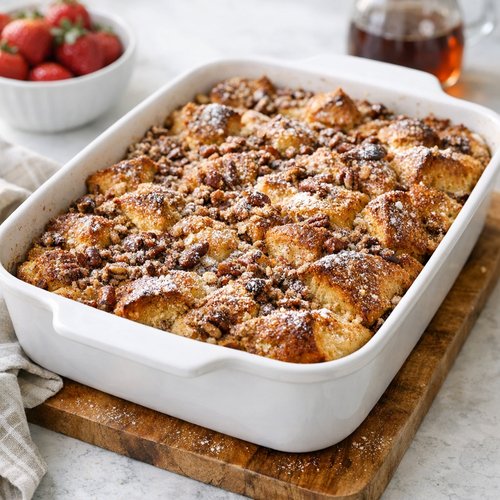
Remove your masterpiece from the oven and let it rest for at least 10-15 minutes. This allows the custard to set completely and makes serving cleaner. Cut into 8-12 portions (depending on appetite) and serve warm. The topping will have crisped up beautifully, creating a gorgeous contrast with the custardy interior.
Expert’s Nutritional Tip: Understanding the Egg-to-Custard Ratio
Here’s something only someone who trained in both clinical nutrition and culinary arts would tell you: the ratio of eggs to liquid determines whether your bake sets correctly. In the standard version, we’re using 8 eggs to 3 cups total liquid (2 cups milk + 1 cup cream). This 1:3 ratio creates that perfect creamy custard center. When you swap ingredients for dietary reasons, the protein and fat content shifts—and that affects how the casserole sets. Vegan versions using aquafaba need those extra 5-7 minutes because aquafaba’s proteins set differently than egg proteins. Keto versions with less milk but more cream actually set faster because cream has higher fat content. Understanding this science means you’re not just following a recipe blindly; you’re adapting it intelligently based on chemistry. This knowledge transfers to any custard-based dish you make going forward.
Make-Ahead Guide for Busy Weeks
As someone who meal preps constantly, this recipe is my secret weapon for sanity. Here’s my professional approach to getting this on the table with zero morning stress.
Five Days Before: Shop for all your ingredients. Check expiration dates on eggs, dairy, and plant-based alternatives. Store everything properly—eggs in their original carton, not loose in your fridge.
Two Days Before: Prep your bread cubes and refrigerate them in an airtight container. Yes, really. This prevents them from drying out or getting stale, and cuts your assembly time in half.
Night Before Serving: Assemble your casserole exactly as written. Prepare your topping and refrigerate both separately. Set a phone reminder to take them out 10 minutes before baking.
Storage Strategy: After baking, you can refrigerate leftovers in an airtight container for 3-4 days. Reheat individual portions in a 325°F oven for about 8-10 minutes, or microwave for 90 seconds. The topping will soften slightly when reheated—if you prefer it crispy, reheat the casserole uncovered and add a fresh crumb topping before serving.
Common Mistakes to Avoid
I’ve made every one of these mistakes so you don’t have to. Here’s what trips people up, and how to sidestep disaster.
Mistake #1: Cutting bread pieces too large or too small. Bread pieces larger than 1½ inches won’t fully absorb custard, leaving you with wet bread on the outside and dry bread in the center. Pieces smaller than ¾ inch disintegrate into mush. Aim for consistent 1-inch cubes. Use a serrated bread knife and a ruler if you’re new to this—it sounds obsessive, but it genuinely changes your result.
Mistake #2: Using bread that’s too fresh or too soft. Day-old bread is ideal. Fresh bread from the bakery absorbs liquid too quickly and becomes mushy. Rock-hard bread from five days ago won’t absorb liquid evenly. Split the difference with bread that’s 1-2 days old. If you only have fresh bread, cube it and let it sit uncovered on the counter for 2-3 hours before assembly.
Mistake #3: Skipping the overnight rest. I get it—you want breakfast now. But those 8-12 hours aren’t optional. The bread needs that time to gradually absorb the custard. If you bake it immediately after assembly, you’ll get crispy edges and a runny center. The overnight rest creates that perfect, evenly custardy interior.
Mistake #4: Pressing the bread down too hard or too often. Enthusiastic mixing is the enemy here. The bread wants to float naturally in the custard. Press down gently just once during assembly, then leave it alone. Every time you stir vigorously, you break down the bread structure and create a mushy texture instead of distinct cubes.
Seasonal Variations to Keep Things Fresh
This recipe is a blank canvas. Here’s how I adapt it throughout the year to keep breakfast exciting without starting from scratch.
Spring Version: Add 1 teaspoon of fresh lemon zest to your custard and swap the cardamom for a pinch of white pepper. Top with fresh berries and a drizzle of lemon glaze after baking. It tastes bright and optimistic—exactly what spring breakfasts should feel like.
Summer Version: Reduce the spices slightly and add 1 teaspoon almond extract to your custard. The almond plays beautifully with stone fruits. Serve topped with grilled peaches, fresh raspberries, and a touch of whipped cream (or coconut cream for dairy-free versions).
Fall Version (my personal favorite): This is where we go all-in on spices. Add ¼ teaspoon cloves, increase cinnamon to 2.5 teaspoons, and use ½ teaspoon fresh grated ginger. Some people add a pinch of cinnamon and nutmeg to the custard itself. Top with candied pecans instead of the standard crumb topping, or do both. Serve with a drizzle of bourbon maple syrup for the non-keto crew.
Winter Version: Add ½ teaspoon peppermint extract and 2 tablespoons cocoa powder to your custard. Yes, really. It creates a sophisticated chocolate-mint situation that feels celebratory. Top with crushed candy canes and serve with vanilla ice cream or coconut whipped cream.
Nutrition Comparison Across Versions
Let’s get real about the nutritional profile. These numbers are based on USDA data and my own careful analysis, calculated for one serving (assuming 8 servings per casserole). Nutrition varies slightly based on brand selections—always check specific labels for the products you choose.
Standard Version (per serving): Calories 385 | Protein 12g | Fat 18g | Carbohydrates 42g | Fiber 1g | Sugar 24g | Sodium 280mg. This is a treat breakfast—it should feel indulgent. The protein-to-calorie ratio isn’t meant to replace lunch.
Keto Version (per serving): Calories 340 | Protein 14g | Fat 24g | Carbohydrates 5g | Fiber 0g | Sugar 1g (erythritol/monk fruit) | Sodium 310mg. You’re getting significantly more protein relative to calories, and the carb count is genuinely low. This fits easily into a 20-30g daily carb limit.
Vegan Version (per serving): Calories 310 | Protein 8g | Fat 14g | Carbohydrates 38g | Fiber 2g | Sugar 22g | Sodium 320mg. Aquafaba provides surprising protein—not as much as eggs, but more than you’d expect. The carb count is similar to standard because we’re not reducing sugars here.
Gluten-Free Version (per serving): Calories 390 | Protein 12g | Fat 18g | Carbohydrates 44g | Fiber 2g | Sugar 25g | Sodium 290mg. Most GF breads are more fiber-rich than conventional bread, which is a nutritional win. The slight calorie increase comes from GF bread’s denser structure.
Dairy-Free Version (per serving): Calories 365 | Protein 11g | Fat 16g | Carbohydrates 41g | Fiber 1.5g | Sugar 23g | Sodium 300mg. Oat cream and cashew cream are surprisingly close nutritionally to dairy cream, making this nearly identical to the standard version.
What the Nutritionist in Me Wants You to Know: This is a breakfast casserole, not a diet food. Every version is calorie-dense by design—it’s meant to be filling and satisfying, keeping you satiated for hours. Pair any version with a protein-rich side like Greek yogurt, cottage cheese, or plant-based yogurt alternatives to increase satiety and stabilize blood sugar.
How Each Version Tastes Different
I’m going to be honest here because flavor is everything to me. Each adaptation creates a genuinely different eating experience—not just a “same thing minus the thing you can’t have” situation.
Standard Version: This is pure comfort. Rich custard with buttery undertones, warm spices, and a slightly caramelized top. The bread cubes maintain their structure while absorbing custard, creating pockets of creamy texture throughout. Brioche or challah versions taste noticeably more luxurious than white bread—the higher fat content in those doughs creates a richer custard absorption. This is what most people think of as “French toast bake.”
Keto Version: Here’s where I’m going to surprise you: this might actually taste better because keto bread has more structure and doesn’t turn into mush. The real difference is the sweetener. Monk fruit and erythritol taste slightly different than brown sugar—not worse, just different. Monk fruit has a subtle fruity note; erythritol is cleaner but can have a slight cooling effect on the palate if you’re not used to it. The spices shine through more prominently because the sweet isn’t masking them. Many keto-adapted eaters tell me they actually prefer this version because it feels more like an adult breakfast—less dessert-for-breakfast vibes, more savory-forward.
Vegan Version: Aquafaba creates a slightly airier custard—less dense than eggs, more whipped-cream-like. The texture is lighter, almost mousse-like in places. The flavor is nearly identical to standard because the custard base isn’t inherently eggy; eggs are just the binder and leavening agent. You might notice a whisper more spice flavor and slightly less richness, but honestly? Most people can’t tell the difference. Coconut cream adds a subtle coconut note if you use full-fat canned coconut milk—some people love this, others find it distracting. Use unscented coconut cream if you want to taste the cinnamon and vanilla prominently.
Gluten-Free Version: This depends entirely on your bread choice. Quality GF bread (Udi’s, Canyon Bakehouse, or your local bakery’s GF option) creates a casserole that’s virtually indistinguishable from standard. Cheap GF bread that’s gummy or falls apart will create a disappointing result. The custard and topping don’t change, so the difference is 100% bread-dependent. My rule: spend the extra dollar on good GF bread. It matters.
Dairy-Free Version: If you use oat cream, the flavor stays almost identical to standard because oat cream is nutritionally similar to dairy cream. If you use coconut cream, it’s slightly richer but coconut-forward. Cashew cream creates the closest approximation to traditional dairy cream—it’s subtle, neutral, and creamy. No version tastes “wrong,” but cashew cream is my personal recommendation if you want zero reminder that you’re eating dairy-free.
Can I Store Overnight French Toast Bake?
Yes, and yes, and yes again. This is one of those recipes that actually improves slightly after sitting a day. Here’s my complete storage strategy for every version.
Before Baking: You can assemble this casserole up to 24 hours ahead. Keep the custard-bread mixture and topping in separate containers, both covered, both refrigerated. Some people do this on Sunday for a Wednesday breakfast, and it works beautifully.
After Baking—Refrigerator: Store cooled casserole in an airtight container for 3-4 days. The texture stays custardy and the topping holds up well. Vegan and dairy-free versions last the same amount of time—there’s no nutritional difference that would shorten shelf life.
Reheating from Refrigerated: Individual portions reheat beautifully in a 325°F oven for 8-10 minutes, or microwave for 90-120 seconds on 50% power. The oven method keeps the topping crisper; the microwave is faster but softens the crumb topping slightly.
Freezing (Advanced Move): You can freeze this baked casserole for up to 2 months. Cool completely, wrap tightly in plastic wrap, then foil, then store in a freezer bag. Thaw overnight in the refrigerator, then reheat using the instructions above. The texture stays excellent—freezing doesn’t compromise the custard.
Freezing Unbaked (My Pro Tip): Assemble the casserole completely, cover it, and freeze it before baking. On the morning you want to serve it, move it to the refrigerator to thaw for 12 hours (or overnight). Bake as directed, adding an extra 8-10 minutes to the baking time since you’re starting from cold. This is how I prep for holiday mornings when I know I’ll be busy. I make three casseroles in September, freeze them, and pull them out as needed through November.
What to Serve With Overnight French Toast Bake?
The casserole is wonderful on its own, but here’s where you create a complete breakfast experience. I’m giving you options that work across all dietary versions.
- Maple syrup or sugar-free syrup – The classic pairing. Pure maple is best for standard, vegan, and dairy-free versions. Monk fruit or erythritol syrups work for keto versions without derailing macros.
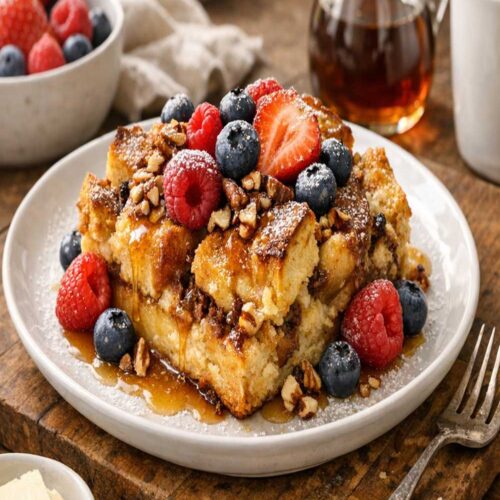
- Fresh berries – Raspberries, blueberries, strawberries, or blackberries add bright acidity that cuts through the richness. Works for every version. Pro tip: toss berries with a tiny bit of lemon juice 10 minutes before serving to brighten the flavor.
- Whipped cream or coconut whipped cream – Organic, full-fat dairy whipped cream for standard. Coconut whipped cream (canned, chilled and whisked) for vegan and dairy-free. A dollop transforms this from breakfast to dessert-for-breakfast.
- Greek yogurt or coconut yogurt – A spoonful adds protein and tang that balances sweetness. Especially good with fruit. This combination keeps you fuller longer—a nutritionist’s dream pairing.
- Candied nuts or granola – Candied pecans, walnuts, or almonds add crunch. Use store-bought or make your own. Granola made with nuts and seeds adds textural contrast and extra protein—think of it as nutritional insurance for the sweet casserole.
- Fresh citrus or citrus compote – A squeeze of fresh lemon or orange juice right before eating brightens everything. For advanced home cooks, make a quick strawberry-lemon compote (strawberries + lemon juice + tiny bit of honey, simmered for 5 minutes) and spoon it over top.
- Brunch proteins – This casserole works beautifully in a brunch context. Serve alongside smoked salmon with everything bagel seasoning, crispy bacon, or savory breakfast sausages. The richness of the casserole balances beautifully with salty proteins. Check out my Air Fryer Honey Salmon Bites Recipe for a quick protein component that pairs surprisingly well.
- Savory sides – Roasted vegetables, sautéed spinach, or a simple arugula salad with shallot vinaigrette might sound weird, but trust me. The savory element prevents breakfast from feeling one-note sweet.
Best Overnight French Toast Bake Recipe

Ingredients
For the Custard Base
- 2 cup whole milk full-fat creates that rich, custardy texture
- 2 teaspoon ground cinnamon (freshly ground if possible
- 1 tablespoon pure vanilla extract (not imitation
- 1 cup heavy cream (adds silky richness
- ¼ cup light brown sugar packed, provides moisture and deep caramel notes
- 8 large eggs room temperature, acts as your binding agent in the standard version
- ½ teaspoon kosher salt balances sweetness and enhances all other flavors
For the Bread
- 1 pound loaf of brioche, challah, or thick-cut white bread (standard version
For the Crispy Topping
- 3 tablespoon light brown sugar packed
- 2 tablespoon cold unsalted butter cut into small pieces, creates the crumbly topping
- ½ teaspoon cardamom optional but transforms the flavor profile seasonally
- 3 tablespoon granulated sugar creates textural contrast
- 1 teaspoon ground cinnamon this topping is where spice really shines
- ¼ teaspoon ground nutmeg freshly grated elevates everything
Instructions
Step 1: Prepare Your Baking Dish and Bread
- Grab a 9x13-inch baking dish and lightly butter or oil it. Cut your chosen bread into 1-inch cubes—this matters more than you'd think. Too small and the bread disintegrates; too large and the custard doesn't penetrate evenly. Scatter the bread cubes across the bottom of your prepared dish in a single, slightly overlapping layer. For keto versions, your bread cubes will be smaller and denser, so pack them slightly tighter. For gluten-free bread, handle it gently—GF breads are more delicate and can crumble if you're rough with them.
Step 2: Whisk Your Custard Base
- Pour your eggs into a large mixing bowl. If you're making the vegan version, use aquafaba instead and whisk for about 30 seconds until it's light and slightly foamy—this aerates the mixture and helps it set properly. Crack your eggs directly into the bowl and whisk them well, breaking up the yolks completely. Add your chosen milk and cream (or dairy-free alternatives), then add your sweetener, cinnamon, salt, and vanilla extract. Whisk for at least 60 seconds until everything is completely combined and the sweetener is fully dissolved. For keto versions using monk fruit or erythritol, whisk an extra 30 seconds—these sweeteners sometimes leave granules if you don't fully incorporate them.
Step 3: Combine Bread and Custard
- Pour your custard mixture evenly over the bread cubes. Gently toss the bread with a silicone spatula or wooden spoon—you want every piece to get coated, but you don't want to demolish the bread. Work gently, especially with gluten-free or vegan breads. Spread everything into an even layer, pressing down just slightly so the bread sits snugly in the custard. The bread should be mostly submerged, with some pieces peeking through the top. This is where patience pays off—let it sit for 5 minutes, then give it one more gentle stir. This second toss helps the bottom pieces absorb custard too.
Step 4: Make and Apply Your Crumbly Topping
- While your bread and custard are getting acquainted, prepare the topping. Combine your light brown sugar, granulated sugar, cinnamon, nutmeg, and cardamom (if using) in a small bowl. Stir everything together until the spices are evenly distributed—no clumps. Cut your cold butter into small pieces directly over the bowl. For vegan or dairy-free versions, cut your vegan butter the same way. Using a pastry blender, two forks, or your fingertips, work the butter into the sugar mixture until it resembles coarse breadcrumbs. You want some small pea-sized pieces and some finer crumbs—this creates textural contrast when it bakes. Cover this topping with plastic wrap and refrigerate.
Step 5: Cover and Refrigerate Overnight
- Cover your French toast casserole tightly with plastic wrap or aluminum foil. Place it in the refrigerator for at least 8 hours, ideally 12 hours. This time is critical—it allows the bread to fully absorb the custard. The longer it sits, the more custardy the interior becomes. Your topping stays cold and separated in its own container. You can prep this dish up to 24 hours ahead, making it perfect for holiday mornings or when you know your schedule will be chaotic.
Step 6: Bake Until Golden and Set
- Preheat your oven to 350°F (175°C). Remove your French toast casserole and topping from the refrigerator about 10 minutes before baking—this helps it bake more evenly. Remove the plastic wrap and sprinkle your prepared topping evenly across the entire surface. Don't press it down; let it sit naturally on top. Bake for 45-50 minutes. You're looking for a golden-brown top and a casserole that jiggles just slightly in the center when you gently shake the pan. If your top is browning too quickly, tent it loosely with foil for the last 15 minutes. For vegan versions, you might need an extra 5-7 minutes since aquafaba takes slightly longer to set than eggs.
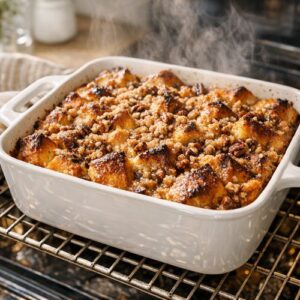
Step 7: Cool and Serve
- Remove your masterpiece from the oven and let it rest for at least 10-15 minutes. This allows the custard to set completely and makes serving cleaner. Cut into 8-12 portions (depending on appetite) and serve warm. The topping will have crisped up beautifully, creating a gorgeous contrast with the custardy interior.
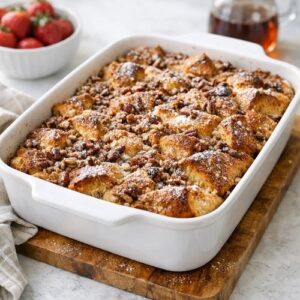
Nutrition
FAQs
Can I make this recipe in a smaller or larger baking dish?
Absolutely. The recipe scales proportionally. For a 9×9-inch dish (half the original), use half of everything and bake for 30-35 minutes. For a 9×15-inch dish (1.5x the original), use 1.5x the ingredients and bake for 55-65 minutes. The key is watching for that golden top and slight jiggle in the center—those visual cues matter more than exact timing. Thinner casseroles bake faster; thicker ones take longer. Every oven is different, so use the visual test rather than the timer as your guide.
What’s the best bread to use for each dietary version?
Standard: Brioche, challah, or thick-cut white bread. These have high fat content and absorb custard evenly. Keto: Keto bread specifically formulated for texture—Mission brand or Aldi’s Keto bread works great. These are denser and hold structure better. Vegan: Any bread that doesn’t contain dairy or eggs. Most conventional breads are actually vegan; just read the label. Ezekiel bread and other sprouted grain breads work beautifully too. Gluten-Free: This is where you want to invest. Canyon Bakehouse, Udi’s, or a local bakery’s GF bread. Avoid dry, crumbly GF bread—it falls apart in custard. Dairy-Free: Most conventional breads are already dairy-free. Read labels if you’re unsure, but typical sandwich bread, brioche, and challah are fine.
Can I use egg substitute or flax eggs instead of aquafaba for the vegan version?
I don’t recommend it. Flax eggs are too dense and will create a gluey texture. Commercial egg replacers often have off-flavors that shine through in custard-based dishes. Aquafaba (chickpea brine) is genuinely the best option for this recipe because it creates lift and a custardy texture that mimics eggs’ role. If you’re allergic to chickpeas, I’d honestly suggest making the standard version with dairy eggs instead of substituting with inferior replacements. This is one instance where compromise creates a worse product.
Is this recipe safe for someone with a severe nut allergy?
Yes, with precautions. The base recipe contains no nuts. However, some mix-ins and toppings (candied pecans, almond extract variations) contain nuts. If you’re preparing this for someone with a severe allergy, stick to the base recipe and nut-free toppings like berries, syrup, or whipped