This post contains affiliate links. As an Amazon Associate I earn from qualifying purchases.
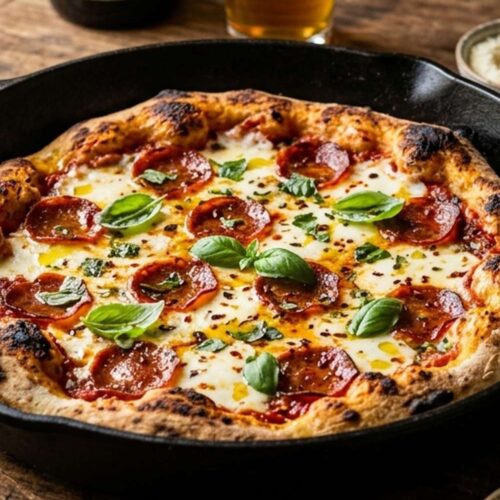
This cast iron pizza grill recipe doesn’t just taste incredible—it stops people in their tracks. The moment you pull that skillet from the oven, golden crust bubbling at the edges and cheese stretched into pools of melty perfection, you’ve created something that looks as good as it tastes. I’ve been blending my nutrition background with chef techniques for years, and this dish perfectly captures that sweet spot where healthy ingredients meet pure indulgence. Whether you’re feeding yourself on a Tuesday night or impressing guests on the weekend, this one delivers every single time.
The Most Beautiful Cast Iron Pizza Grill Recipe You’ll Ever Make (And It’s Easier Than It Looks)
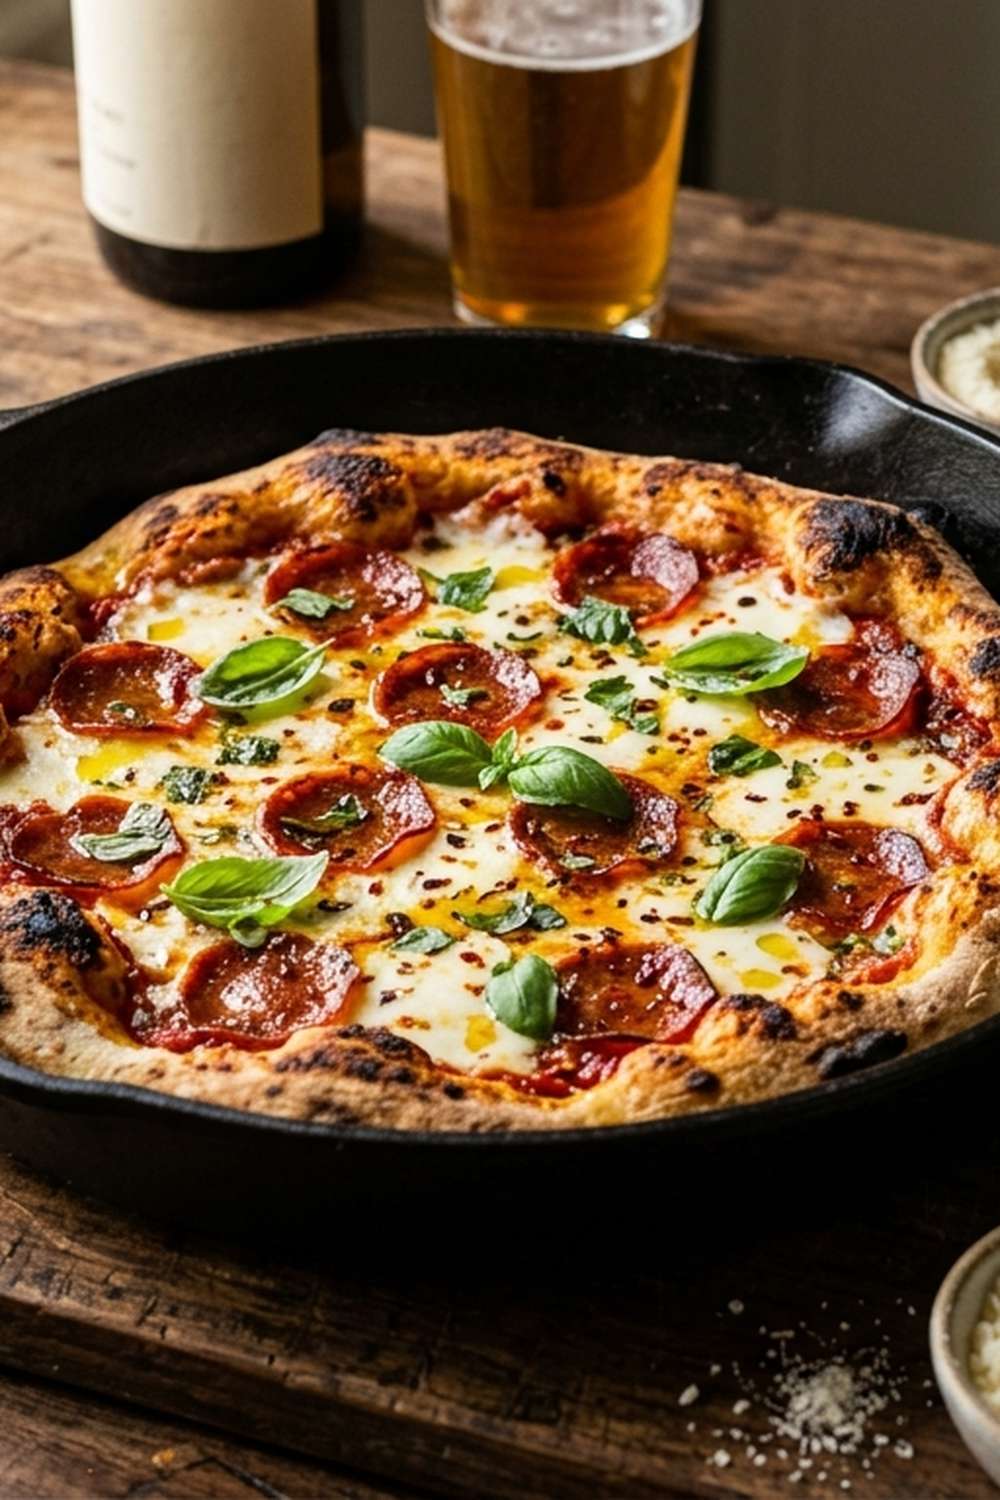
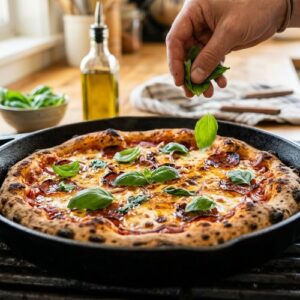
I’ll never forget the first time I made this in front of my culinary team in New York. One of my colleagues walked past my station, stopped dead, and just stared. Not at the plating of some fancy composed dish—at a cast iron skillet straight from the oven. The crust had this deep golden-brown exterior with darker caramelized spots along the edges. The cheese was bubbling in molten pockets. Fresh basil leaves caught the kitchen light like little green jewels. Before anyone tasted it, they were already sold. That’s the power of this recipe. It’s rustic but refined, simple but showstopping.
The Visual Elements That Make This Dish Stunning
Every element here serves a dual purpose—it tastes amazing and looks intentional. The colors aren’t accidental; they’re strategic. The textures create contrast that makes each bite interesting before you even taste it. This is edible art that happens to be incredibly nourishing.
- Deep Golden-Brown Crust – The Maillard reaction creates color complexity that signals quality to your brain before your taste buds engage. This comes from proper oven temperature and that final 10-minute bake after topping.
- Bubbly, Caramelized Cheese – Low-moisture mozzarella creates actual bubbles and golden spots rather than a flat, oily surface. The contrast between golden peaks and creamy valleys is what catches the eye.
- Bright Red Tomato Pops – Cherry tomato slices provide color architecture. They’re not buried; they sit proud on the cheese layer, creating vertical interest and visual breaks that feel intentional.
- Fresh Green Basil Garnish – Applied after cooking, basil provides vibrant color contrast and signals freshness. The dark green against the golden crust and red tomatoes creates a complementary color palette.
Choosing Ingredients for Maximum Visual Impact
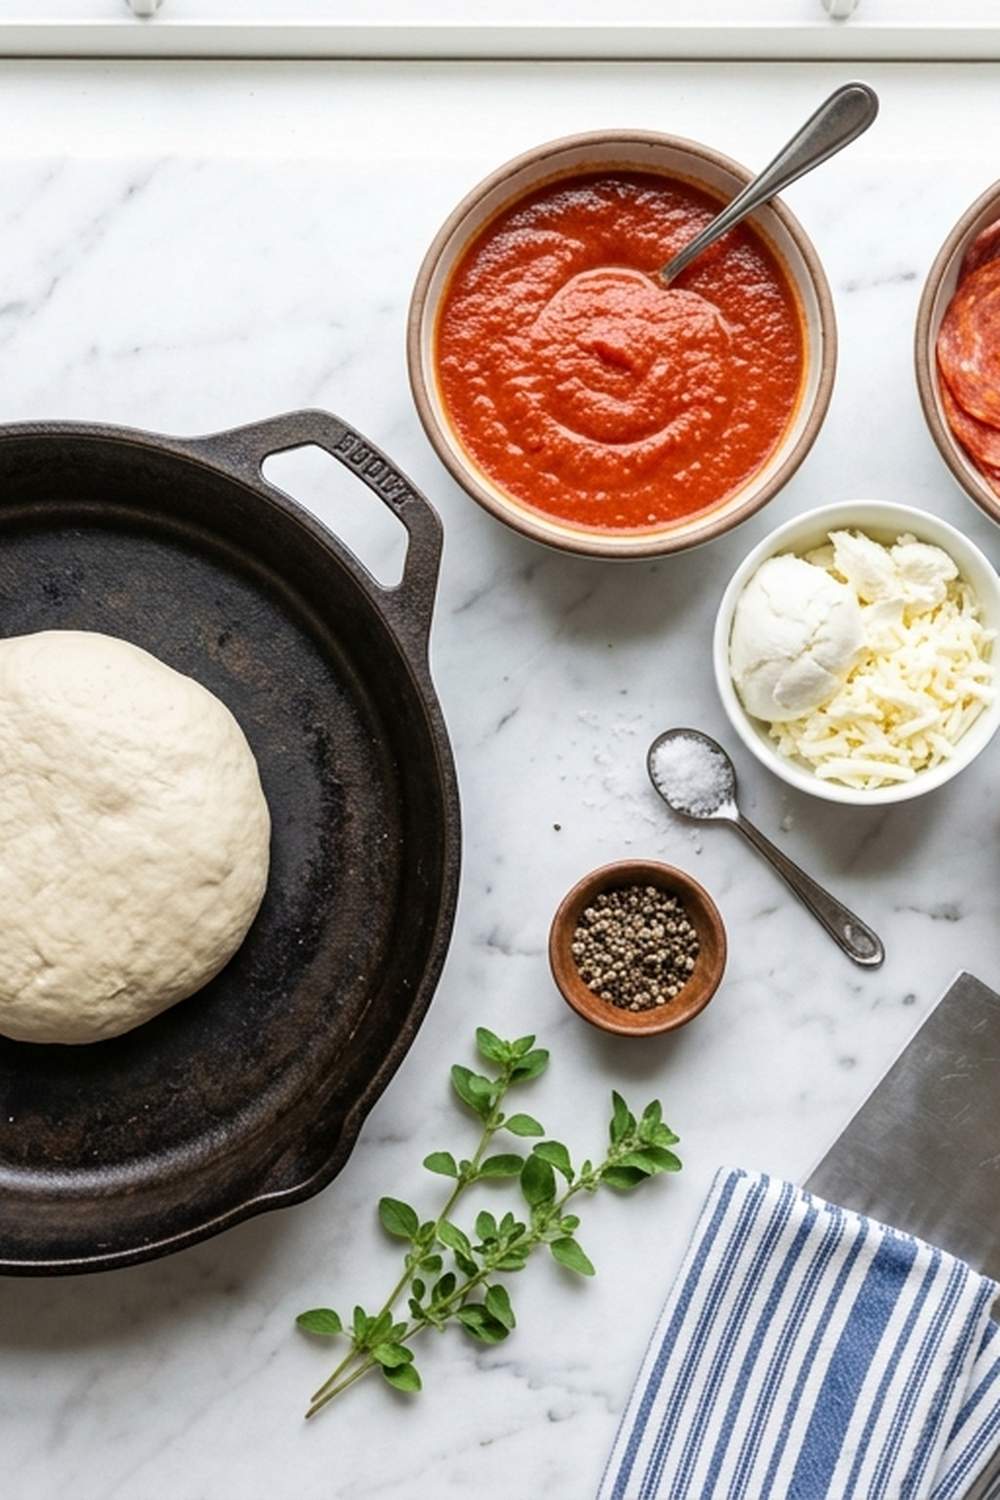
I select every ingredient in this recipe for two reasons: flavor and presentation. When you’re working with whole foods in a minimal ingredient list, each one has to earn its place visually and nutritionally. Let me walk you through my choices.
- 1 tablespoon balsamic reduction, optional but recommended (adds depth and visual shine to finished crust)
- 1 pound pizza dough, store-bought (room temperature for easier stretching and even cooking)
- ½ teaspoon Italian seasoning blend (oregano, basil, thyme base for complexity)
- ⅔ cup shredded low-moisture mozzarella (creates those Instagram-worthy bubbles and color)
- ⅛ teaspoon kosher salt (enhances crust flavor without overwhelming delicate dough)
- 8-10 cherry tomatoes, sliced thin (color architecture and fresh tomato notes)
- ¼ teaspoon crushed red pepper (adds visual flecks and subtle heat without overpowering)
- 3 tablespoons extra-virgin olive oil (divided for seasoning the pan and drizzling the dough)
- Fresh basil leaves, whole (final garnish for bright color and aromatic quality)
- ⅓ cup marinara sauce, homemade or quality store-bought (provides the red base layer)
How to Make Picture-Perfect Cast Iron Pizza Grill Recipe
I’m going to walk you through this step-by-step, but here’s my philosophy: every action you take affects the final presentation. This isn’t just cooking; it’s creating edible art. Pay attention to the moments I flag for visual impact.
Step 1: Prepare Your Oven and Workspace
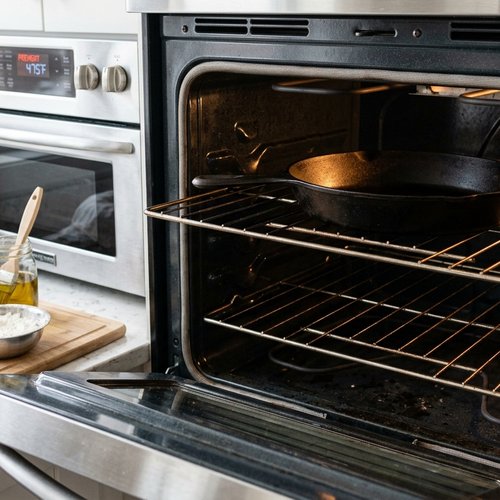
Position your oven rack to the topmost position and preheat to 475°F. This matters more than you’d think—the top position ensures your cheese gets proper color and bubble development while your crust cooks through. While the oven warms, place your store-bought dough on a clean work surface. Don’t skip room temperature dough—it stretches easier and cooks more evenly, which translates to better color distribution.
Step 2: Stretch and Shape Your Dough Canvas
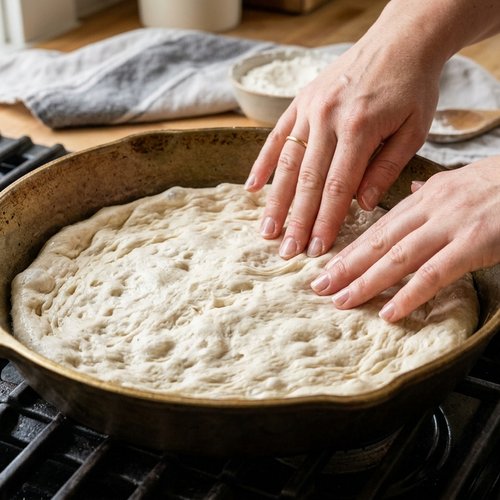
Gently stretch your dough into a 10-inch round. Use your fingertips, not your palm—you want even thickness without pressing all the air out. Thicker edges mean more crust color variation, which looks sophisticated. Once shaped, cover loosely with plastic wrap while you prep toppings. This prevents the dough from drying out and maintains its elasticity for that beautiful puff in the oven.
Step 3: Season Your Cast Iron and Add the Base
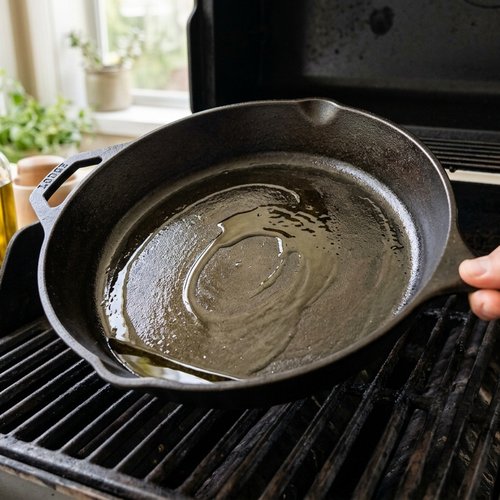
Drizzle 1 tablespoon of extra-virgin olive oil directly into your well-seasoned cast iron skillet, coating the bottom evenly. The oil creates a crispy, golden bottom layer and prevents sticking. Carefully lay your stretched dough into the skillet, then use your fingertips to gently extend it all the way to the edges. Getting dough all the way to the sides ensures even cooking and those caramelized edge spots that look incredible.
Sprinkle the salt and crushed red pepper across the dough surface. The red pepper flecks add visual interest—they’re functional seasoning and a presentation detail. Drizzle the remaining 2 tablespoons of olive oil over the top. This is your golden ticket to a deeply colored crust.
Step 4: The First Bake (Crust Development)
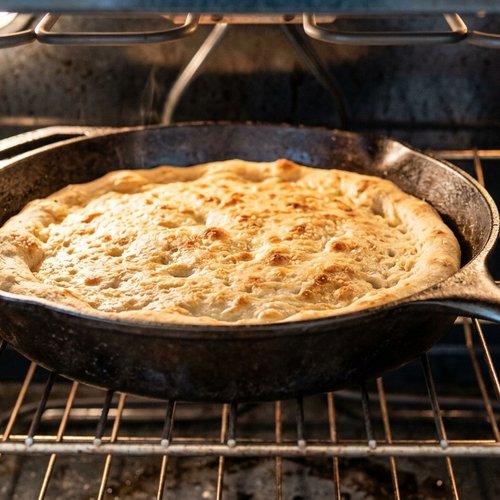
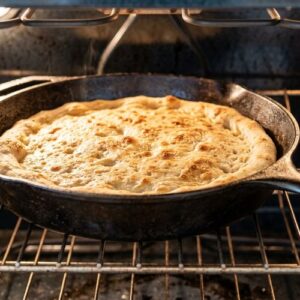
Place the cast iron skillet in your preheated 475°F oven on the top rack. Bake for about 5 minutes until the crust is lightly golden brown. This first bake is critical—it sets the structure and begins the Maillard reaction that creates that gorgeous color. You’re not aiming for dark brown yet; this is just the foundation for your visual masterpiece.
Step 5: The Topping Strategy
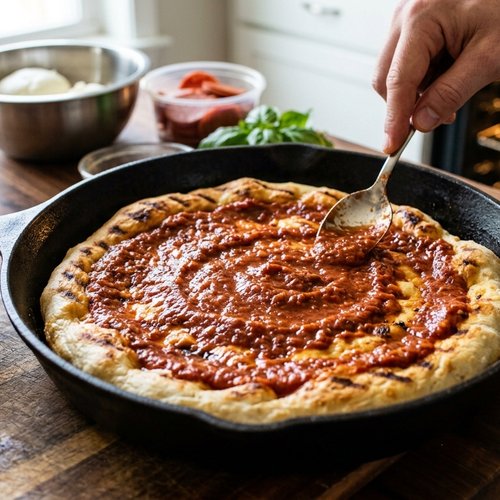
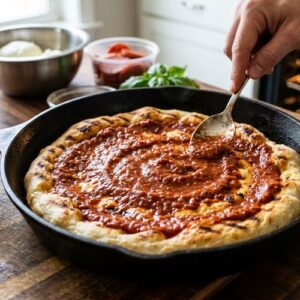
Remove the skillet carefully from the oven—that cast iron handle is seriously hot. Spread the marinara sauce over the entire dough surface, leaving a thin ½-inch border around the edges. This border will puff and brown dramatically, creating height and color contrast. Spread sauce intentionally, not randomly—you want to see some texture variation, which reads as artisanal.
Now distribute your mozzarella evenly across the sauce. Don’t pile it in the center—spread it in one even layer. The tomato slices come next, arranged in a pattern that feels intentional but not overly formal. I like radiating them from the center outward, with slight overlaps. This creates visual rhythm and ensures even cheese coverage around each tomato slice, which means better color development.
Sprinkle the Italian seasoning blend across the surface. The visual flecks of herbs signal flavor complexity before anyone tastes it.
Step 6: The Final Bake and Color Development
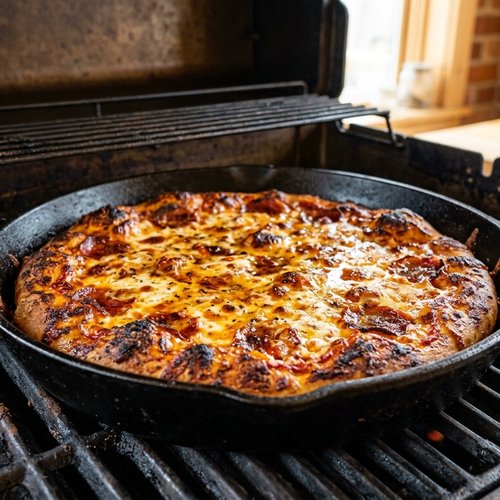
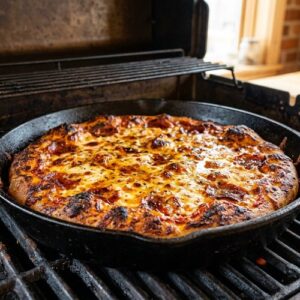
Return the skillet to the top rack and bake for approximately 10 minutes until the crust is deeply golden brown around the edges and the cheese is bubbly. This is where the magic happens—your cheese develops those gorgeous golden bubbles and brown spots, and your crust edges go from light brown to mahogany. Watch it toward the end; ovens vary, and you want that sweet spot between bubbling and burned.
Step 7: Rest and Reveal
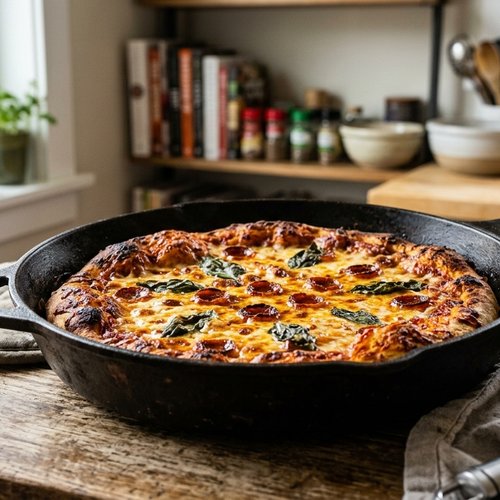
Pull the skillet from the oven and let it cool for exactly 5 minutes. This is non-negotiable. During this time, the cheese sets slightly so it won’t slide everywhere when you plate, and the crust firms up enough to slice cleanly. The bubbles remain glossy and defined rather than deflating into flatness.
Step 8: The Garnish Moment
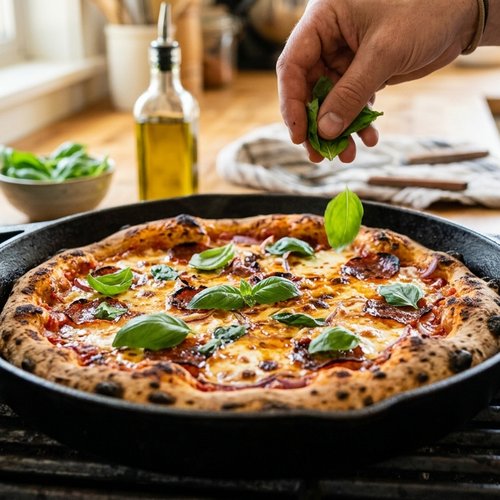
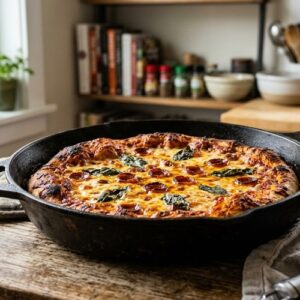
Top with fresh basil leaves, scattering them across the surface. If you want to elevate this further—and I absolutely recommend it—drizzle a tiny bit of balsamic reduction across the crust. This adds visual sophistication and a sophisticated depth note that makes people wonder what your secret is. Serve immediately while the crust is still warm and the basil releases its fragrance.
The Plating Masterclass
Here’s where presentation becomes everything. This is a skillet-to-table situation, so plating happens in the pan. I learned early in my career that the way you present food affects how people perceive its taste—and I mean this scientifically. Visual appeal actually makes food taste better to your brain.
- The Skillet as Plating Tool – Bring the hot cast iron straight to the table. The visual drama of a sizzling skillet with golden crust and bubbly cheese is part of the experience. The black cast iron creates a stunning frame that makes your pizza pop. Slice directly in the pan at the table if you want maximum theatre.
- Height and Dimension – As you slice, notice those bubbled cheese spots at different heights. They create dimension that a flat pizza never achieves. When you transfer slices to individual plates, let the cheese maintain that texture—don’t flatten it. Slice cleanly with a pizza wheel to preserve those visual bubbles.
- Negative Space Strategy – Don’t overcrowd the serving plate. A single slice with some breathing room looks more intentional and premium than a plate piled high. Let the golden crust, tomatoes, and cheese be the stars. A simple white plate makes the pizza’s colors pop even more.
Photography Tips for This Dish
If you’re going to make something this beautiful, you might as well capture it. I’ve photographed hundreds of dishes for my work, and this one photographs beautifully with just a few intentional moves.
- Golden Hour Is Your Friend – The warm, directional light of late afternoon or early evening flatters the golden crust and makes the red tomatoes sing. If you’re shooting indoors, position yourself near a window with natural light hitting the skillet at a 45-degree angle. This creates shadow definition that makes the bubbled cheese look three-dimensional.
- Shoot Straight-On and Slightly Elevated – Your first shot should be directly overhead or very slightly angled (about 30 degrees from above). This captures the full pizza landscape and shows off your tomato arrangement and herb garnish. The elevated angle flatters cast iron and makes the depth of those cheese bubbles obvious.
- Capture the Steam and Motion – If you can, photograph within the first 2-3 minutes of plating. You’ll catch wisps of steam rising from the hot crust. This adds atmospheric drama and signals temperature and freshness to viewers. Include a hand reaching toward the slice, or a knife cutting through, to create action and narrative.
- Props and Context Matter – Scatter fresh basil leaves around the skillet, include a small bowl of balsamic reduction, show your wooden cutting board. These contextual elements tell a story of intentional cooking and make the final image feel like a meal, not just a dish.
Expert’s Nutritional Insight
As a registered dietitian, I want you to understand what’s happening nutritionally here. That cast iron skillet does more than create beautiful color—it actually contributes iron to your pizza. When acidic tomato sauce interacts with properly seasoned cast iron, you get bioavailable iron in your meal. Combined with the vitamin C in fresh tomatoes, your body absorbs this iron more effectively.
The extra-virgin olive oil isn’t just for flavor and appearance. It contains polyphenols—powerful antioxidants that signal color and flavor complexity. When you see that golden crust and vibrant tomato red, you’re looking at anthocyanins and lycopene, the exact compounds your body uses for cellular protection. This pizza isn’t just pretty; it’s nutritionally diverse because of its visual diversity.
Seasonal Color Variations
The beautiful thing about this cast iron pizza formula is its flexibility. You can adapt it seasonally while maintaining that wow-factor presentation.
Spring Version: Swap cherry tomatoes for thinly sliced fresh mozzarella di bufala before the final bake, then top with fresh pea shoots and microgreens after cooking. Add lemon zest to the basil garnish. The pale green and white create a bright, fresh color palette.
Summer Version: This is the classic tomato version, but amplify it with heirloom tomato slices in different colors—yellow, orange, red—before topping with cheese. The rainbow of tomato colors is spectacular and signals peak-season freshness.
Fall Version: Reduce marinara slightly and add caramelized red onions and roasted garlic cloves before the cheese layer. Switch basil to crispy sage leaves as garnish. Finish with a drizzle of white truffle oil. Warm burgundy and golden tones replace the bright reds.
Winter Version: Use roasted mushrooms, caramelized leeks, and crispy pancetta under the cheese. Top with fresh thyme instead of basil. The earthier color palette feels cozy and grounded, and the darker colors create visual warmth.
Make-Ahead Guide
One of my favorite things about this recipe is how make-ahead friendly it is. I can prep components hours ahead without sacrificing presentation.
Up to 8 Hours Ahead: Slice your cherry tomatoes and place them on paper towels to drain moisture. Store covered in the refrigerator. Pat them dry again before assembling your pizza—this prevents excess moisture that would create a soggy crust bottom.
Up to 4 Hours Ahead: Measure all your dry ingredients and seasonings into small bowls. Grate your mozzarella and store in an airtight container. Spread your marinara sauce into a separate container. When it’s time to cook, everything is literally a grab-and-go situation.
Up to 2 Hours Ahead: Remove your pizza dough from the refrigerator and let it reach room temperature. This affects how easily it stretches and how evenly it cooks. Tear fresh basil leaves and store them loosely covered—they stay vibrant for plating.
Do Not Make Ahead: The actual assembly and baking. This is where timing matters. You want that final bake to happen right before serving so your cheese is actively bubbling and your crust is at peak crispness. That’s what creates the visual and textural magic.
Common Mistakes to Avoid
I’ve seen brilliant cooks mess up this recipe by missing one detail. Let me save you from the same pitfalls.
- Skipping the Proper Oven Position – Using the middle rack instead of the top rack means your cheese never develops proper color and bubbles. You’ll get a cooked pizza, but not this showstopper version. The top position is non-negotiable.
- Cold Dough from the Fridge – Room temperature dough stretches evenly and cooks with color consistency. Cold dough resists stretching, springs back, and creates thick spots that brown unevenly. Give yourself time for this to warm up.
- Over-saucing the Base – Too much marinara creates excess moisture that makes the bottom soggy and prevents crust crisping. Use exactly ⅓ cup and spread it evenly. Your crust bottom will be perfectly crispy with color, not pale and soft.
- Moisture in Your Mozzarella – High-moisture mozzarella (like fresh) creates pools of water instead of bubbles. Low-moisture shredded mozzarella is essential for those gorgeous, defined bubbles that photograph beautifully and taste creamy rather than watery.
Can I Store Cast Iron Pizza Grill Recipe?
Here’s the honest answer: this pizza is best eaten within 15 minutes of coming out of the oven when the crust is crispy, the cheese is actively melting, and the basil is fragrant. That’s the peak experience.
That said, real life happens. If you have leftovers, store them in an airtight container in the refrigerator for up to 2 days. The crust will lose crispness—that’s inevitable—but the flavor remains excellent.
Reheating Strategy: Skip the microwave entirely. Place slices directly in a cast iron skillet or on a baking sheet at 375°F for about 5 minutes until the cheese softens and the crust warms through. This doesn’t fully restore the original crispness, but it’s the closest you’ll get and prevents the rubbery, tough texture that microwaves create.
For maximum visual appeal if you’re serving leftovers, add fresh basil leaves right after reheating. This signals freshness and brightness even though the pizza was made earlier.
Nutrition Information
One slice (⅙ of the pizza) contains approximately 285 calories, 14g fat, 28g carbohydrates, 12g protein, and 2g dietary fiber. This data aligns with USDA standards for pizza recipes using store-bought dough and low-moisture cheese.
The beauty of this nutrition profile is how it reflects ingredient diversity. The color you see—golden crust, red tomatoes, white cheese, green basil—directly correlates to nutritional complexity. The lycopene in those red tomatoes supports cellular health. The olive oil provides monounsaturated fats that your body actually needs. The fresh herbs contribute antimicrobial compounds and antioxidants.
One thing I emphasize to my clients: this pizza isn’t “healthy food” in the restrictive sense. It’s whole-food-based pizza that balances indulgence with nutritional substance. You’re feeding both pleasure and your body’s actual needs simultaneously.
What to Serve Alongside for a Complete Visual Spread
If you’re making this for guests or a special meal, here’s how I build a cohesive visual table around it. The goal is complementary colors and textures that make the entire spread look intentional.
I typically start with a simple pan-seared protein on the side—maybe a quick-seared piece of fish or a steak bite if your guests are extra. This adds protein depth and visual contrast. The pink-brown meat tones complement your golden pizza beautifully.
For sides, I lean into bright, crunchy vegetables. A simple arugula salad dressed with lemon and olive oil provides peppery greens that contrast the richness of the pizza. Roasted green beans with garlic add another green note and textural variety. These aren’t heavy sides; they’re visual anchors and palate cleansers.
- Fresh Arugula Salad with Lemon – The peppery greens and bright acid cut through the pizza’s richness while adding vibrant color to your table spread.
- Roasted Garlic Green Beans – The deep green provides color contrast and the slight char adds visual interest. The crunch is textural relief against the soft pizza.
- Simple Tomato and Burrata Salad – Since your pizza already features tomatoes, doubling down on fresh tomatoes in salad form keeps the flavor theme cohesive without being repetitive. The creamy burrata adds richness.
Cast Iron Pizza Grill Recipe

Ingredients
- 1 tablespoon balsamic reduction, optional but recommended adds depth and visual shine to finished crust
- 1 pound pizza dough, store-bought room temperature for easier stretching and even cooking
- ½ teaspoon Italian seasoning blend oregano, basil, thyme base for complexity
- ⅔ cup shredded low-moisture mozzarella creates those Instagram-worthy bubbles and color
- ⅛ teaspoon kosher salt enhances crust flavor without overwhelming delicate dough
- 8-10 cherry tomatoes, sliced thin color architecture and fresh tomato notes
- ¼ teaspoon crushed red pepper adds visual flecks and subtle heat without overpowering
- 3 tablespoon extra-virgin olive oil divided for seasoning the pan and drizzling the dough
- Fresh basil leaves, whole final garnish for bright color and aromatic quality
- ⅓ cup marinara sauce, homemade or quality store-bought provides the red base layer
Instructions
Step 1: Prepare Your Oven and Workspace
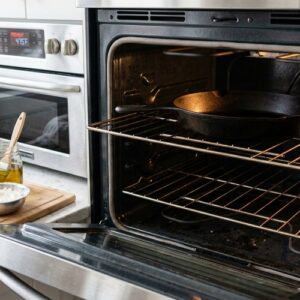
- Position your oven rack to the topmost position and preheat to 475°F. This matters more than you'd think—the top position ensures your cheese gets proper color and bubble development while your crust cooks through. While the oven warms, place your store-bought dough on a clean work surface. Don't skip room temperature dough—it stretches easier and cooks more evenly, which translates to better color distribution.
Step 2: Stretch and Shape Your Dough Canvas
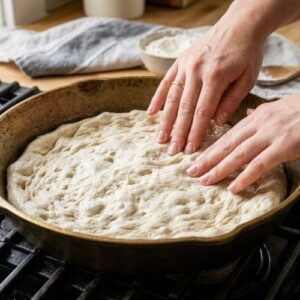
- Gently stretch your dough into a 10-inch round. Use your fingertips, not your palm—you want even thickness without pressing all the air out. Thicker edges mean more crust color variation, which looks sophisticated. Once shaped, cover loosely with plastic wrap while you prep toppings. This prevents the dough from drying out and maintains its elasticity for that beautiful puff in the oven.
Step 3: Season Your Cast Iron and Add the Base
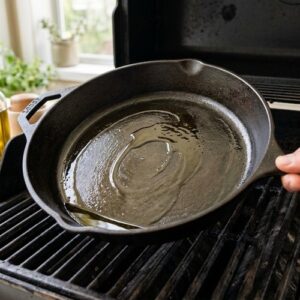
- Drizzle 1 tablespoon of extra-virgin olive oil directly into your well-seasoned cast iron skillet, coating the bottom evenly. The oil creates a crispy, golden bottom layer and prevents sticking. Carefully lay your stretched dough into the skillet, then use your fingertips to gently extend it all the way to the edges. Getting dough all the way to the sides ensures even cooking and those caramelized edge spots that look incredible. Sprinkle the salt and crushed red pepper across the dough surface. The red pepper flecks add visual interest—they're functional seasoning and a presentation detail. Drizzle the remaining 2 tablespoons of olive oil over the top. This is your golden ticket to a deeply colored crust.
Step 4: The First Bake (Crust Development)
- Place the cast iron skillet in your preheated 475°F oven on the top rack. Bake for about 5 minutes until the crust is lightly golden brown. This first bake is critical—it sets the structure and begins the Maillard reaction that creates that gorgeous color. You're not aiming for dark brown yet; this is just the foundation for your visual masterpiece.
Step 5: The Topping Strategy
- Remove the skillet carefully from the oven—that cast iron handle is seriously hot. Spread the marinara sauce over the entire dough surface, leaving a thin ½-inch border around the edges. This border will puff and brown dramatically, creating height and color contrast. Spread sauce intentionally, not randomly—you want to see some texture variation, which reads as artisanal. Now distribute your mozzarella evenly across the sauce. Don't pile it in the center—spread it in one even layer. The tomato slices come next, arranged in a pattern that feels intentional but not overly formal. I like radiating them from the center outward, with slight overlaps. This creates visual rhythm and ensures even cheese coverage around each tomato slice, which means better color development. Sprinkle the Italian seasoning blend across the surface. The visual flecks of herbs signal flavor complexity before anyone tastes it.
Step 6: The Final Bake and Color Development
- Return the skillet to the top rack and bake for approximately 10 minutes until the crust is deeply golden brown around the edges and the cheese is bubbly. This is where the magic happens—your cheese develops those gorgeous golden bubbles and brown spots, and your crust edges go from light brown to mahogany. Watch it toward the end; ovens vary, and you want that sweet spot between bubbling and burned.
Step 7: Rest and Reveal
- Pull the skillet from the oven and let it cool for exactly 5 minutes. This is non-negotiable. During this time, the cheese sets slightly so it won't slide everywhere when you plate, and the crust firms up enough to slice cleanly. The bubbles remain glossy and defined rather than deflating into flatness.
Step 8: The Garnish Moment
- Top with fresh basil leaves, scattering them across the surface. If you want to elevate this further—and I absolutely recommend it—drizzle a tiny bit of balsamic reduction across the crust. This adds visual sophistication and a sophisticated depth note that makes people wonder what your secret is. Serve immediately while the crust is still warm and the basil releases its fragrance.
Notes
Nutrition
FAQs
Can I use fresh mozzarella instead of low-moisture mozzarella?
Technically yes, but visually no. Fresh mozzarella contains significantly more water, which means it releases moisture as it cooks. Instead of those gorgeous, defined bubbles with golden-brown spots, you’ll get a flat, oily, pale surface. The water in fresh mozzarella essentially steams the cheese, preventing browning. Low-moisture is essential for this specific visual result. If you love fresh mozzarella, save it for caprese salads where its moisture and delicate flavor shine.
Why does the crust get darker at the edges than in the center?
This is actually the goal, not a mistake. The edges of your dough make direct contact with the hot cast iron skillet and are positioned closer to the heating elements. They brown more deeply and quickly—that’s caramelization, and it looks professional. The center cooks more gently because it’s insulated slightly by the toppings and sauce. This variation in color depth is what separates this from a flat, uniformly beige crust. It signals skilled cooking.
How do I prevent the basil from turning black or bruised-looking?
Basil oxidizes and darkens when exposed to heat or cut with metal knives. Always add basil after cooking, never before. Use your fingers to tear leaves rather than cutting them with a knife—this minimizes cell damage and keeps the bright green color intact. Add basil as the very last step before serving, never more than 5 minutes ahead. The fresher and less handled the basil, the more vibrant and beautiful it looks on your finished pizza.
What temperature is my cast iron skillet when it comes out of the oven?
The skillet itself is approximately 475°F—extremely hot. The food inside is around 180-190°F. This is why you need to cool for exactly 5 minutes: it allows the cheese to set and the crust to firm enough to slice without collapsing, but it’s still warm enough to enjoy hot. Use a kitchen towel or silicone handle cover when removing the skillet and serving. A hot cast iron skillet is a serious burn hazard and deserves respect.
Can I add more toppings without sacrificing the look?
More isn’t better here. The visual appeal comes from restraint. Each element you see should be intentional and contribute to the composition. If you crowd the pizza, toppings overlap confusingly, cheese doesn’t bubble properly, and your carefully arranged tomatoes disappear. I typically recommend: choose one addition (mushrooms, pepperoni, fresh vegetables, whatever) and use it sparingly. Apply it in a pattern—scattered evenly or radiating from center—so it reads as intentional rather than haphazard. When you see professional pizzerias, they don’t pile toppings to the ceiling. They layer thoughtfully.
More Visually Stunning Recipes
If you loved the process of creating restaurant-quality pizza at home, here are some other recipes that deliver that same visual impact and approachable technique:
- Air Fryer Honey Salmon Bites Recipe – Golden-glazed protein with that same sizzle-to-table drama as cast iron pizza.
- Air Fry Steak Bites Recipe – Perfectly seared exterior with interior pink tones. Visual restaurant quality in minutes.
- Sesame Chicken Recipe – Glossy, caramelized exterior with similar color depth and professional appearance.
Final Thoughts on Visual Cooking
Making this cast iron pizza grill recipe taught me something I’ve carried through my entire career: the most beautiful dishes aren’t complicated. They’re intentional. Every choice—from ingredient selection to oven position to garnish timing—affects how this pizza looks and tastes. When you feed people something that stops them in their tracks, you’re not just feeding their bodies. You’re feeding their joy, their sense of occasion, their memory of a moment.
I’ve plated hundreds of dishes, analyzed countless nutrients, and tested infinite techniques. But there’s something magical about simple, whole foods cooked with precision. Your cast iron, your dough, your tomatoes, and your care create magic. The color you’re looking at isn’t artificial; it’s real food reaching its peak potential. The bubbles aren’t fancy techniques; they’re chemistry and heat working together.
You’re not just making pizza. You’re creating an experience. You’re showing people they matter enough for you to cook with intention. That’s the real recipe here—and it’s worth every moment.
More Recipes You Will Love
- This Easy Chicken Dinner – Worth adding to your recipe collection.
Celebrate your flavorful adventure!