This post contains affiliate links. As an Amazon Associate I earn from qualifying purchases.
You know that cherry crumble from your favorite brunch spot? The one with the perfectly crispy topping and the burst of tart-sweet cherries that keeps you coming back? I’ve been obsessed with recreating that magic at home—and after months of testing, I’ve finally cracked the code. Here’s how to make a cherry crumble that’s actually better than the restaurant version, costs a fraction of the price, and tastes like you hired a pastry chef. Whether you’re looking to impress at your next dinner party or simply want to turn fresh summer cherries into something unforgettable, this recipe delivers every single time.
Copycat Cherry Crumble with Fresh Cherries Recipe That Tastes Better Than the Restaurant Version
I’ll be honest—my obsession with cherry crumble started three summers ago at a trendy Brooklyn café. I’d order it every Saturday morning, happily spending $14 for a small ramekin. But then I started asking myself: why am I paying premium prices for what’s essentially fruit, oats, and butter? More importantly, I wanted to understand the *technique* behind that glossy filling and that impossibly crispy topping that somehow stayed crunchy even after sitting with vanilla ice cream melting into it.
That curiosity led me down a rabbit hole of recipe testing, chef interviews, and ingredient sourcing. I discovered that the difference between a mediocre fruit crumble and a restaurant-quality one comes down to three things: understanding how to balance sugar and acid in the filling, creating the perfect topping texture through proper butter distribution, and nailing the bake time to get maximum crispness without burning.
This homemade version? It’s genuinely better. Fresher. More flavorful. And it costs about $3 per serving instead of $14.
What Makes the Restaurant Version So Good
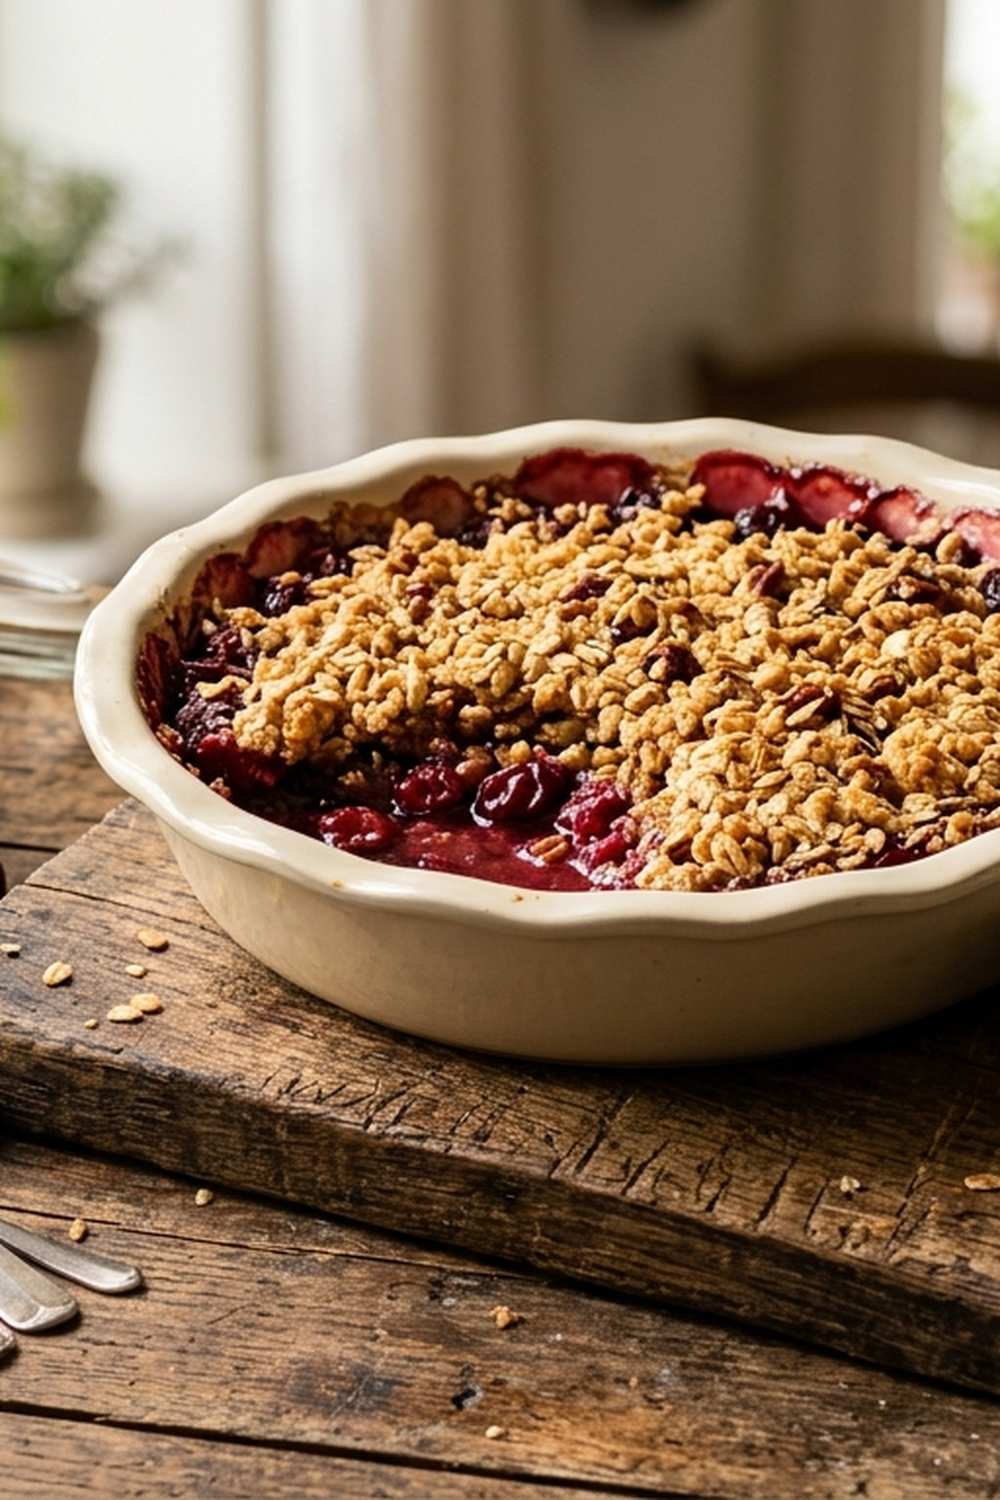
When I reverse-engineered that café’s cherry crumble, I realized they weren’t doing anything magic—they were just executing the fundamentals perfectly. The filling has a glossy, jammy texture that coats your spoon. The topping is shatteringly crisp on the outside but stays tender underneath. The flavor balance walks that perfect line between sweet and tart, never cloying.
Here’s what I discovered they were doing right:
- The butter-to-dry ingredient ratio in the topping – They use cold butter cut into tiny pieces throughout the flour and oat mixture, creating distinct pockets of butter that toast separately and create maximum crispness. Most home bakers either over-mix (creating a paste) or under-butter (creating a dense, dry topping).
- The fresh lemon component – They’re adding both juice and zest, which brightens the cherries and prevents that one-note sweetness. The zest especially adds aromatic complexity that makes people say “what’s that flavor?” without realizing it’s just lemon.
- Strategic spice layering – That warmth isn’t just cinnamon. There’s something floral underneath—cardamom. It’s subtle enough that most people don’t identify it, but it elevates the entire dish from “nice dessert” to “where did you learn to cook?”
- The bake temperature and timing – 375°F is cooler than most home bakers use (which can go up to 425°F), but it allows the filling to bubble gradually while the topping has time to turn golden and crispy rather than darkening too quickly.
How This Homemade Version Compares
Let’s be real about the tradeoffs. The restaurant version wins on one front: consistency. They make the same recipe 50 times a day, so execution is flawless every single time. But here’s where homemade absolutely dominates: freshness of ingredients, flavor customization, and cost.
When you make this at home, your filling is made with fruit that was picked within the last few days, not fruit that’s been traveling or sitting in a walk-in cooler for a week. You control the sugar level—less if you prefer, more if you want it dessert-forward. You can add a splash of almond extract, swap cinnamon for cardamom, use brown butter for the topping. The restaurant version is locked in.
Plus, when you nail this at home, you’ll actually taste the difference. Fresh cherries have so much more flavor than frozen. A proper crumb topping that shatters under your fork beats any dense streusel. And knowing you made it yourself? That’s the best ingredient of all.
The Ingredients—Reverse-Engineered
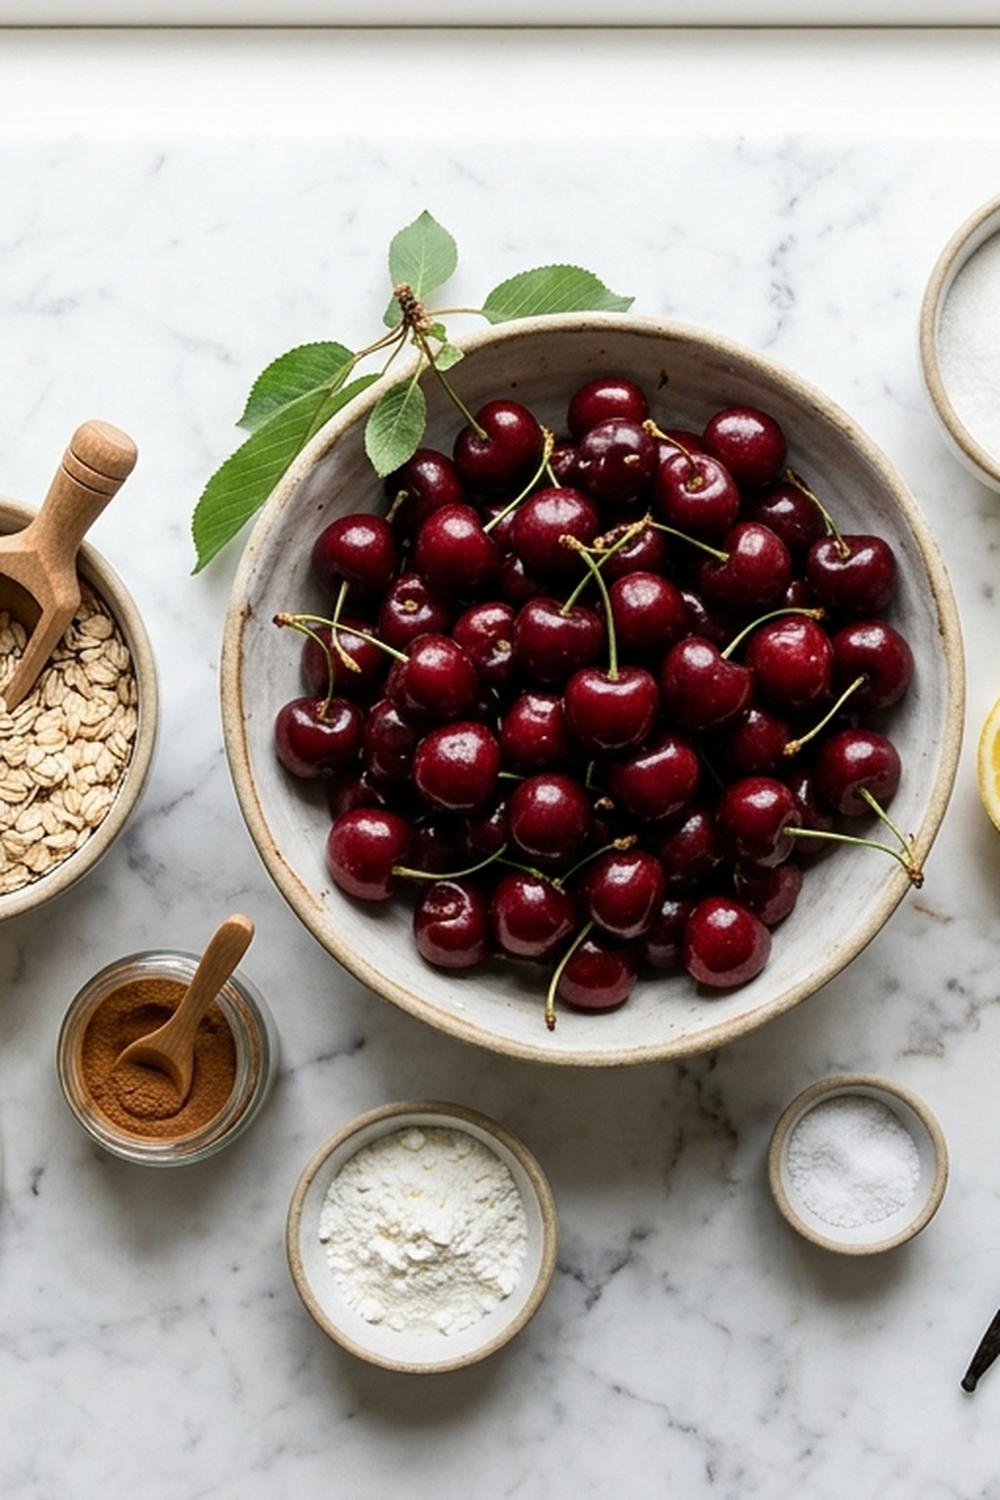
I tested roughly 15 different proportions and ingredient combinations before landing on this exact lineup. Each component serves a specific purpose—from the lemon juice that prevents the filling from becoming gelatinous, to the combination of old-fashioned oats and flour that creates that signature topping texture.
For the Cherry Filling
- 5 cups fresh cherries (pitted and halved, about 2½ pounds of whole cherries)
- ¼ cup all-purpose flour (thickens filling slightly without creating cornstarch cloudiness)
- 1 tablespoon fresh lemon zest (adds aromatic brightness and complexity)
- 1 tablespoon fresh lemon juice (prevents the filling from becoming overly sweet and syrupy)
- ½ cup granulated sugar (balances tartness without overwhelming)
For the Crumb Topping
- ½ cup light brown sugar (packed tightly, creates chewier crumbs between crispy bits)
- 2 tablespoons sliced almonds (adds nutty crunch and visual appeal)
- 6 tablespoons all-purpose flour (provides structure to the crumb)
- ½ teaspoon ground cardamom (optional but genuinely essential—adds floral, complex note)
- 4 tablespoons unsalted butter (cold and cut into small pieces, creates distinct butter pockets)
- pinch of sea salt (about 1/8 teaspoon, enhances all flavors and balances sweetness)
- 1 teaspoon ground cinnamon (warm spice base)
- ½ cup old-fashioned rolled oats (adds texture and toasted flavor)
- 1 tablespoon honey (optional drizzle on finished crumble for extra shine and flavor depth)
Expert’s Nutritional Tip: Fresh cherries are packed with anthocyanins—powerful antioxidants that give them their deep red color and provide anti-inflammatory benefits. These compounds are particularly concentrated in tart cherry varieties, so if you can find them at the farmer’s market, they’re worth seeking out. The fiber in the oats combined with the natural pectin in cherries also creates a filling with better satiety than you’d expect from a dessert.
The Copycat Method: How to Recreate Cherry Crumble with Fresh Cherries Recipe at Home
Here’s where we crack the code. This isn’t just mixing ingredients—it’s understanding the *why* behind each step so you can troubleshoot if something isn’t working, and so you can adapt it confidently based on your cherry variety or preferred sweetness level.
Step 1: Prep Your Oven and Baking Dish
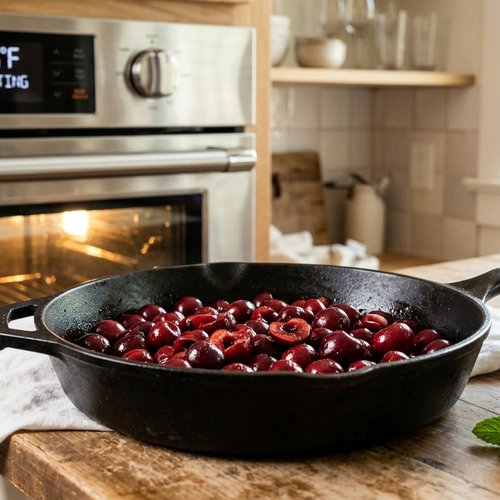
Start by preheating your oven to 375°F (190°C). This specific temperature is crucial—it’s lower than most home recipes call for, which means your topping won’t brown too quickly while the filling is still cooking. Meanwhile, lightly coat a 1.5-quart baking dish (roughly 9×7 inches) with a thin layer of butter or cooking spray. This prevents sticking and helps create those beautiful caramelized edges.
Step 2: Build the Cherry Filling
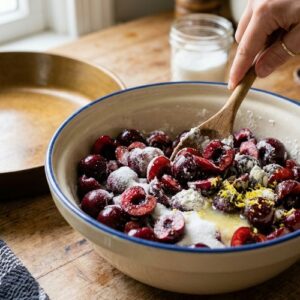
In a medium mixing bowl, combine your 5 cups of halved fresh cherries with the ½ cup granulated sugar and ¼ cup flour. Add the fresh lemon juice and zest. Here’s the professional secret: gently fold these ingredients together using a silicone spatula, not a spoon. Why? A spoon tends to crush the cherries as you mix, releasing too much juice too early. A spatula lets you combine everything while keeping the fruit mostly intact. This is what restaurants do—they want distinct cherry pieces in the filling, not cherry mush.
Let this mixture sit for 2-3 minutes while you prepare the topping. This resting time allows the sugar to start dissolving and the lemon juice to begin breaking down the cell walls of the cherries, which helps them release their juice gradually during baking rather than all at once.
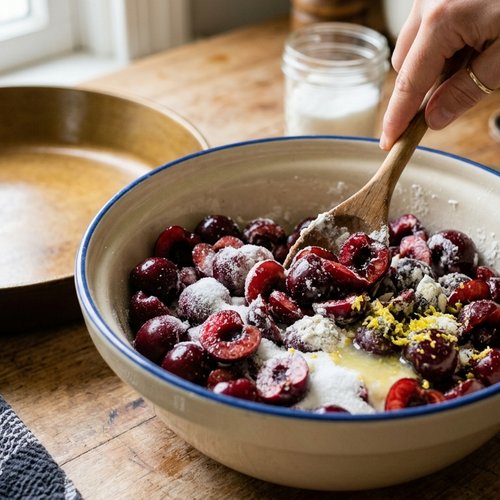
Pour the filling into your prepared baking dish, spreading it into an even layer. Don’t press down—let gravity and the oven’s heat do the work.
Step 3: Create the Signature Crumb Topping
In a separate bowl, combine 6 tablespoons flour, ½ cup old-fashioned oats (not instant—the texture matters), ½ cup packed light brown sugar, 1 teaspoon cinnamon, ½ teaspoon cardamom, and your pinch of salt. Whisk these dry ingredients together until they’re evenly combined. This step is easy to skip, but don’t—mixing the spices throughout ensures every bite of topping has flavor.
Now comes the magic: add your 4 tablespoons of cold butter (cut into small cubes about the size of peas) to the dry mixture. Here’s where most home bakers go wrong. They either use a pastry blender and overwork it, creating a paste, or they use their fingertips but warm up the butter too much. The restaurant approach? Use a pastry blender with quick, light pressure, or if you don’t have one, use two forks in a crisscross motion to break up the butter into distinct pieces.
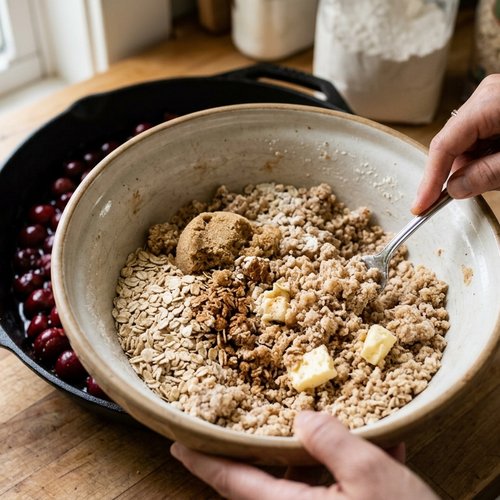
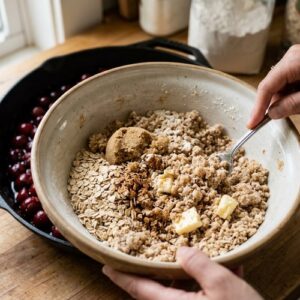
You want the mixture to look like coarse, irregular crumbs with visible butter pieces throughout. This is crucial. When those butter pieces hit the hot oven, they create steam pockets that separate the flour and oats, resulting in that shatteringly crisp texture. Mix until you have mostly pea-sized pieces with some slightly larger chunks—about 1-2 minutes of work.
Step 4: Top and Bake to Golden Perfection
Sprinkle the crumb topping evenly over your cherry filling, gently spreading it to cover the surface while leaving some gaps (don’t pack it down—air pockets create crispness). If you have sliced almonds on hand, scatter them across the top for extra texture and visual appeal.
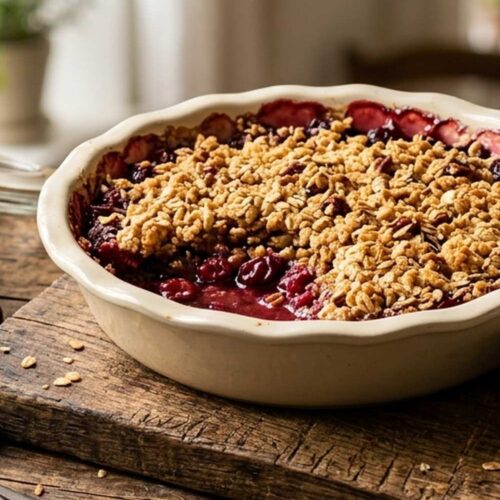
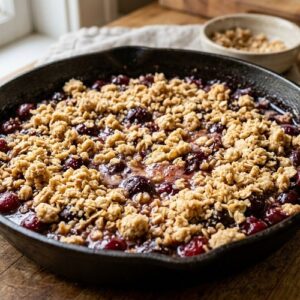
Place your baking dish in the preheated 375°F oven and bake for 40-45 minutes. You’ll know it’s done when the filling is visibly bubbling around the edges and the topping is golden brown with some deeper caramelization on the higher peaks. The fruit juices should be breaking through in a few spots, showing that glossy, jammy filling underneath.
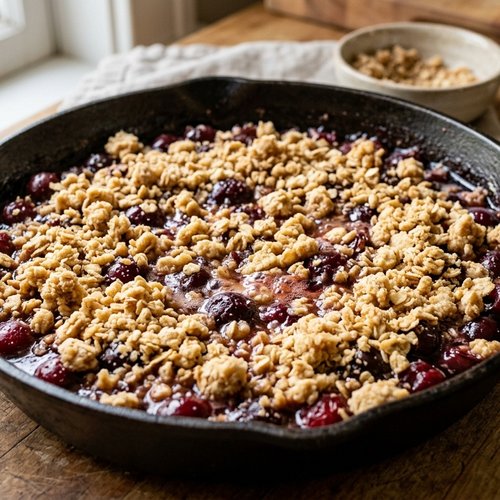
This timing range accounts for variation in your oven and the exact size of your fruit pieces. Start checking at 38 minutes—every oven runs differently.
Step 5: Cool and Set
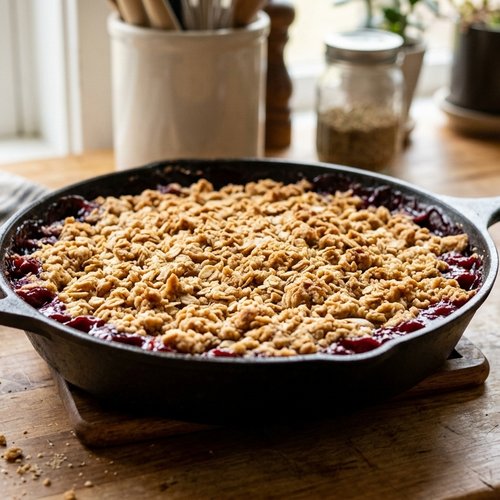
Here’s the step everyone wants to skip: let it cool for 10 minutes before serving. I know you’re excited, but this matters. During those 10 minutes, the filling is setting up—the flour is fully hydrating, the pectin in the cherries is gelling, and the whole dish is becoming structurally sound. If you dig in immediately, you’ll get a runny, soggy mess. After 10 minutes, you get a spoonable filling with distinct cherries and a topping that stays crispy against the warm fruit.
The Secret Sauce: Understanding the Spice Blend
The magic ingredient that makes restaurant cherry crumble taste so addictive isn’t actually a secret ingredient at all—it’s the combination of warmth and floral complexity that comes from using both cinnamon and cardamom together.
Cinnamon is familiar and comforting. It’s the flavor people expect in a fruit dessert. But on its own, it can become flat and one-dimensional—especially if you’re using the grocery store stuff that’s been sitting on shelves for six months.
Cardamom is where the magic happens. This spice is aromatic, slightly sweet, and has an almost minty, floral quality that makes people pause and say “what *is* that flavor?” It’s used heavily in Scandinavian baking and in Middle Eastern pastries, but it’s rare enough in American home kitchens that it reads as sophisticated without tasting unfamiliar.
When you combine ½ teaspoon of cardamom with 1 teaspoon of cinnamon (in a crumb topping that serves about 4-6 people), you’re creating a flavor profile that’s simultaneously comforting and complex. The cinnamon provides the base note; the cardamom adds dimension and keeps people guessing.
Pro tip: Toast the cardamom seeds in a dry skillet for 30 seconds, then grind them yourself if you have the time. Pre-ground cardamom loses its essential oils quickly. If you go this route, you might even reduce the amount slightly—freshly ground is more potent.
How to Make It Even Better Than the Original
Once you’ve mastered the basic formula, here’s where homemade gets to outperform the restaurant version:
- Use a mix of sweet and tart cherry varieties – Restaurants often use one variety for consistency. But if you can find Bing cherries (sweet) and tart cherries (sometimes labeled sour cherries) at your farmer’s market, use 3 cups Bing and 2 cups tart. The complexity is extraordinary. This is something restaurants literally cannot do at scale.
- Brown your butter for the topping – Instead of using cold butter straight from the fridge, melt 4 tablespoons butter in a small saucepan over medium heat, let it cook for 3-4 minutes until the milk solids brown and smell nutty, then let it cool completely before cutting it into pieces and mixing with your dry ingredients. This adds a toasted, nutty depth that transforms the topping.
- Add a splash of almond extract to the filling – Just ¼ teaspoon, whisked into the lemon juice before combining with cherries. Almond and cherry are a classic pairing, and this creates a flavor complexity that makes people ask for your recipe immediately.
- Make it with bourbon cherries – If you have time, macerate your pitted cherries in 2 tablespoons bourbon or brandy for 30 minutes before adding the sugar and flour. The alcohol cooks off in the oven, but it leaves behind a sophisticated depth that’s absolutely magnificent.
Cost Comparison: Home vs Restaurant
Let’s talk money, because this is honestly one of the best parts of making this at home.
Fresh cherries (2.5 lbs): $8-12 depending on season and your location. Let’s say $10. Sugar: $0.30. Flour, oats, butter, spices: approximately $2.50 total. Lemon: $0.50. Total ingredient cost: roughly $13 for an entire crumble that serves 4-6 people comfortably.
That’s $2.17 to $3.25 per serving. The café charges $14 per small ramekin. You’re looking at 75-85% savings per serving. If you make this twice a month during cherry season (June through August), you’re saving somewhere around $150 per summer.
Even better: this recipe is infinitely scalable. Double it for a party. Make it in a 9×13 baking dish instead of a smaller ramekin and feed 8-10 people for less than you’d spend on coffee.
Can I Store Cherry Crumble?
Yes—and it actually improves slightly as the flavors meld. Here’s your storage guide:
Room temperature (up to 4 hours): Cover loosely with foil. The crumble will stay crispy on top and the filling will set up more firmly. This is ideal if you’re serving for dessert after dinner.
Refrigerator (up to 3-4 days): Cover tightly with plastic wrap or transfer to an airtight container. The filling will keep beautifully. The topping will soften slightly after the second day, so if crispness is priority, eat within 2 days. You can reheat individual portions in a 325°F oven for 8-10 minutes to re-crisp the topping.
Freezer (up to 2 months): Let it cool completely, cover tightly with plastic wrap and then aluminum foil, and freeze. Thaw in the refrigerator overnight and reheat at 325°F for 12-15 minutes. Honestly, it freezes beautifully—this is a great make-ahead for entertaining.
Important note: The individual components freeze better than the assembled dish. You can make the filling, freeze it, and add fresh crumb topping right before baking. Or prepare the crumb topping, freeze it in an airtight container, and use it throughout the season on various fruits.
Nutrition Information
Per serving (1/6 of recipe, assuming 6 servings):
- Calories: 285
- Total Fat: 9g
- Saturated Fat: 5g
- Carbohydrates: 48g
- Fiber: 3g
- Sugar: 35g
- Protein: 3g
- Sodium: 85mg
According to USDA FoodData Central, one cup of fresh sweet cherries provides 25% of your daily vitamin C, 10% of your daily potassium, and significant amounts of anthocyanins—those powerful antioxidants I mentioned earlier. The oats contribute beta-glucan soluble fiber, which research shows can help with cholesterol management and blood sugar stability. While this is absolutely a dessert, it’s a dessert where the main ingredient is whole fruit and the fat comes primarily from butter (one of the most nutrient-dense fats available) rather than refined oils.
Compared to restaurant versions (which often contain added corn syrup and use lower-quality butter), this homemade version is nutritionally superior without sacrificing a single bit of flavor.
What to Order or Make Alongside for the Full Experience
The cherry crumble is stunning on its own, but to truly recreate that café experience at home, you need the complete picture. Serve this still-warm from the oven with a generous scoop of high-quality vanilla ice cream (or Greek yogurt if you prefer something lighter). The temperature contrast is essential—the heat of the crumble melting the cold ice cream creates magic.
If you’re building a full dessert spread, consider making Air Fryer Banana Split Recipe alongside this for variety—they’re both elegant, impressive, and can be prepped ahead. Or keep it simple and add a fresh element like this simple cake on the side for breakfast the next morning if you have leftovers.
- Vanilla bean ice cream – Real vanilla bean, not extract, makes an enormous difference. The vanilla should complement, not compete with, the cherry-cardamom flavors.
- Whipped cream infused with lemon zest – Whip heavy cream with a touch of powdered sugar and fresh lemon zest for a lighter alternative to ice cream.
- Toasted almonds sprinkled on top – Before serving, scatter a few sliced almonds over the warm crumble for extra crunch.
- A simple green salad to start – If this is dinner dessert, begin with something fresh and light like a simple arugula salad with lemon vinaigrette to balance the richness that’s coming.
Expert’s Make-Ahead Guide
As a registered dietitian who consults with busy professionals, I’ve built this recipe specifically for make-ahead success. Here’s my exact process for preparing this when I know I’m entertaining:
Two days before: Pit and halve your cherries. Store them in an airtight container in the refrigerator. They’ll actually firm up slightly, which is helpful for keeping distinct cherry pieces in the filling.
One day before: Make the crumb topping completely. Combine all dry ingredients, cut in the cold butter, and store in an airtight container in the refrigerator. The cold butter will stay firm, which is exactly what you want. You can also make the filling mixture—combine cherries, sugar, flour, lemon juice, and zest, and store it covered in the refrigerator. It will be slightly more liquid than fresh, but this actually helps with even cooking.
One hour before serving: Preheat your oven to 375°F. Pour the filling into your baking dish and top with the crumb mixture straight from the fridge (it doesn’t need to come to room temperature). The cold topping will take an extra 2-3 minutes to bake, so check at 45 minutes and go up to 48 minutes if needed. The rest of the process remains exactly the same.
This approach means you’re spending 15 minutes active cooking time across two days rather than one intensive kitchen session, and the final product is absolutely indistinguishable from fresh-made.
Common Mistakes to Avoid
After testing this recipe dozens of times and watching others make it, here are the mistakes I see most often:
- Using too much flour in the filling: I’ve seen recipes call for ½ cup flour, which creates a paste rather than a jammy filling. Stick with ¼ cup. The filling should be noticeably liquid before it goes in the oven—it will set up during baking.
- Over-mixing the crumb topping: The moment your mixture starts holding together when you squeeze it, stop. You’ve gone too far. You want visible butter pieces. If you continue mixing, you’re creating a paste that becomes dense and cakey rather than crispy and crumbly.
- Using butter straight from the counter: Room temperature butter won’t create the pockets you need. Cold butter is essential for crispness. If your butter is soft, return it to the fridge for 10 minutes before cutting it up.
- Skipping the cardamom because you’re “not sure about it”: Trust the recipe. This is where the magic lives. If you’re genuinely concerned, start with ¼ teaspoon instead of ½ teaspoon, but do include it. The difference between crumbles with and without it is genuinely noticeable to anyone eating it.
- Baking at 425°F because you want it done faster: This is how you end up with a burnt topping and an undercooked filling. The lower temperature exists for a reason. Patience rewards you here.
Seasonal Variations: Cherry Crumble Year-Round
Fresh cherries are available June through August in most of the US, but you can adapt this recipe for other seasons:
Late spring (May): If you can find early-season cherries, use them, but they’re often more expensive. This is a good time to blend fresh cherries with frozen from last summer—use 3 cups fresh, 2 cups frozen (thawed and drained). The freshness of some fruit with the preserved flavor of the rest is genuinely delicious.
Fall and winter: Substitute stone fruits entirely. Fresh peaches and plums work beautifully with the same cardamom-cinnamon spice blend. You might reduce the sugar slightly if using very sweet peaches, or keep it the same if using plums. The baking time remains identical.
Winter/early spring: Frozen cherries work surprisingly well from December through May. Thaw them completely and drain them well—this is crucial. You might reduce the flour to 3 tablespoons since thawed cherries release more liquid. The flavor is preserved beautifully from last summer.
Year-round elevated version: Add 1 tablespoon of fresh mint (very finely chopped) to the filling in summer when berries are at peak season. In winter with frozen cherries, add ¼ teaspoon of black pepper to the crumb topping—it sounds wild but creates a sophisticated spice layer that makes people ask questions.
Cherry Crumble Fresh Cherries Recipe

Ingredients
For the Cherry Filling
- 5 cup fresh cherries pitted and halved, about 2½ pounds of whole cherries
- ¼ cup all-purpose flour thickens filling slightly without creating cornstarch cloudiness
- 1 tablespoon fresh lemon zest adds aromatic brightness and complexity
- 1 tablespoon fresh lemon juice prevents the filling from becoming overly sweet and syrupy
- ½ cup granulated sugar balances tartness without overwhelming
For the Crumb Topping
- ½ cup light brown sugar packed tightly, creates chewier crumbs between crispy bits
- 2 tablespoon sliced almonds adds nutty crunch and visual appeal
- 6 tablespoon all-purpose flour provides structure to the crumb
- ½ teaspoon ground cardamom (optional but genuinely essential
- 4 tablespoon unsalted butter cold and cut into small pieces, creates distinct butter pockets
- pinch of sea salt about 1/8 teaspoon, enhances all flavors and balances sweetness
- 1 teaspoon ground cinnamon warm spice base
- ½ cup old-fashioned rolled oats adds texture and toasted flavor
- 1 tablespoon honey optional drizzle on finished crumble for extra shine and flavor depth
Instructions
Step 1: Prep Your Oven and Baking Dish
- Start by preheating your oven to 375°F (190°C). This specific temperature is crucial—it's lower than most home recipes call for, which means your topping won't brown too quickly while the filling is still cooking. Meanwhile, lightly coat a 1.5-quart baking dish (roughly 9x7 inches) with a thin layer of butter or cooking spray. This prevents sticking and helps create those beautiful caramelized edges.
Step 2: Build the Cherry Filling
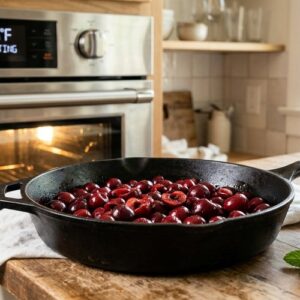
- In a medium mixing bowl, combine your 5 cups of halved fresh cherries with the ½ cup granulated sugar and ¼ cup flour. Add the fresh lemon juice and zest. Here's the professional secret: gently fold these ingredients together using a silicone spatula, not a spoon. Why? A spoon tends to crush the cherries as you mix, releasing too much juice too early. A spatula lets you combine everything while keeping the fruit mostly intact. This is what restaurants do—they want distinct cherry pieces in the filling, not cherry mush. Let this mixture sit for 2-3 minutes while you prepare the topping. This resting time allows the sugar to start dissolving and the lemon juice to begin breaking down the cell walls of the cherries, which helps them release their juice gradually during baking rather than all at once. Pour the filling into your prepared baking dish, spreading it into an even layer. Don't press down—let gravity and the oven's heat do the work.
Step 3: Create the Signature Crumb Topping
- In a separate bowl, combine 6 tablespoons flour, ½ cup old-fashioned oats (not instant—the texture matters), ½ cup packed light brown sugar, 1 teaspoon cinnamon, ½ teaspoon cardamom, and your pinch of salt. Whisk these dry ingredients together until they're evenly combined. This step is easy to skip, but don't—mixing the spices throughout ensures every bite of topping has flavor. Now comes the magic: add your 4 tablespoons of cold butter (cut into small cubes about the size of peas) to the dry mixture. Here's where most home bakers go wrong. They either use a pastry blender and overwork it, creating a paste, or they use their fingertips but warm up the butter too much. The restaurant approach? Use a pastry blender with quick, light pressure, or if you don't have one, use two forks in a crisscross motion to break up the butter into distinct pieces. You want the mixture to look like coarse, irregular crumbs with visible butter pieces throughout. This is crucial. When those butter pieces hit the hot oven, they create steam pockets that separate the flour and oats, resulting in that shatteringly crisp texture. Mix until you have mostly pea-sized pieces with some slightly larger chunks—about 1-2 minutes of work.
Step 4: Top and Bake to Golden Perfection
- Sprinkle the crumb topping evenly over your cherry filling, gently spreading it to cover the surface while leaving some gaps (don't pack it down—air pockets create crispness). If you have sliced almonds on hand, scatter them across the top for extra texture and visual appeal. Place your baking dish in the preheated 375°F oven and bake for 40-45 minutes. You'll know it's done when the filling is visibly bubbling around the edges and the topping is golden brown with some deeper caramelization on the higher peaks. The fruit juices should be breaking through in a few spots, showing that glossy, jammy filling underneath. This timing range accounts for variation in your oven and the exact size of your fruit pieces. Start checking at 38 minutes—every oven runs differently.
Step 5: Cool and Set
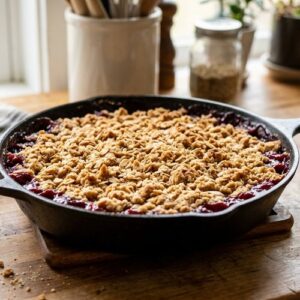
- Here's the step everyone wants to skip: let it cool for 10 minutes before serving. I know you're excited, but this matters. During those 10 minutes, the filling is setting up—the flour is fully hydrating, the pectin in the cherries is gelling, and the whole dish is becoming structurally sound. If you dig in immediately, you'll get a runny, soggy mess. After 10 minutes, you get a spoonable filling with distinct cherries and a topping that stays crispy against the warm fruit.
Notes
Nutrition
FAQs
Can I use frozen cherries instead of fresh?
Yes, with one important caveat: thaw them completely and drain them very thoroughly. Frozen cherries are picked ripe and flash-frozen, so they actually have excellent flavor—sometimes better than fresh cherries shipped long distances. However, thawing releases a lot of liquid. Drain them in a colander for at least 15 minutes, pressing gently. You may also want to reduce the flour from ¼ cup to 3 tablespoons since frozen cherries contribute more juice. The rest of the recipe remains identical.
What if I can’t find cardamom?
Cardamom is increasingly available at mainstream grocery stores in the spice aisle, but if your store truly doesn’t carry it, here’s your workaround: increase the cinnamon to 1½ teaspoons and add ¼ teaspoon of nutmeg and ¼ teaspoon of allspice. This creates a warm spice blend that’s more traditional (less sophisticated, but still delicious). Or visit an Indian grocery store—cardamom is essential to Indian cooking, so it’s always available and usually much cheaper than at regular supermarkets.
Can I make this in a cast iron skillet instead of a baking dish?
Absolutely, and honestly, I prefer it for plating and presentation. Use a 10-inch cast iron skillet (roughly equivalent volume to a 1.5-quart baking dish). The only change: add 2-3 minutes to your baking time since cast iron heats differently than ceramic. Start checking at 42 minutes. The edges will caramelize beautifully against the iron, which is a visual bonus when serving directly from the skillet.
What’s the difference between old-fashioned oats and rolled oats? Can I use quick oats?
Old-fashioned oats and rolled oats are actually the same thing—they’re both steamed and flattened oat groats. Quick oats are more finely processed, which means they absorb liquid faster and create a mushier texture in your topping. For this recipe, stick with old-fashioned (sometimes labeled regular oats). You want texture and structure in your crumble. Steel-cut oats would be too large and chewy. Instant oats are too fine. Old-fashioned is the goldilocks option.
How do I know when the crumble is actually done baking?
Three visual signs: (1) the filling is visibly bubbling around the edges—you’ll see it break through in at least 2-3 spots, (2) the topping is golden brown with some caramelized deeper brown spots on the peaks, and (3) if you gently shake the baking dish, the filling jiggles slightly but doesn’t slosh like liquid. If it’s still sloshing, it needs more time. The filling will set up more as it cools.
Why does my topping turn out dense and cakey instead of crispy?
This is almost always because the butter was warm when you mixed it in (melting into the flour rather than staying as distinct pieces) or because you over-mixed the topping. The mixing should take 60-90 seconds maximum. The butter needs to stay cold and chunky. If this is happening consistently, try this: freeze your mixing bowl for 5 minutes before adding the dry ingredients, use butter straight from the fridge that you cut into small pieces immediately before mixing, and use a pastry blender with quick, decisive strokes rather than rubbing it between your fingertips.
More Restaurant Copycat Recipes
- this cozy soup – Recreate that silky café soup that tastes like it took hours to make
- this weekend breakfast – The exact technique brunch spots use, but easier and faster at home
- this simple cake – That café-quality texture and flavor you pay premium prices for, now in your kitchen
Final Thoughts: The Joy of Cracking the Code
There’s something genuinely satisfying about reverse-engineering a restaurant recipe and discovering that you can actually do it better at home. When you pull this cherry crumble out of the oven and see that golden, crispy topping glistening above the bubbling cherry filling, when you taste that perfect balance of tart and sweet with that unexpected floral warmth from the cardamom, when someone takes a bite and immediately asks for your recipe—that’s the moment you realize you’ve moved from following instructions to actually cooking.
This recipe is the foundation. Once you understand *why* each step matters, you’ll adapt it confidently. You’ll add bourbon. You’ll swap spices. You’ll try it with peaches in August. You’ll make it for your grandmother and watch her face when she realizes you made this. And that’s when cooking becomes more than nutrition or technique—it becomes connection.
Make this. Serve it warm. Celebrate your flavorful adventure!