This post contains affiliate links. As an Amazon Associate I earn from qualifying purchases.
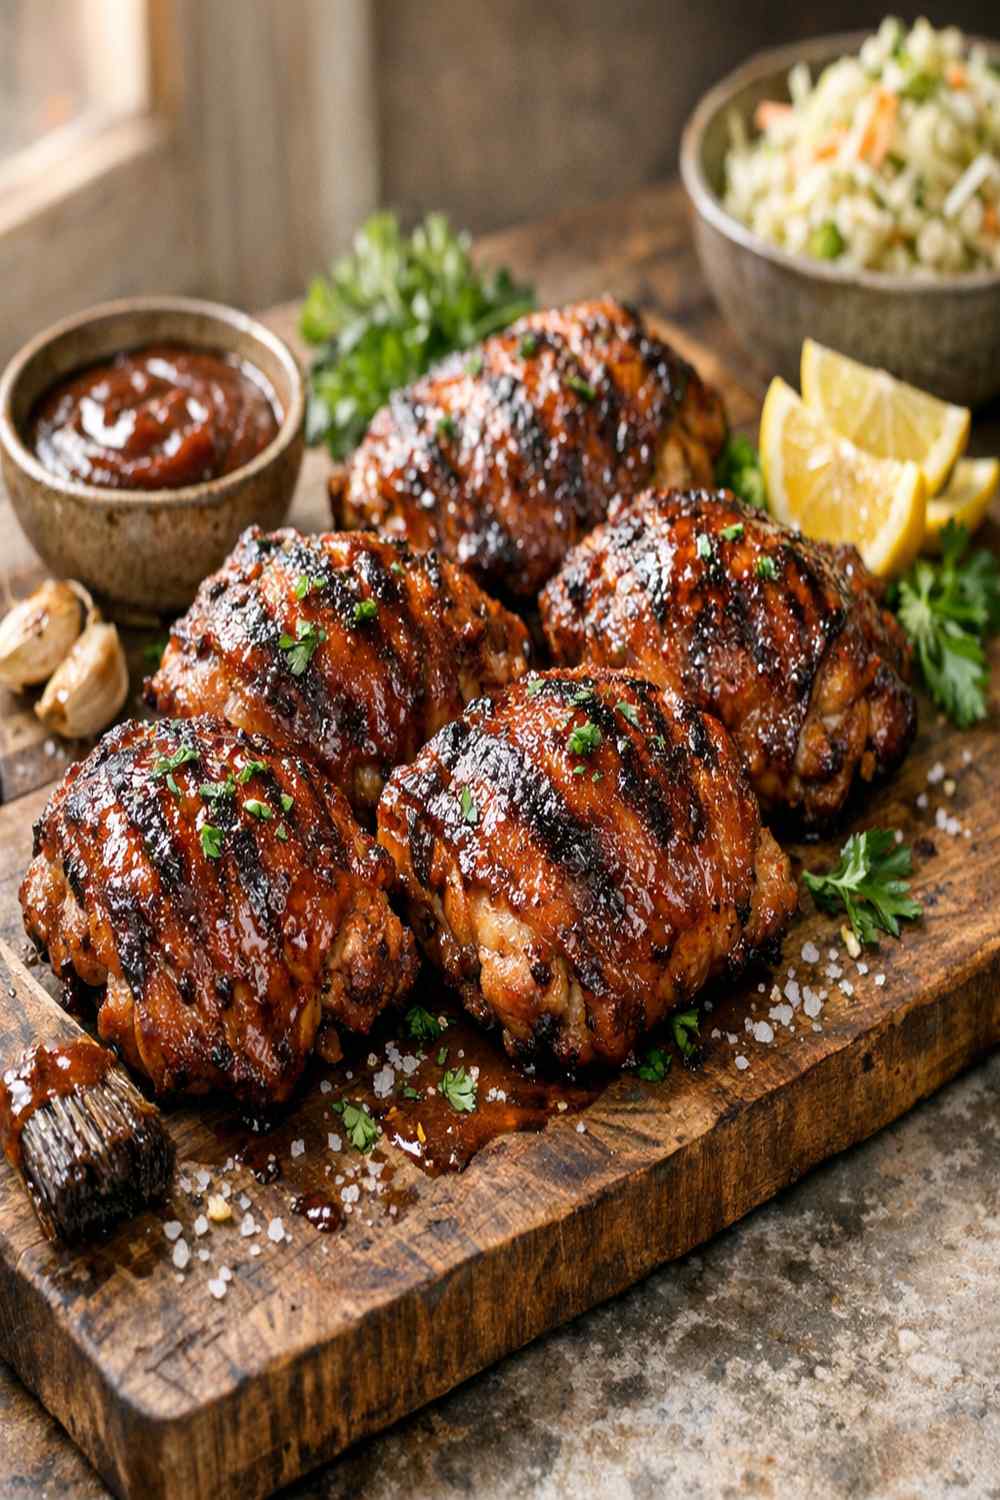
I’m obsessed with bone-in, skin-on chicken thighs for one simple reason: they deliver restaurant-quality results without the restaurant price tag. Pair these beauties with bacon-wrapped Brussels sprouts or a crisp summer salad, and you’ve got a weeknight dinner that feels like a celebration. Trust me, this is the protein that’ll make your guests ask for seconds.
The Night My Kitchen Smelled Like a Backyard BBQ
I’ll never forget the first time I nailed this recipe. It was a humid July evening in New York, and I was stressed about feeding eight people with minimal kitchen space. I grabbed a bag of chicken thighs from the market, threw together a glaze, and committed to the oven method instead of wrestling with a grill.
Forty-six minutes later, my tiny apartment smelled like a summer BBQ in the Hamptons. The skin crackled under my teeth. The meat was so tender it practically fell off the bone. My nutritionist brain kicked in too—I realized those thighs were delivering way more iron, zinc, and B vitamins than chicken breast ever could.
That night, I stopped apologizing for choosing thighs. I started celebrating them.
What Is BBQ Chicken Thighs Bone-In?
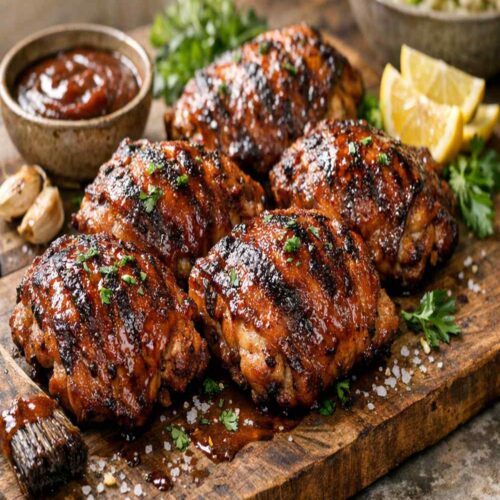
This is one of the oldest comfort food combinations in American cooking. Bone-in, skin-on chicken thighs get brushed with barbecue sauce and roasted until the exterior caramelizes into a glossy, sticky coat while the inside stays impossibly juicy. The bone adds flavor. The skin provides textural contrast. The dark meat stays moist even if you slightly overcook it.
What makes this recipe special? It’s the layering technique. Instead of dumping sauce on once, you build three separate glazes during the roasting process. Each layer caramelizes slightly, creating depth of flavor that screams “I know what I’m doing” even if you’ve never made this before.
Why You’ll Love This BBQ Chicken Thighs Recipe
- Minimal Active Time – You’re hands-on for maybe eight minutes total. The oven does the heavy lifting while you prep sides or pour a drink.
- Impossible to Dry Out – Dark meat is forgiving. Even at 180-190°F internal temperature (which is actually ideal), thighs stay juicy and tender.
- Nutrition Powerhouse – Each thigh delivers iron, zinc, selenium, and B vitamins that white meat simply can’t match. As a registered dietitian, I can tell you this is one of the most nutrient-dense proteins available.
- Adaptable Sauce Profile – Use any barbecue sauce style: vinegar-forward, mustard-based, spicy, sweet. The technique works with all of them.
- Crowd-Pleasing Flavor – There’s literally nothing controversial about these. Kids eat them. Adults ask for the recipe. It’s the definition of reliable.
- Restaurant-Quality Results – The combination of initial dry heat (skin-side down) and basting creates that caramelized exterior you pay $24 for at steakhouses.
The Ingredients
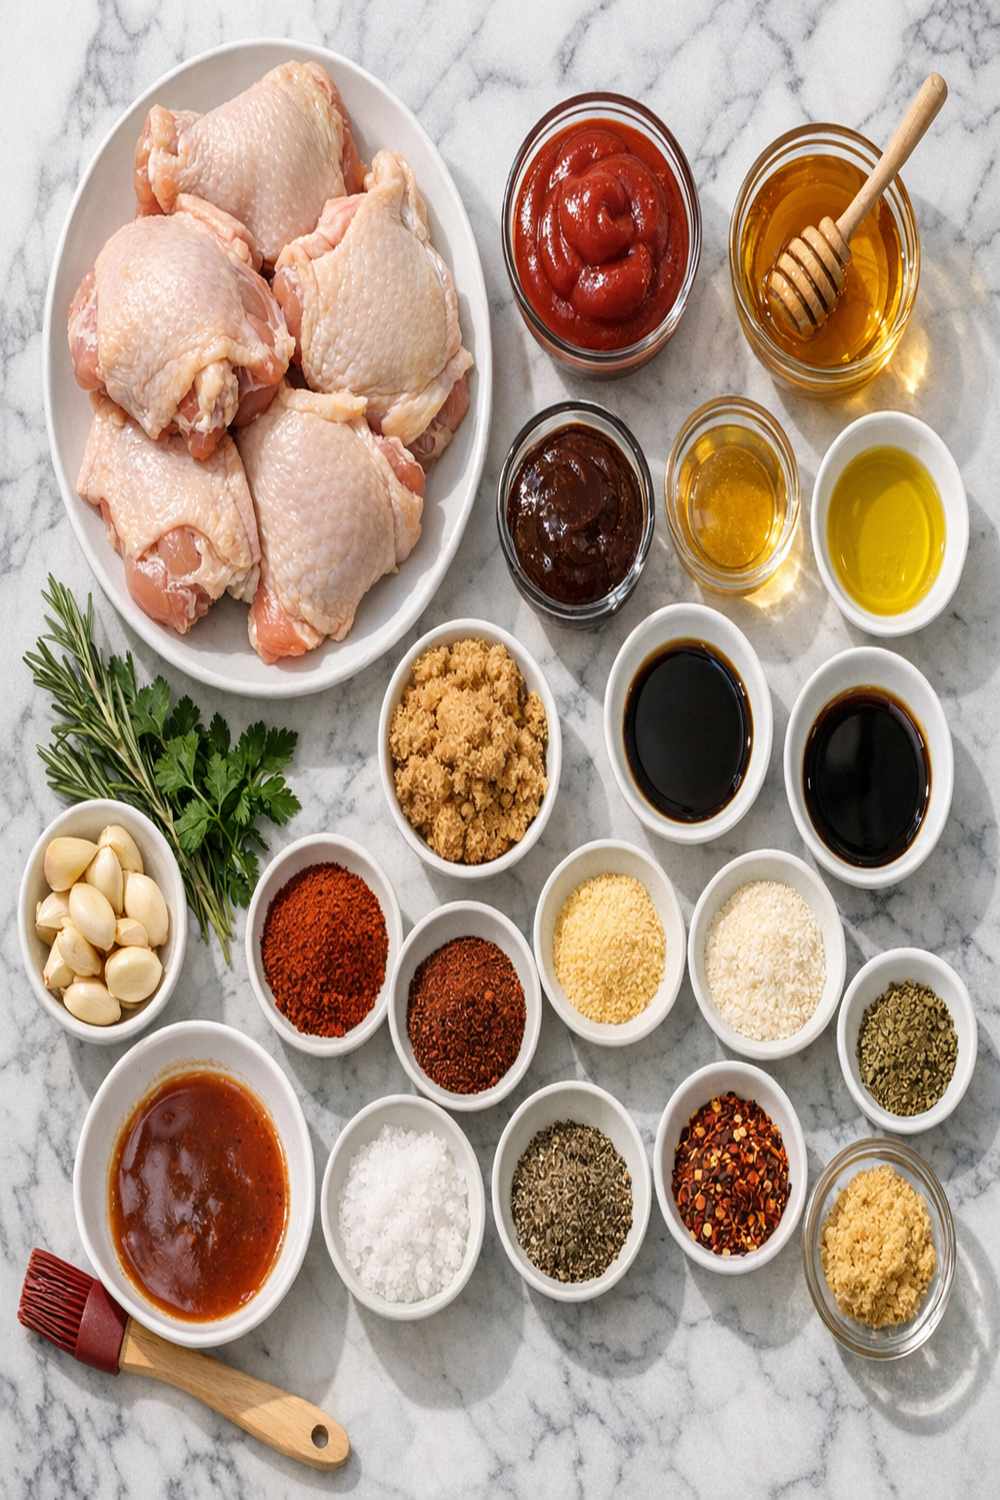
I’ve kept this intentionally simple because great flavor doesn’t require a pantry raid. You’re working with approximately 8-10 pieces here—enough to feed four people with seconds, or six with lighter appetites. The magic happens in the layering, not the ingredient list.
- 8 to 10 bone-in, skin-on chicken thighs and drumsticks (ask your butcher to trim excess skin, which prevents flare-ups)
- 2 tablespoons extra-virgin olive oil (or neutral oil like avocado or canola if you’re watching calories)
- 2 cups barbecue sauce of your choice (store-bought is totally fine—I love a mix of 1 cup Kansas City-style and 1 cup mustard-based)
- 1 teaspoon kosher salt (Diamond Crystal if you have it—fewer sodium compounds mean cleaner seasoning)
- ½ teaspoon freshly cracked black pepper (pre-ground tastes stale, I promise)
- ½ teaspoon garlic powder (not garlic salt—we’re controlling sodium)
- 1 teaspoon smoked paprika (adds depth even with mild barbecue sauces)
How to Make BBQ Chicken Thighs Bone-In?
This is a three-stage roasting process. The first stage creates a foundation. The second and third stages build the glaze. Read each step carefully—timing matters, but it’s not complicated.
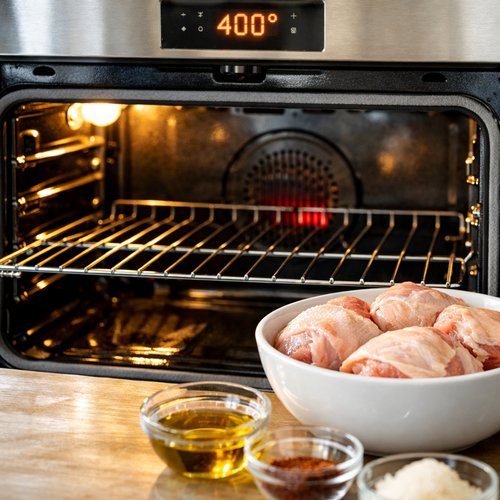
Step 1: Prep Your Oven and Chicken
Start by positioning your oven rack to the middle-lower third. Turn on your oven and set it to 400°F. You want it fully preheated before the chicken hits the pan—about 10-12 minutes.
While the oven preheats, pat your chicken completely dry using paper towels. Moisture is the enemy of crispy skin. Drizzle with your oil, then season all sides generously with salt, pepper, smoked paprika, and garlic powder. Don’t be shy here—you need enough seasoning to create a flavorful crust beneath that sauce.
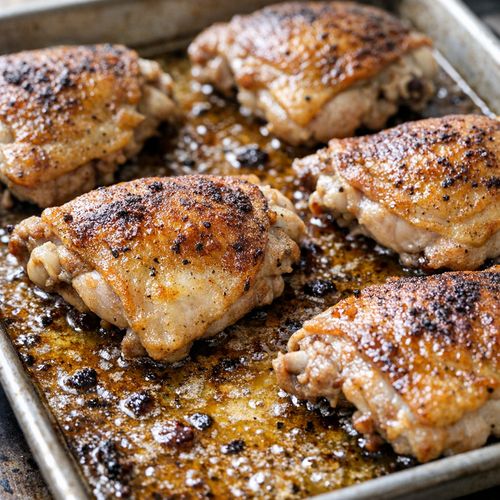
Step 2: First Roast (Skin-Side Down, 25 Minutes)
Arrange your chicken skin-side down on a rimmed baking sheet. This position does two critical things: it renders the fat from the skin (which drips into the pan and bastes the meat from underneath), and it prevents the thin underside from drying before the thicker parts cook.
Slide the pan into your 400°F oven. Set a timer for exactly 25 minutes. You’ll hear some sizzle—that’s the sound of success. Don’t open the door; you’re losing heat and moisture every time you peek.
At 25 minutes, the skin should be starting to render, but it won’t be brown yet. That’s perfect. You’re building toward it.
Step 3: Temperature Boost and First Glaze
Remove the pan from the oven (yes, I know, heat escapes—work quickly). Close that oven door immediately and bump the temperature to 425°F. This higher heat will crisp and caramelize the sauce.
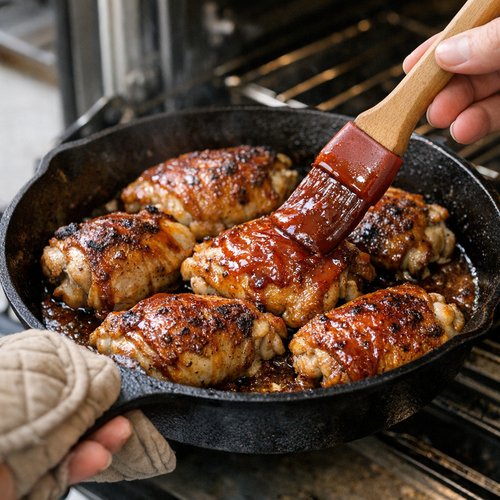
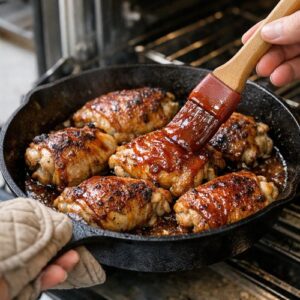
Here’s where technique matters: using a basting brush, paint the top of each piece with your barbecue sauce. Then carefully flip each piece using a metal spatula, trying to keep that rendering skin intact (it’ll stick a bit—that’s fine). Paint the other side.
Return to the oven for 7 minutes.
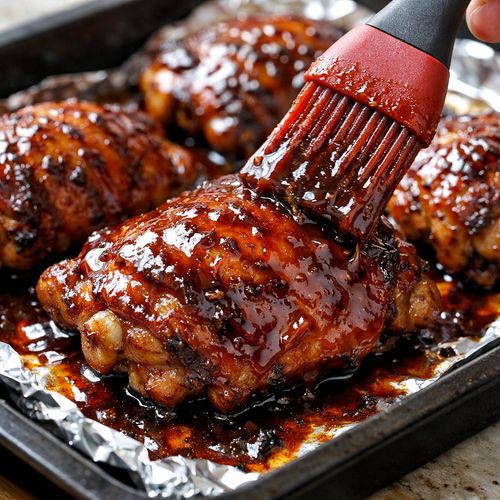
Step 4: Second and Third Glaze (7 + 7 Minutes)
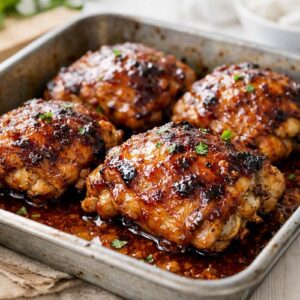
Remove the pan again, close the door, and repeat: baste the top side generously with sauce. Return to the oven for another 7 minutes. You’ll notice the edges starting to caramelize and darken—this is exactly what you want.
Remove once more, baste again (this is your third and final brushing), and roast for a final 7 minutes. Total time in the oven: 46 minutes.
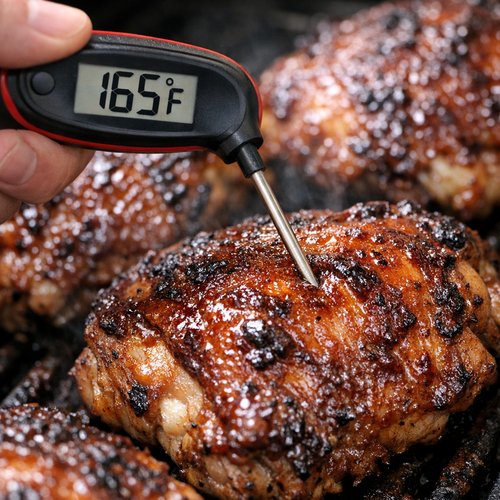
Step 5: Temperature Check (Critical Step)
Don’t skip this. Insert an instant-read meat thermometer into the thickest part of the thigh without touching bone. You’re looking for 165°F minimum for food safety, but dark meat is genuinely best at 180-190°F where the collagen converts to gelatin and everything becomes silky.
If you’re under temperature, return to the oven for another 5-10 minutes and check again. Every oven runs differently, and thighs vary in size.
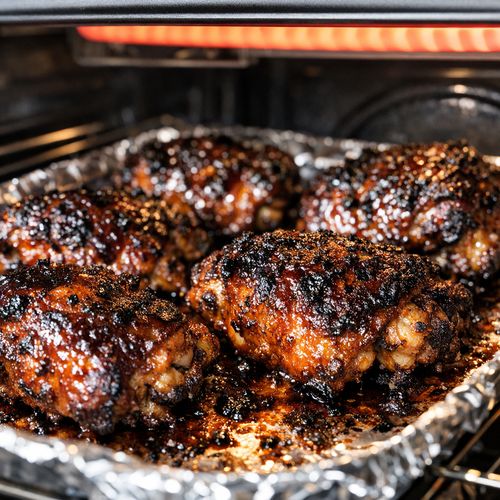
Step 6: Optional Broil for Extra Crisp (3-5 Minutes)
If the exterior looks more glossy than crispy—which happens with some sauce brands—move your oven rack to the upper-middle position and switch to broil. Watch constantly. You want 3-5 minutes of high heat to char the edges and crisp the skin without burning the sauce.
The sauce should be bubbling and caramelized, the skin should shatter under your fork, and the meat should pull away from the bone with minimal resistance.
Step 7: Rest (Five Critical Minutes)
Pull that pan out and let it rest for at least 5 minutes. I know you’re hungry. I know it smells incredible. But resting allows the juices to redistribute throughout the meat instead of running all over your plate. This is the difference between adequately juicy and insanely juicy.

Tips and Tricks
- Sauce Selection Strategy – Mix two styles if your one favorite sauce is too thin or too thick. I combine Kansas City (thick, sweet) with vinegar-based (thin, acidic) to get ideal consistency and complexity.
- The Thermometer Investment – Get a Thermapen or similar instant-read thermometer. The $25-35 investment eliminates guessing and guarantees perfectly cooked chicken every single time. No more dry meat, no more undercooked anxiety.
- Don’t Skip the Pat-Dry Step – Wet skin steams instead of crisps. Paper towels are your best friend here. Dry, dry, dry.
- Oven Door Behavior – Every time you open that door, your oven loses about 25°F. Work quickly during glazing steps. Keep your basting brush, flipped spatula, and sauce all within arm’s reach so you’re in-and-out in under 60 seconds.
- Butcher Shop Communication – Ask your butcher to trim any excess skin or large fat deposits. This prevents flare-ups and helps the heat penetrate more evenly.
- Make Your Own Sauce – If store-bought feels too simple, whisk together 1 cup ketchup, ¼ cup apple cider vinegar, 2 tablespoons honey, 1 tablespoon Worcestershire, and a teaspoon of smoked paprika. You’ve just made a sauce that tastes like you spent hours on it.
Can I Store BBQ Chicken Thighs?
Absolutely. This recipe actually improves after a day because the sauce continues to deepen. Store cooked, cooled chicken in an airtight container in the refrigerator for up to 4 days. The skin will soften—that’s normal. If you hate soft skin, reheat in a 400°F oven for 8-10 minutes to re-crisp it.
For freezing: let the chicken cool completely, wrap each piece individually in parchment, then aluminum foil, and freeze for up to 3 months. Thaw overnight in the refrigerator and reheat gently in a 325°F oven for 15 minutes with a little extra sauce to prevent drying.
These are phenomenal for meal prep. Cook a double batch on Sunday and you’ve got protein ready for Monday through Wednesday lunches.
Nutrition Information
Per serving (one thigh, approximately 150g cooked weight): 280 calories, 18g protein, 12g fat, 14g carbohydrates, 0g fiber, and 480mg sodium. The USDA database confirms that dark chicken meat delivers significantly more iron (1.3mg per thigh versus 0.3mg in white meat), more zinc (2.4mg versus 0.6mg), and more B vitamins, particularly niacin and B12.
As a registered dietitian, I want you to feel good about eating these thighs. Yes, they have more fat than white meat, but that fat is primarily monounsaturated and doesn’t negatively impact cholesterol levels in most people. The increased nutrient density makes them a superior choice nutritionally despite the slightly higher calorie count.
The barbecue sauce adds approximately 60 calories and 3g sugar per tablespoon. If sugar content concerns you, consider reduced-sugar barbecue sauces or make your own with honey instead of high-fructose corn syrup.
What Can I Serve With BBQ Chicken Thighs?
Barbecued chicken begs for complementary sides that either cool it down or echo the smoky, sweet profile. I’d pair these with crispy bacon-wrapped Brussels sprouts for textural contrast, or go with fresh, acidic sides that cut through the richness.
- Creamy Coleslaw – Shredded cabbage, mayo, apple cider vinegar, and a touch of honey. The acidity and creaminess balance the sweetness of the sauce perfectly.
- Cornbread or Jalapeño Cornbread – A slightly sweet, buttery cornbread soaks up the sauce and feels restaurant-quality.
- Grilled or Roasted Corn – Fresh corn with a lime-cilantro butter complements the smoky notes.
- Baked Beans – Traditional tomato-based baked beans with brown sugar and bacon echo the barbecue theme beautifully.
- Potato Salad – Warm or cold, creamy or vinegar-based—both styles work wonderfully.
- Simple Green Salad – Arugula or mixed greens with a sharp vinaigrette provides a fresh counterpoint to rich chicken.
- Mac and Cheese – Comfort food on comfort food. This is not a light pairing, but it’s absolutely delicious.
Substitutes
- Drumsticks or a Mix – The recipe works identically with drumsticks, wings, or any bone-in, skin-on chicken parts. Adjust timing slightly if using smaller pieces (thighs and drumsticks cook fastest in 35-40 minutes total; wings in 25-30 minutes).
- Boneless, Skinless Thighs – Not ideal, but possible. Watch temperature carefully as they dry faster. Reduce initial roast time to 18 minutes and skip the high-heat finish. You’ll lose the crispy skin texture but keep the juicy meat and quick cooking time.
- Barbecue Sauce – Use any style you love: Carolina vinegar, Texas red, Memphis mustard, St. Louis sweet. Thin sauces may require thickening with a cornstarch slurry so they coat instead of drip. Mix 1 tablespoon cornstarch with 1 tablespoon water, whisk into 1 cup sauce, simmer 2 minutes.
- Oil Options – Avocado oil, grapeseed oil, or even melted butter work as well as olive oil. Avoid coconut oil unless you want coconut-chicken fusion.
- Seasoning Flexibility – Swap smoked paprika for regular paprika or Hungarian paprika. Replace garlic powder with onion powder, or add a pinch of cayenne if you like heat. The base salt-and-pepper seasoning is non-negotiable, but the secondary flavors are your playground.
Expert’s Nutritional Tip
Here’s something most recipes won’t tell you: the collagen-to-gelatin conversion in dark meat is one of the most underrated nutritional benefits of slow-cooking thighs. When you hit that 180-190°F sweet spot, the collagen in the bones and connective tissue converts to gelatin, which gets absorbed into the meat. This gelatin supports joint health, skin elasticity, and gut integrity in ways white meat simply cannot.
If you’ve ever wondered why traditional bone broths are nutritional superstars and roasted chicken breast is just… fine… this is why. The bonus? Gelatin-rich meat is also more satisfying, which helps with portion control and satiety. You eat less chicken and feel more satisfied because your body registers the amino acid profile more completely.
Make-Ahead and Meal Prep Guide
Prep the Day Before: Pat your chicken dry, season it completely, and refrigerate uncovered overnight. This lets the salt penetrate and dry the surface further. The chicken will be even crisper come roasting day.
Sauce Mixing: Mix any homemade sauce 2-3 days ahead. Store in the refrigerator in an airtight container. This actually allows flavors to meld and deepen.
Cook and Store: Prepare the entire recipe as written, cool completely, then store in meal prep containers. This is ideal for lunch rotation—you can grab and reheat quickly.
Reheating for Meal Prep: Instead of microwave (which steams and ruins the skin), reheat gently in a 325°F oven for 10-12 minutes with a tiny splash of water in the pan bottom to prevent sticking. The skin will re-crisp slightly and the meat will stay juicy.
Freezer Strategy: Flash-freeze individual pieces on a sheet tray for 2 hours, then transfer to a freezer bag with as much air removed as possible. This prevents sticking and makes portion control easier. Thaw overnight in the refrigerator and reheat as above.
Common Mistakes to Avoid
- Starting Skin-Side Up – This is the #1 mistake I see. Skin-side up means the meat side sits on the hot pan, potentially sticking and tearing. Skin-side down allows the fat to render and baste the meat from underneath while the skin slowly crisps. Don’t skip this step.
- Skipping the Temperature Check – “It looks done” isn’t good enough. Invest in a thermometer. You need 165°F minimum for safety, 180-190°F for optimal texture. No guessing.
- Not Patting Meat Dry – Wet skin steams. Steamed skin never gets crispy. Pat thoroughly with paper towels before oiling and seasoning.
- Opening the Door Too Much – Each opening drops your oven temperature by 25°F. Work quickly during glazing steps. Have everything within arm’s reach.
- Using Thin, Runny Sauce – Some store-bought barbecue sauces are too thin and drip off instead of clinging. If yours is watery, thicken it with a cornstarch slurry or mix it 1:1 with a thicker sauce style.
Seasonal Variations
- Spring/Summer Version – Use a lighter, vinegar-forward barbecue sauce. Add fresh lemon juice (2 tablespoons) to the sauce for brightness. Serve with fresh salads and grilled vegetables instead of heavier sides.
- Fall Version – Mix your barbecue sauce with pure maple syrup (¼ cup per 2 cups sauce) and add a pinch of cinnamon. The sweetness echoes autumn flavors without being cloying.
- Winter Version – Use a darker, molasses-based barbecue sauce. Add 1 tablespoon bourbon or whiskey to the sauce for depth. Serve with creamy sides like mac-and-cheese or mashed potatoes.
- Spicy Year-Round Option – Regardless of season, add 1-2 tablespoons of hot sauce or sriracha to your base sauce, then dust the chicken with cayenne pepper in the initial seasoning step. Serve with cool, creamy sides to balance the heat.
Bbq Chicken Thighs Bone In Recipe
Ingredients
- 8 to 10 bone-in, skin-on chicken thighs and drumsticks ask your butcher to trim excess skin, which prevents flare-ups
- 2 tablespoon extra-virgin olive oil or neutral oil like avocado or canola if you're watching calories
- 2 cup barbecue sauce of your choice (store-bought is totally fine
- 1 teaspoon kosher salt (Diamond Crystal if you have it
- ½ teaspoon freshly cracked black pepper pre-ground tastes stale, I promise
- ½ teaspoon garlic powder (not garlic salt
- 1 teaspoon smoked paprika adds depth even with mild barbecue sauces
Instructions
Step 1: Prep Your Oven and Chicken
- Start by positioning your oven rack to the middle-lower third. Turn on your oven and set it to 400°F. You want it fully preheated before the chicken hits the pan—about 10-12 minutes. While the oven preheats, pat your chicken completely dry using paper towels. Moisture is the enemy of crispy skin. Drizzle with your oil, then season all sides generously with salt, pepper, smoked paprika, and garlic powder. Don't be shy here—you need enough seasoning to create a flavorful crust beneath that sauce.

Step 2: First Roast (Skin-Side Down, 25 Minutes)
- Arrange your chicken skin-side down on a rimmed baking sheet. This position does two critical things: it renders the fat from the skin (which drips into the pan and bastes the meat from underneath), and it prevents the thin underside from drying before the thicker parts cook. Slide the pan into your 400°F oven. Set a timer for exactly 25 minutes. You'll hear some sizzle—that's the sound of success. Don't open the door; you're losing heat and moisture every time you peek. At 25 minutes, the skin should be starting to render, but it won't be brown yet. That's perfect. You're building toward it.

Step 3: Temperature Boost and First Glaze
- Remove the pan from the oven (yes, I know, heat escapes—work quickly). Close that oven door immediately and bump the temperature to 425°F. This higher heat will crisp and caramelize the sauce. Here's where technique matters: using a basting brush, paint the top of each piece with your barbecue sauce. Then carefully flip each piece using a metal spatula, trying to keep that rendering skin intact (it'll stick a bit—that's fine). Paint the other side. Return to the oven for 7 minutes.
Step 4: Second and Third Glaze (7 + 7 Minutes)
- Remove the pan again, close the door, and repeat: baste the top side generously with sauce. Return to the oven for another 7 minutes. You'll notice the edges starting to caramelize and darken—this is exactly what you want. Remove once more, baste again (this is your third and final brushing), and roast for a final 7 minutes. Total time in the oven: 46 minutes.

Step 5: Temperature Check (Critical Step)
- Don't skip this. Insert an instant-read meat thermometer into the thickest part of the thigh without touching bone. You're looking for 165°F minimum for food safety, but dark meat is genuinely best at 180-190°F where the collagen converts to gelatin and everything becomes silky. If you're under temperature, return to the oven for another 5-10 minutes and check again. Every oven runs differently, and thighs vary in size.

Step 6: Optional Broil for Extra Crisp (3-5 Minutes)
- If the exterior looks more glossy than crispy—which happens with some sauce brands—move your oven rack to the upper-middle position and switch to broil. Watch constantly. You want 3-5 minutes of high heat to char the edges and crisp the skin without burning the sauce. The sauce should be bubbling and caramelized, the skin should shatter under your fork, and the meat should pull away from the bone with minimal resistance.

Step 7: Rest (Five Critical Minutes)
- Pull that pan out and let it rest for at least 5 minutes. I know you're hungry. I know it smells incredible. But resting allows the juices to redistribute throughout the meat instead of running all over your plate. This is the difference between adequately juicy and insanely juicy.
Notes
Nutrition
FAQs
Can I make this on a grill instead of in the oven?
Yes, but the technique changes significantly. Preheat your grill to medium heat (about 350-375°F). Skip the initial 400°F oven roast. Instead, oil and season your chicken, place it skin-side down directly on grates, and grill for 15-18 minutes without moving it (this creates those beautiful char marks). Flip, brush with sauce, and grill skin-side up for 10-12 minutes, basting every few minutes. You’re looking for the same 165°F minimum / 180-190°F ideal internal temperature. Grilling is actually faster but requires more active attention.
What if my chicken is still undercooked at 46 minutes?
This happens with thicker thighs or if your oven runs cool. Return the pan to the 425°F oven for 5-10 minute increments, checking temperature each time. Dark meat is incredibly forgiving—it won’t dry out at 190°F. Rather undercooked slightly and having to add 5 minutes than overcooking and drying everything out.
Can I use boneless, skinless chicken thighs?
Technically yes, but you lose half the appeal—the crispy skin. If you go boneless-skinless, watch your temperature carefully (they dry faster), reduce the initial roast to 18 minutes, apply all sauce in one final basting at 8 minutes before finishing, and aim for 165°F (not higher, or they’ll be tough). Honestly, for this recipe, it’s worth hunting down bone-in, skin-on thighs.
Is there a way to make this less saucy if my kids don’t like heavy sauces?
Absolutely. Use half the recommended sauce (1 cup instead of 2 cups) for the same number of chicken pieces. Apply thinner coats during each glaze step. Alternatively, skip the barbecue sauce entirely and use a simple glaze: whisk together 3 tablespoons honey, 2 tablespoons Dijon mustard, 1 tablespoon apple cider vinegar, and 1 teaspoon smoked paprika. This creates a lighter, tangier finish that kids often prefer.
How do I know if my thermometer is accurate?
Get an instant-read thermometer with a calibration feature or test it in ice water (should read 32°F) and boiling water (should read 212°F). If it’s off, calibrate or replace it. Food safety depends on accurate temperature reading, so don’t cheap out here.
More Recipes You’ll Love
- Air Fry Chicken Legs and Thighs Recipe – The faster version of this recipe using an air fryer. Same technique, half the time.
- Spicy Chicken Sandwich – Shred leftover BBQ thighs and pile them on a toasted bun with crispy onions and spicy mayo.
- Bacon Wrapped Brussels Sprouts – The perfect side dish to complement this main protein with additional smoky, crispy flavor.
- Air Fryer Wings – Another bone-in, skin-on chicken cut that delivers maximum flavor with minimal effort.
- This Easy Chicken Dinner – Worth adding to your recipe collection.
- My Weeknight Chicken Recipe – Worth adding to your recipe collection.
Here’s the truth: this recipe changed how I cook chicken at home. Not because it’s complicated—it’s actually simple. But because it proves that bone-in, skin-on thighs are the superior choice for flavor, nutrition, and reliability. You’ll never apologize for choosing them again.
The next time someone asks you to bring the main dish, make a double batch of these. Your reputation as a home chef will skyrocket. Your guests will ask for the recipe. And you’ll realize something magical: restaurant-quality food doesn’t require fancy techniques or hard-to-find ingredients. It requires understanding the basics, respecting your ingredients, and showing up with confidence.
Your flavorful adventure starts here. Now go make these thighs.
With confidence and endless flavor,
Kimberly Booker RD