This post contains affiliate links. As an Amazon Associate I earn from qualifying purchases.
Whether you’re keto, vegan, or living gluten-free, you don’t have to miss out on decadent, chewy-centered bars that taste like you spent hours in a bakery. I created this cashew date bars recipe to work across every dietary preference—no separate recipes, no complicated swaps. Just one base that adapts beautifully. If you’re looking for more make-ahead snacks, check out my this simple cake for another grab-and-go option.
Why I Created This Recipe (And Why You Need It)
Five years ago, I was testing recipes for a corporate client who had three different dietary needs at the same lunch meeting. One was keto, one vegan, and one gluten-free. I spent an entire afternoon making three separate versions of the same bar recipe, and I remember thinking: This is ridiculous. There had to be a better way.
That’s when I started experimenting with ingredient flexibility. Dates are naturally sweet. Cashews are naturally creamy. Salt enhances everything. I realized the base could stay identical—and the modifications would only come in if someone needed them. That afternoon changed how I approach recipe development entirely.
Now, when someone tells me their dietary restriction, I don’t see a limitation. I see an opportunity to make something even more intentional and delicious.
Which Version Is Right for You?
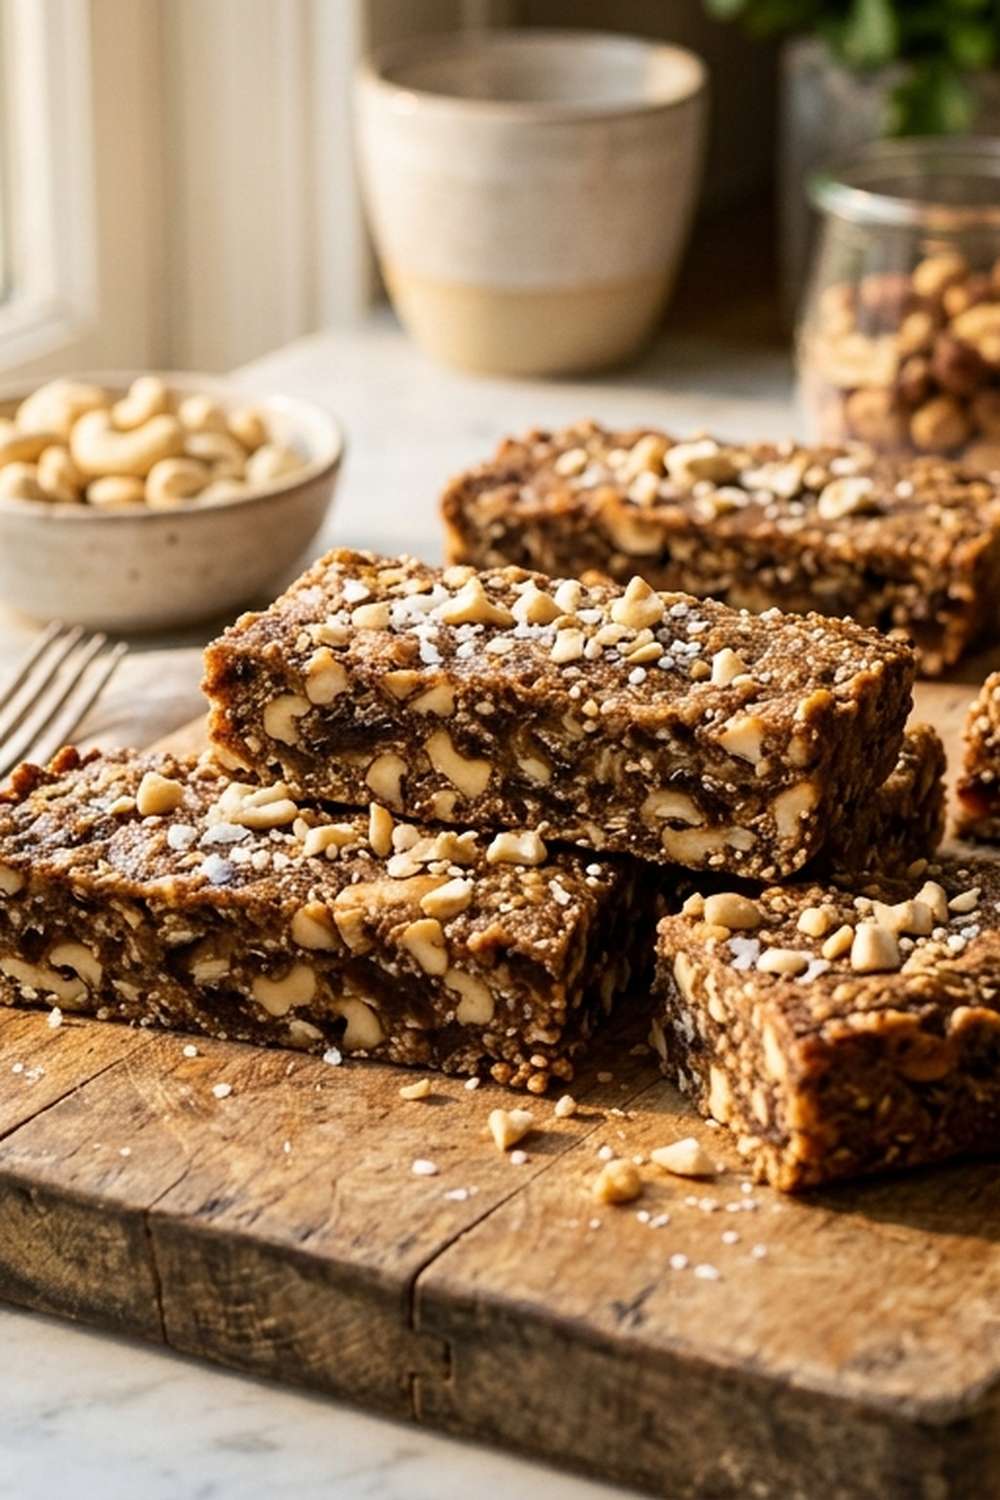
This recipe works as a true base. You’re not making “compromises” for dietary needs—you’re making conscious choices about what goes into your body. Here’s how to pick your path:
- Keto Version – Replaces some dates with monk fruit sweetener and adds MCT oil for sustained energy. Keeps the dense, fudgy texture keto dieters crave. Macros shift to higher fat, lower net carbs. Perfect if you’re tracking and want that satisfying mouthfeel without blood sugar spikes.
- Vegan Version – The base recipe is already vegan. This version emphasizes it by using coconut oil instead of any dairy-adjacent ingredients (though we don’t have any). Adds a subtle tropical note. Best for anyone avoiding animal products who still wants restaurant-quality texture.
- Gluten-Free Version – This base is naturally gluten-free. If you’re celiac or sensitive, you get the same result as everyone else—no cross-contamination risks, no separate prep required. Total peace of mind.
- Dairy-Free Version – Since this recipe contains zero dairy from the start, all versions are inherently dairy-free. No substitutions needed. Ideal for anyone with lactose sensitivity or following plant-based approaches.
The Base Ingredients (Works for All Versions)
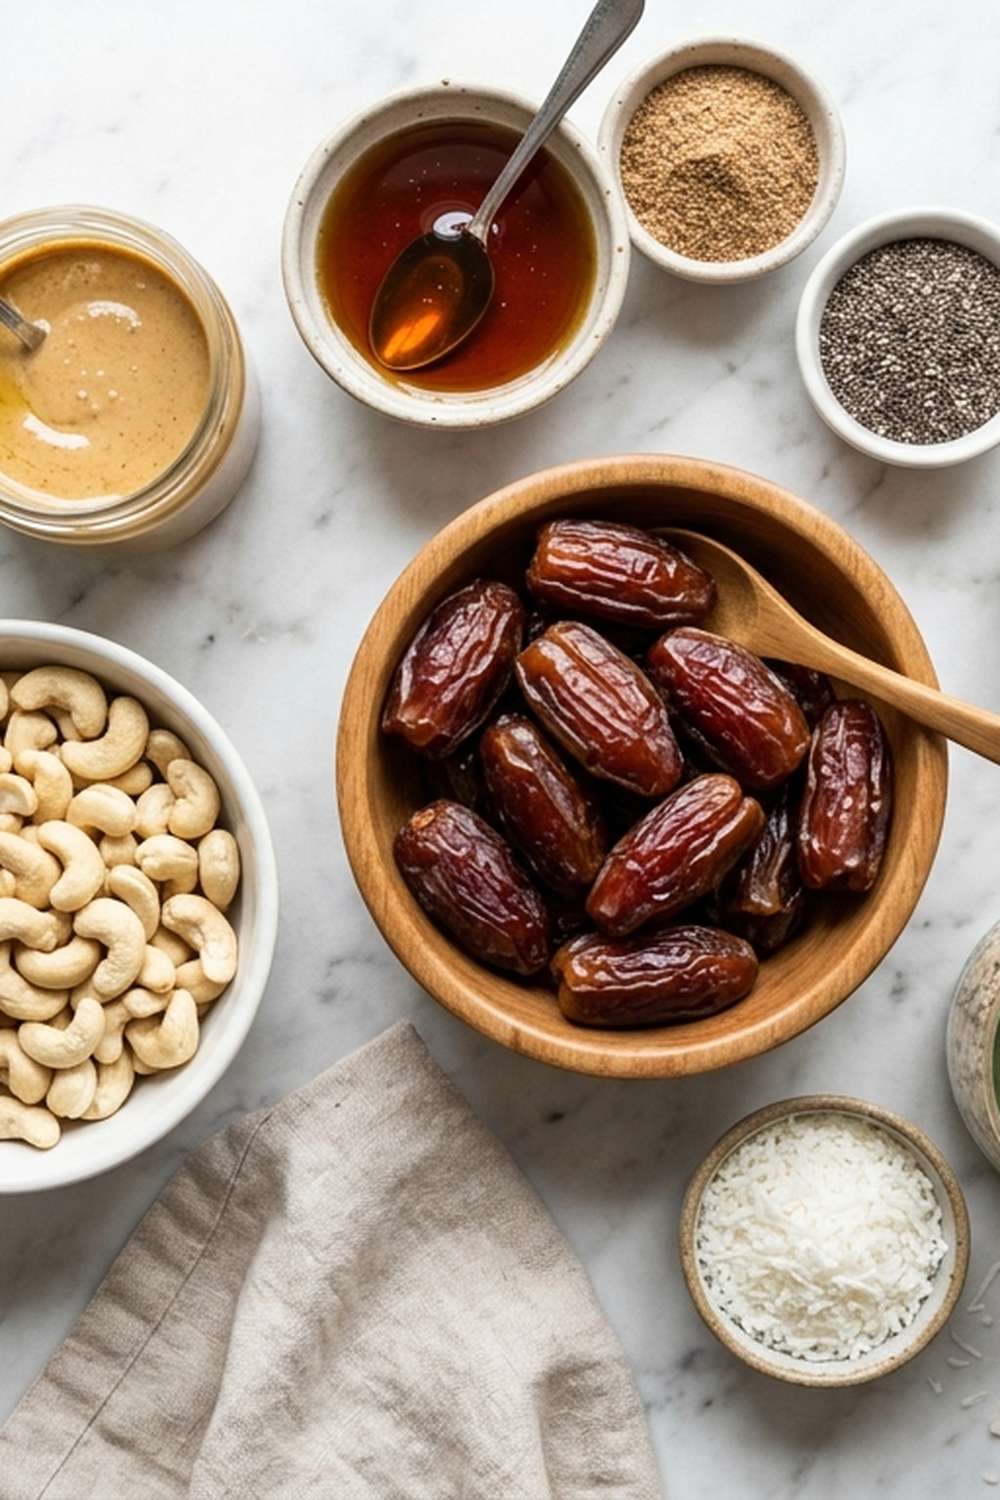
These ingredients stay constant across every dietary version. They’re whole foods—nothing processed, nothing that needs decoding on a label. This recipe yields 10 bars that are perfectly portion-controlled and make enough for a week of grab-and-go breakfasts or afternoon snacks.
- ½ teaspoon pure vanilla extract (deepens flavor complexity)
- 1.5 cups raw cashews, unsalted (divided into 1 cup and ½ cup portions)
- ¼ teaspoon coarse sea salt (cuts through sweetness and amplifies cashew richness)
- 1 tablespoon coconut oil, virgin (adds slight moisture and tropical undertone—optional but recommended)
- 30 pitted Medjool dates (soft, naturally sweet, and packed with fiber—the backbone of this bar)
Dietary Substitution Chart
Here’s exactly what to swap if you’re following a specific plan. These changes are optional—the base recipe works perfectly for everyone, but these tweaks optimize nutrition and macros for your goals.
- Coconut oil (moisture) -> Keto: Use MCT oil for faster ketone production | Vegan: Use coconut oil | Gluten-Free: No change | Dairy-Free: No change
- Dates (sweetness component) -> Keto: Replace 15 dates with 3 tablespoons monk fruit sweetener, keep 15 whole dates | Vegan: No change | Gluten-Free: No change | Dairy-Free: No change
- Cashews (fat and protein) -> Keto: Increase to 2 cups total (½ cup more adds fat for satiety) | Vegan: No change | Gluten-Free: No change | Dairy-Free: No change
Expert’s Nutritional Tip
Here’s what I tell clients: Medjool dates aren’t just sweetness—they’re nutrition hiding in plain sight. One Medjool date contains roughly 1.6 grams of fiber and specific polyphenols that support gut health and reduce inflammation. When you process them into a bar, you’re not “eating cake.” You’re eating whole fruit that happens to taste indulgent. That’s the entire philosophy behind this recipe. The fiber content also means slower glucose response compared to refined sugar, which matters whether you’re keto or not.
How to Make Cashew Date Bars Recipe Your Way
Follow these steps exactly, and pause at the notes marked for your dietary preference. The process is identical for everyone—only ingredient swaps change between versions. I recommend using a high-powered food processor for this recipe. A blender won’t cut dates finely enough, and a hand mixer will take forever.
Step 1: Prep Your Pan and Gather Your Tools
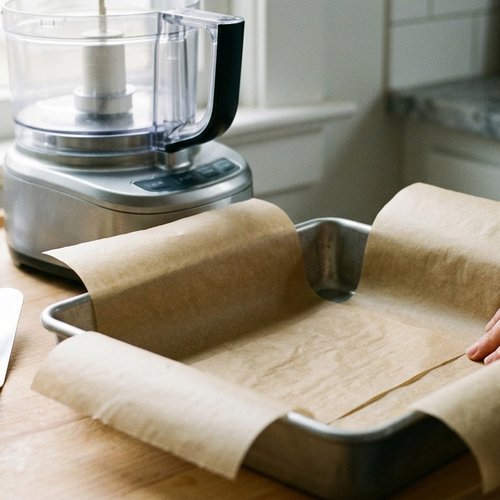
Line an 8×8-inch baking pan (or similar square pan) with parchment paper, letting it hang slightly over two opposite sides. This creates handles that make removal effortless. Tap the paper down gently so it stays put. Have your food processor cleaned and ready—you’ll use it immediately. If you’re making the keto version, measure out your monk fruit sweetener now so it’s ready to blend with the cashews.
Step 2: Grind Your First Batch of Cashews
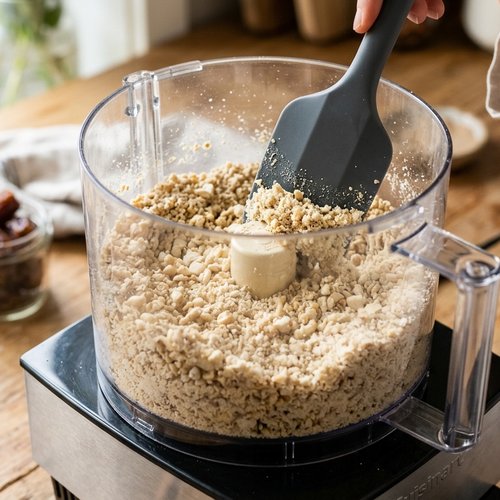
Pour 1 cup of raw cashews into your food processor and pulse on high speed for 1 to 2 minutes. You’re looking for a coarse crumb texture—think wet sand, not flour. For the keto version, add ½ teaspoon monk fruit sweetener here to help break down the cashews faster. Stop and scrape down the sides with a silicone spatula once or twice. Don’t over-process; you want some texture remaining, not a smooth butter.
Step 3: Add Your Dates and Create the Base Dough
Add all 30 pitted dates to the crumbled cashews (or your keto-adjusted amount) and blend on high speed for 3 to 4 minutes. You’ll see the dates start to break down around the 90-second mark. Keep going. The natural moisture from the dates will eventually hydrate everything into a cohesive dough. Stop and scrape the sides 2 to 3 times during this process. For the keto version, add your remaining monk fruit sweetener now if you didn’t add it earlier. The dough will smell incredible—warm, caramelly, with cashew depth.
Step 4: Add Your Final Texture Layer and Seasoning
Add the remaining ½ cup of raw cashews plus your coarse sea salt to the processor. Pulse on high speed for just 30 to 45 seconds—you’re not blending these in completely. You want distinct cashew pieces throughout the final bar. This creates textural contrast with the soft, date-based interior. Stop immediately when you see small, recognizable cashew chunks. For the keto version with MCT oil, add 1 tablespoon now and pulse 2 to 3 times. The mixture should feel like cookie dough and smell like a high-end bakery.
Step 5: Transfer and Press Into Your Pan
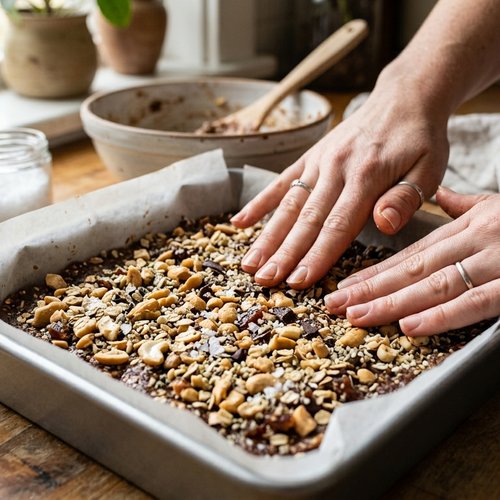
Scrape all the dough out of the food processor using a sturdy silicone spatula. Form it into a large ball (it’s fun, I promise) and place it in the center of your prepared pan. Using your hands or the back of a spatula, press the ball down firmly and evenly across the entire bottom of the pan. Work from the center outward. You want even pressure so the bars have consistent texture throughout—about ¾ inch thick. Smooth out any cracks or gaps.
Step 6: Chill to Set the Structure
Place the entire pan in the freezer (not the refrigerator) for 20 to 30 minutes. The cold solidifies the natural oils in the cashews and firms the date structure. You’re not freezing it solid—you’re setting the shape. For the keto version, this step becomes even more critical because MCT oil sets faster in cold temperatures. You’ll know it’s ready when the top feels firm to a gentle finger press.
Step 7: Remove and Cut Into Perfect Bars
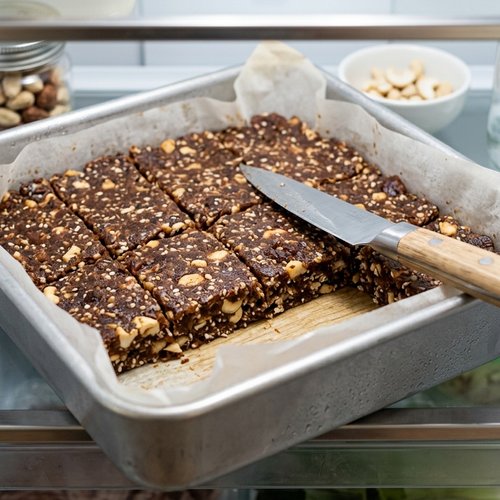
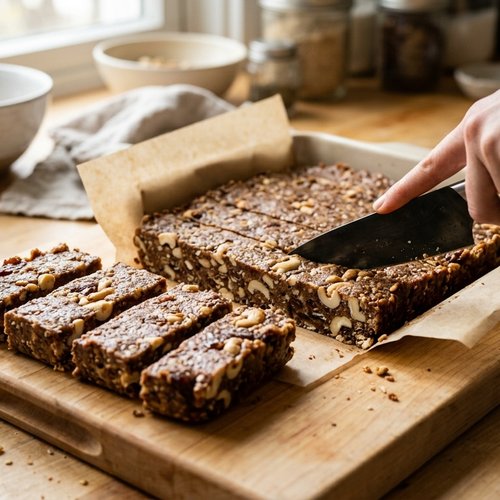
Remove the pan from the freezer and let it sit at room temperature for 2 minutes—this prevents the bars from cracking when you cut them. Grab both ends of the parchment paper and lift the entire cashew block out onto a clean cutting board. Using a sharp knife (a 10-inch chef’s knife is ideal), cut straight down with firm, deliberate strokes. Wipe the blade between each cut for clean edges. Aim for 10 bars, which gives you a perfect serving size of roughly 1.5 ounces each.
Step 8: Store Strategically Based on Your Version
Transfer all bars into an airtight container and return to the freezer immediately. All versions store identically. Label the container with the date so you know when you made them. They’ll keep for 4 to 6 weeks frozen. If you prefer to eat them at room temperature, remove one bar 5 minutes before eating—the texture becomes chewy and softer, which is personal preference.
Common Mistakes to Avoid
After making these bars hundreds of times in my kitchen and teaching others to make them, I’ve seen the same three mistakes repeatedly. Here’s how to sidestep them:
- Over-processing the final cashew addition. Too many people blend those final cashews until they disappear into the dough. Stop at “I can still see pieces.” Those visible pieces are what make the texture special. You’re going for a chunky bar, not a smooth paste.
- Using old or rancid cashews. Cashews oxidize faster than most nuts. If you buy in bulk, store them in an airtight container in the freezer. Rancid cashews taste like wet cardboard and ruin the entire batch. Smell yours before processing—they should smell like roasted nuts, not musty.
- Skipping the freezer chill. Impatient bakers often refrigerate instead of freezing, or skip it entirely. These bars need genuine cold to hold their shape during cutting. A refrigerator (40°F) won’t do it. Freezing (0°F or below) is non-negotiable.
Nutrition Comparison Across Versions
Here’s the real nutrition data for each version, based on USDA reference data for whole dates, raw cashews, and supporting ingredients. These numbers assume you’re eating one bar (one-tenth of the recipe). Numbers are approximate because natural foods vary slightly by source.
- Standard Version (30 whole dates, 1.5 cups cashews) – Per bar: 198 calories | 12g fat | 24g carbs | 2g fiber | 4g protein. Best for: General health, balanced macros, anyone without specific dietary tracking.
- Keto Version (15 whole dates + monk fruit, 2 cups cashews) – Per bar: 224 calories | 16g fat | 12g net carbs (18g total carbs – 6g fiber) | 5g protein. Best for: Ketogenic diets (stays under 20g net carbs per serving), sustained energy without glucose spikes.
- Vegan Version (identical to standard) – Per bar: 198 calories | 12g fat | 24g carbs | 2g fiber | 4g protein. Best for: Plant-based dieters who want confirmation that zero animal products are used.
- Gluten-Free Version (identical to standard) – Per bar: 198 calories | 12g fat | 24g carbs | 2g fiber | 4g protein. Best for: Celiac disease or gluten sensitivity, with zero cross-contamination risk.
How Each Version Tastes Different
The base is consistently delicious across all versions, but subtle shifts happen with modifications. Let me be honest about what you’re getting:
Standard Version: Exactly what you’d expect from dates and cashews. Chewy interior, chunky texture from cashew pieces, almost candy-like sweetness balanced by salt and nuttiness. It tastes expensive and indulgent. If you served this blindfolded, someone would guess “professional bakery,” not “homemade.” The vanilla adds a sophisticated undertone that keeps it from feeling one-dimensional.
Keto Version: Slightly less “sweet” on first bite because monk fruit has a different sweetness profile than dates (it hits faster, then fades). Some people love this—it feels more sophisticated. Others miss the date depth. The added MCT oil creates an almost silky mouthfeel. If you’re doing keto, you know that silky texture is rare and valuable. The flavor is still cashew-forward and satisfying.
Vegan and Gluten-Free Versions: Identical to the standard, because the base recipe contains no animal products and no gluten. These versions feel like a win if you’ve spent years eating “dietary substitutes” that taste like cardboard. These taste like a real bar. Period.
Seasonal Variations to Try
Once you master the base, try these seasonal adaptations. They’re small tweaks that keep the recipe exciting year-round:
- Fall (September-November): Add ¼ teaspoon pumpkin pie spice and ⅛ teaspoon ginger to Step 2. Reduces the vanilla to ¼ teaspoon. Creates warm, autumn spice notes without tasting gimmicky. Perfect alongside coffee.
- Winter (December-February): Add ¼ teaspoon cardamom and 1 tablespoon cacao nibs (pulse with the final cashews). Creates a sophisticated dark-spice profile. Feels festive without being obvious.
- Spring (March-May): Add 1 tablespoon freeze-dried strawberry powder (pulse with final cashews) and increase vanilla to ¾ teaspoon. Creates a subtle berry undertone that surprises people. Ask what it is—they’ll struggle to name it.
- Summer (June-August): Add zest of 1 lemon and ½ teaspoon vanilla (don’t add extra—lemon is the star). Creates bright, citrus-forward bars that feel refreshing in heat. Pair with cold milk or iced coffee.
Can I Store Cashew Date Bars Recipe?
Yes. This recipe was literally designed for meal prep. Here’s the breakdown:
Freezer (Best option): Store in an airtight container or freezer-safe ziplock bag for 4 to 6 weeks. Bars won’t develop freezer burn at this length because the moisture content is low and fat content is high. Grab one bar straight from the freezer and let it thaw at room temperature for 5 minutes before eating. The texture becomes chewy and soft—delicious.
Refrigerator: In an airtight container, bars last 2 to 3 weeks. They stay firm in the cold. Remove 5 minutes before eating if you want them softer. The flavor actually deepens slightly after 3 to 4 days as everything melds together.
Room Temperature (not recommended): Bars can sit on the counter for 2 to 3 days maximum before cashew oils begin oxidizing. Avoid this if possible. Always return to cold storage.
For traveling: Wrap individual bars in parchment paper, then place in an airtight container. They travel beautifully—zero mess, totally portable. I make these in batches specifically for trips because TSA approves them, they don’t require refrigeration for 24 hours, and they’re denser and more satisfying than typical airplane snacks.
What to Serve With Cashew Date Bars Recipe?
These bars are satisfying standalone, but they shine paired with complementary foods. Here are my favorite combinations:
- Cold milk (dairy or non-dairy): Works with all versions. The creaminess of milk balances the chewy density of the bars. Keto folks use unsweetened almond or macadamia milk. Vegan folks use oat or soy milk. The cool liquid plus the bar becomes almost dessert-like.
- Strong coffee or espresso: A no-brainer pairing. The slight bitterness of coffee cuts the sweetness of the dates beautifully. Serve one bar with a shot of espresso for a professional-level breakfast. This is what I actually eat most mornings—five-minute meal with staying power.
- Greek yogurt (dairy or dairy-free): If you’re not vegan, full-fat Greek yogurt is incredible alongside a bar. Tear the bar into chunks and fold into yogurt. Creates a parfait situation. For vegan friends, use coconut or cashew yogurt. My Almond Baked Oats Recipe uses a similar texture approach—these two recipes work beautifully as a breakfast combo.
- Fresh fruit (apples, pears, berries): The acidity and natural juices of fruit refresh your palate between bites of dense bar. Particularly good: apple slices with peanut butter on the side. You’re mixing textures and creating an entire snack plate.
- Herbal tea (any blend): Not all pairings are about food. A bar plus a mug of chamomile or peppermint tea becomes an afternoon ritual. The tea soothes while the bar sustains.
Make-Ahead Guide for Meal Prep
I batch-make these every two weeks for client meal prep. Here’s my professional system:
Sunday Prep (60 minutes total): Make three batches back-to-back. Line three pans with parchment. Run the food processor three times (one full batch per run). While one batch freezes, start the next. By the time you finish, the first is set. Transfer all to labeled containers immediately. Three batches = 30 bars = one bar per day for a month, plus extras for sharing.
Prep Storage: Store prepared bars in vacuum-sealed bags in the freezer. Label with date made and version (Standard, Keto, etc.). Stack flat to save freezer space. One gallon-size bag holds roughly 10 bars stacked.
Grab-and-Go Strategy: Monday morning, remove bars for the week (about 5-7) and place in the refrigerator. They’ll thaw slightly, becoming softer and chewy by Wednesday. Still delicious. By Friday, move unused bars back to freezer. This rotation keeps bars at optimal texture throughout the week without any planning.
Cashew Date Bars Recipe

Ingredients
- ½ teaspoon pure vanilla extract deepens flavor complexity
- 1.5 cup raw cashews, unsalted divided into 1 cup and ½ cup portions
- ¼ teaspoon coarse sea salt cuts through sweetness and amplifies cashew richness
- 1 tablespoon coconut oil, virgin (adds slight moisture and tropical undertone
- 30 pitted Medjool dates (soft, naturally sweet, and packed with fiber
Instructions
Step 1: Prep Your Pan and Gather Your Tools
- Line an 8x8-inch baking pan (or similar square pan) with parchment paper, letting it hang slightly over two opposite sides. This creates handles that make removal effortless. Tap the paper down gently so it stays put. Have your food processor cleaned and ready—you'll use it immediately. If you're making the keto version, measure out your monk fruit sweetener now so it's ready to blend with the cashews.
Step 2: Grind Your First Batch of Cashews
- Pour 1 cup of raw cashews into your food processor and pulse on high speed for 1 to 2 minutes. You're looking for a coarse crumb texture—think wet sand, not flour. For the keto version, add ½ teaspoon monk fruit sweetener here to help break down the cashews faster. Stop and scrape down the sides with a silicone spatula once or twice. Don't over-process; you want some texture remaining, not a smooth butter.
Step 3: Add Your Dates and Create the Base Dough
- Add all 30 pitted dates to the crumbled cashews (or your keto-adjusted amount) and blend on high speed for 3 to 4 minutes. You'll see the dates start to break down around the 90-second mark. Keep going. The natural moisture from the dates will eventually hydrate everything into a cohesive dough. Stop and scrape the sides 2 to 3 times during this process. For the keto version, add your remaining monk fruit sweetener now if you didn't add it earlier. The dough will smell incredible—warm, caramelly, with cashew depth.
Step 4: Add Your Final Texture Layer and Seasoning
- Add the remaining ½ cup of raw cashews plus your coarse sea salt to the processor. Pulse on high speed for just 30 to 45 seconds—you're not blending these in completely. You want distinct cashew pieces throughout the final bar. This creates textural contrast with the soft, date-based interior. Stop immediately when you see small, recognizable cashew chunks. For the keto version with MCT oil, add 1 tablespoon now and pulse 2 to 3 times. The mixture should feel like cookie dough and smell like a high-end bakery.
Step 5: Transfer and Press Into Your Pan
- Scrape all the dough out of the food processor using a sturdy silicone spatula. Form it into a large ball (it's fun, I promise) and place it in the center of your prepared pan. Using your hands or the back of a spatula, press the ball down firmly and evenly across the entire bottom of the pan. Work from the center outward. You want even pressure so the bars have consistent texture throughout—about ¾ inch thick. Smooth out any cracks or gaps.
Step 6: Chill to Set the Structure
- Place the entire pan in the freezer (not the refrigerator) for 20 to 30 minutes. The cold solidifies the natural oils in the cashews and firms the date structure. You're not freezing it solid—you're setting the shape. For the keto version, this step becomes even more critical because MCT oil sets faster in cold temperatures. You'll know it's ready when the top feels firm to a gentle finger press.
Step 7: Remove and Cut Into Perfect Bars
- Remove the pan from the freezer and let it sit at room temperature for 2 minutes—this prevents the bars from cracking when you cut them. Grab both ends of the parchment paper and lift the entire cashew block out onto a clean cutting board. Using a sharp knife (a 10-inch chef's knife is ideal), cut straight down with firm, deliberate strokes. Wipe the blade between each cut for clean edges. Aim for 10 bars, which gives you a perfect serving size of roughly 1.5 ounces each.
Step 8: Store Strategically Based on Your Version
- Transfer all bars into an airtight container and return to the freezer immediately. All versions store identically. Label the container with the date so you know when you made them. They'll keep for 4 to 6 weeks frozen. If you prefer to eat them at room temperature, remove one bar 5 minutes before eating—the texture becomes chewy and softer, which is personal preference.
Notes
Nutrition
FAQs
Can I make this recipe without a food processor?
Technically yes, but it’s brutal. You could use a high-powered blender in batches, but blenders are designed for liquids—they’ll struggle with dates. You could try mashing by hand with a fork, but Medjool dates are dense and this will take 20+ minutes of arm strength. A food processor is really the right tool here. If you don’t own one, I’d say it’s worth the investment just for this recipe. A mid-range Cuisinart runs roughly $80 and will last a decade. Cost-per-use ends up being pennies.
I’m on a low-FODMAP diet for IBS. Does this work for me?
Not in the standard version. Dates are high in oligosaccharides (a type of fermentable carb that triggers IBS symptoms for many people), and cashews are moderately high in FODMAPs. However, I have a solution: Use the keto version I outlined, but use a low-FODMAP sweetener like stevia or erythritol instead of monk fruit. Pair with macadamia nuts instead of cashews (lower FODMAP). Use 1.5 cups macadamia nuts total. The result is slightly different (macadamia creates a buttery bar rather than creamy), but it works for low-FODMAP needs. Test this with your registered dietitian before making it regularly, because everyone’s FODMAP tolerance is different.
The bars feel too soft or mushy after freezing. What went wrong?
Two possibilities: Either you didn’t chill long enough in Step 6 (you needed a full 30 minutes), or your cashews contained higher moisture than expected. Check if you stored them properly before using (they should have been in an airtight container, ideally in a cool place). If bars are too soft, pop them back in the freezer for an additional 20 minutes before eating. Going forward, increase your freezer time to 35 minutes, not 30.
Can I make these nut-free for someone with allergies?
The cashews are core to both flavor and texture, but if someone has a tree nut allergy, try sunflower seed butter instead. Use 1 cup raw sunflower seeds ground into a meal, plus ½ cup raw sunflower seeds pulsed in at the end. The result is slightly less creamy and more seed-forward in flavor (you’ll taste the earthiness more). It’s not identical, but it’s legitimately delicious and completely nut-free. This version is great for school snacks because it’s allergen-friendly.
My bars separated or have an oily residue on top. Why?
The cashew oil is separating from the date fiber—this is totally normal and actually a sign your cashews are legitimately raw (not roasted, which would have less free oil). To prevent this: Ensure you’re pulsing the final cashews correctly (not over-processing) and that you’re really pressing the dough firmly into the pan in Step 5. The pressure helps bind everything together. Going forward, add 1 tablespoon of coconut oil to the initial cashew-date blend to stabilize the mixture. It doesn’t change the flavor meaningfully but prevents separation.
More Diet-Friendly Recipes You’ll Love
- this weekend breakfast – Crispy outside, custardy inside, and surprisingly light. Keto and dairy-free adaptable.
- Air Fry Banana And Peanut Butter Recipe – Quick, protein-packed, and satisfies sweet cravings in three minutes flat.
- this simple cake – For when you want something more elaborate. Low-carb, high-fat, and tastes like fall in every bite.
The Bottom Line: Your Dietary Needs Deserve Delicious Food
Dietary restrictions don’t mean food restrictions. This cashew date bars recipe proves that. Whether you’re keto, vegan, gluten-free, or just someone who wants a five-ingredient bar that tastes like you spent hours developing it, you’ve got a solution right here. The same base formula works for everyone because whole foods are inherently flexible. No secret hacks, no “diet-friendly” ingredients that taste like chemicals, just dates, cashews, salt, and a little patience.
Make these once and you’ll understand why I’ve been making them for five years. Make them twice and you’ll have it memorized. Make them three times and you’ll start experimenting with seasonal variations. That’s when the real fun starts.
Celebrate your flavorful adventure!