This post contains affiliate links. As an Amazon Associate I earn from qualifying purchases.
Learning to make this Cashew Crunch Salad Recipe isn’t just about this dish—it’s about mastering a technique that unlocks dozens of other recipes. I’m talking about the art of creating a stable emulsified dressing that’s creamy, balanced, and restaurant-quality without any weird ingredients. Once you understand how fat, acid, and emulsifiers work together, you’ll never buy bottled dressing again. This technique applies to everything from vinaigrettes to creamy pasta sauces. I’ll teach you exactly how cashew butter becomes the MVP that holds everything together, and how whisking patience becomes your secret weapon. Plus, the spiced cashew topping teaches you texture contrast—something most home cooks miss entirely. By the end of this masterclass, you’ll have two fundamental skills that transform your cooking.
Master the Technique Behind Cashew Crunch Salad Recipe (And Never Struggle With Dressings Again)
I’ll never forget the moment this clicked for me. I was in culinary school, standing at the pass in a New York test kitchen, and my instructor stopped me mid-whisk. “You’re stopping too early,” she said, watching my supposedly finished vinaigrette separate into a sad puddle of oil on top of vinegar. I’d been making dressings for years, but I’d never actually understood them. That day, she made me whisk a cashew butter-based dressing for three full minutes while explaining emulsion science. My wrist hurt. My arm was tired. But when I tasted it? Silky, stable, nothing separated. I’ve been obsessed with emulsified dressings ever since—especially ones that don’t require eggs or fancy equipment. This salad recipe is my love letter to that breakthrough moment.
The Core Technique Explained
The heart of this recipe is emulsification—the culinary magic that combines ingredients that normally refuse to mix. Think oil and vinegar: oil is hydrophobic (water-hating), and vinegar is hydrophilic (water-loving). They want nothing to do with each other. But when you introduce a third ingredient—an emulsifier—you create a stable suspension where both can coexist peacefully.
Cashew butter is your emulsifier here. It contains natural fats and proteins that act as a bridge between the oil-based and acid-based components of your dressing. When you whisk continuously, you’re breaking down fat molecules into tinier and tinier particles, coating each one with the emulsifier. This creates a stable structure that doesn’t separate. The science is beautiful: you’re essentially creating a microscopic foam where tiny fat droplets are suspended in a water-based medium.
This isn’t just culinary theater. Understanding emulsification means you’ll recognize when a dressing works and when it doesn’t. You’ll know why your mayo breaks sometimes and how to fix it. You’ll understand why some vinaigrettes are creamy and others are thin. It’s the difference between cooking and understanding your food.
What This Technique Unlocks
Once you master stable emulsification, these dishes become part of your regular rotation:
- Tahini-based dressings – sesame butter creates even richer emulsions than cashew
- Almond butter dressings – nuttier variation with the same emulsification principle
- Creamy pesto variations – nut butters replace some of the traditional oil
- Yogurt-based creamy dressings – different emulsifier, same fundamental technique
- Broth-based sauces with fat – the foundation of French cooking depends on this principle
- Warm vinaigrettes – using emulsification with heated ingredients opens entire categories
The Ingredients—Chosen to Teach the Technique
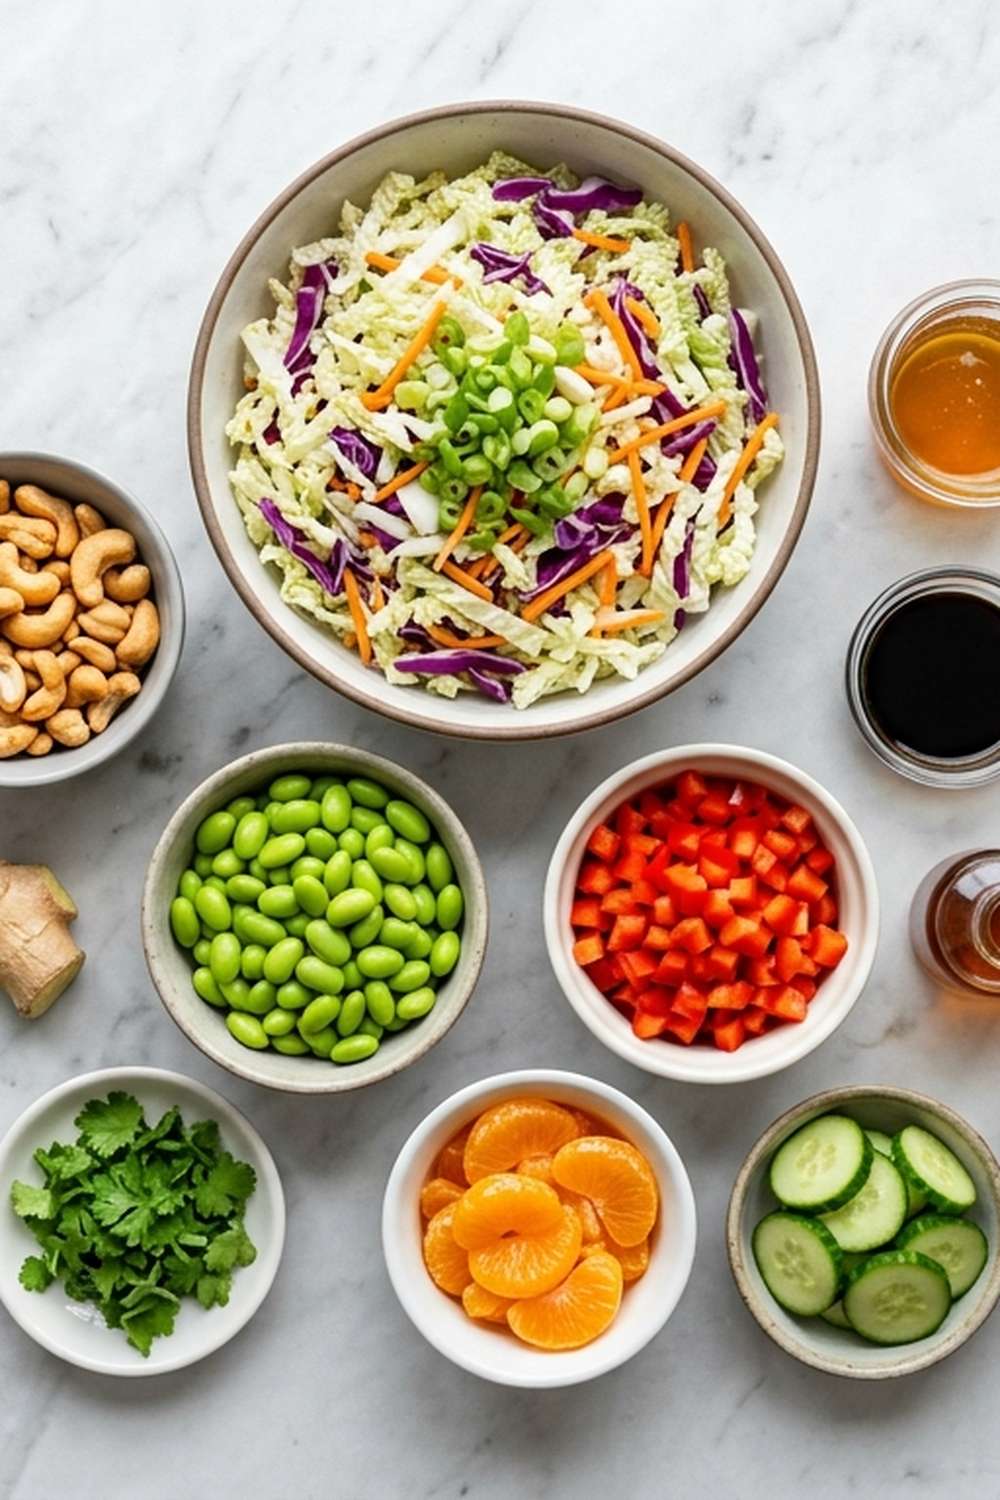
Every single ingredient in this recipe serves a teaching purpose. I’ve deliberately chosen components that work together to demonstrate proper technique while creating stunning flavor. Nothing’s arbitrary here. The vegetables bring hydration and volume. The grains provide substance. The nuts offer texture and richness. But the dressing? That’s where the magic lives, and I’ve selected each component to show you exactly how emulsification works.
For the Spiced Cashews
- 2 teaspoons raw honey (helps caramelize and bind the seasoning)
- 1.5 cups raw cashews (unsalted and whole, not broken pieces)
- 1 tablespoon spicy crispy chili oil (the one made by Momofuku is exceptional, but any quality brand works)
- ½ teaspoon coarse sea salt (finishes the toasted nuts beautifully)
For the Creamy Emulsified Dressing
- ¼ teaspoon fish sauce (umami booster—just a whisper, trust me)
- 1.5 teaspoons fresh ginger root, finely grated (brightens with aromatic heat)
- 2 tablespoons filtered water (adjusts consistency and helps emulsification)
- 2.5 tablespoons unseasoned rice vinegar (mild acid that won’t overpower the nuts)
- 2 teaspoons low-sodium soy sauce (deepens savory notes without overwhelming)
- ⅓ cup creamy natural cashew butter (no added oils or stabilizers—this is your emulsifier)
- 1 teaspoon garlic chili sauce (adds depth and mild spice)
- 1.5 tablespoons fresh lime juice (brightens the entire dressing with natural acid)
For the Salad Base
- 2 cups carrots, cut into matchstick pieces (raw adds sweet crunch)
- ½ teaspoon fine sea salt (season to taste before serving)
- 2 cups cucumbers, sliced into half-moons (hydrating, refreshing contrast)
- 2 cups cooked white quinoa (fluffy, nutty grain that holds dressing beautifully)
- ¼ cup fresh mint leaves, chopped (cooling and refreshing)
- 2 cups fresh sugar snap peas, sliced (tender-crisp adds sophisticated texture)
- ½ cup fresh cilantro leaves, chopped (herbaceous and bright)
- ½ cup red onion, thinly sliced (peppery notes that brighten everything)
- 2 cups shelled edamame (cooked, adds protein and verdant color)
- 2 tablespoons neutral cooking oil (optional, adds richness if you want extra body)
- 3 green onions, chopped (onion notes without the bite of raw red onion)
Makes 4 substantial servings as a main course, or 6 side portions.
The Masterclass: How to Make Cashew Crunch Salad Recipe
This isn’t just a recipe to follow—it’s a teaching opportunity. Each step builds on the previous one, reinforcing why proper technique matters. I’m going to walk you through this exactly as I’d teach it in a professional kitchen, explaining the reasoning behind every action. Pay attention to the sensory cues. They’re how you’ll know you’re doing it right.
Step 1: Toast and Temper Your Cashews for Maximum Flavor
Place a large skillet over medium heat—not high. This is crucial. Grab those 1.5 cups of raw cashews and add them to the dry pan. Here’s where patience teaches you something: stir them constantly for about 2 minutes. You’re not just heating them; you’re releasing their natural oils and developing deeper nutty flavors through dry-roasting. Listen for the sound to change—it gets quieter as moisture escapes. Smell matters too. When you catch that toasted, almost-popcorn-like aroma, you know they’re activating.
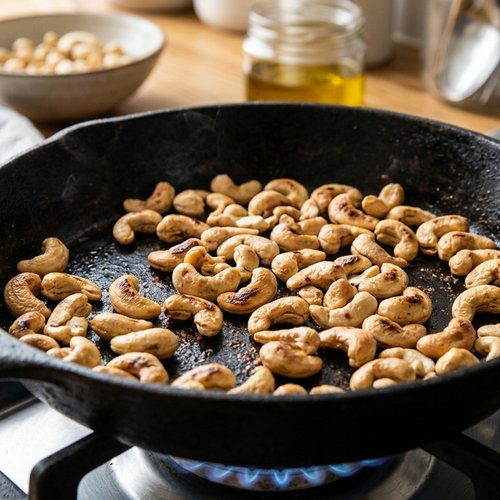
Now add that tablespoon of spicy crispy chili oil and 2 teaspoons of honey. The oil carries heat and flavor; the honey acts as a binder and helps everything caramelize together. Toss constantly for exactly 2 more minutes. You should see the cashews go from pale to golden-tan. Don’t rush this step. Burnt cashews taste bitter and ruin everything downstream. You’re looking for even browning, not dark spots.
Transfer immediately to a clean plate and sprinkle with that ½ teaspoon of coarse salt while still hot. The salt sticks better to warm food. Now here’s the technique secret: refrigerate or freeze them for at least 10 minutes. This stops the cooking process and firms them up, so they stay crunchy instead of getting chewy. This tempering step is why your texture will be superior to most salads.
Step 2: Build Your Emulsified Dressing Through Proper Whisking
Grab a medium mixing bowl and add your ⅓ cup of creamy natural cashew butter. This is your foundation. Pour in your 2.5 tablespoons of rice vinegar first—the acid comes before the water. Now here’s where most people fail: start whisking immediately and whisking hard. The goal is to break down those fat molecules in the cashew butter, creating an even suspension.
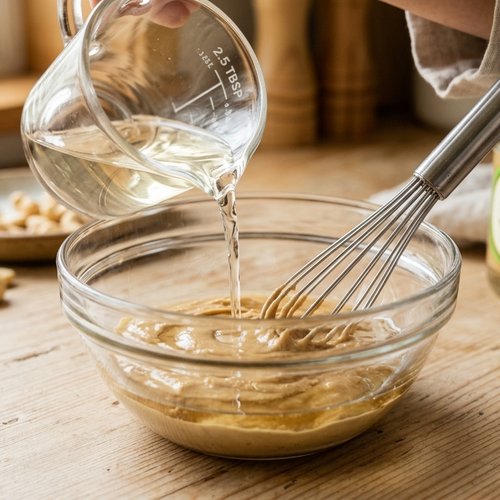
After about 30 seconds of vigorous whisking, you’ll see the mixture look broken and weird—separated and chunky. This is normal. This is actually the moment where emulsification is happening at the molecular level. Keep whisking. Add your 1.5 tablespoons of fresh lime juice and continue. After another 30 seconds, add the 2 tablespoons of water slowly while whisking. You’ll watch something magical happen: the dressing will transform from separated chaos into a silky, creamy suspension. This is emulsification in action. You’re creating a stable structure where all components coexist peacefully.
Now whisk in your 2 teaspoons of soy sauce, ¼ teaspoon of fish sauce (don’t skip this—it adds depth without fishiness), 1 teaspoon of garlic chili sauce, and 1.5 teaspoons of freshly grated ginger. Whisk everything for a full 2 minutes. Your arm will feel it. That’s the point. You’re ensuring complete emulsification. The dressing should be smooth, creamy, and slightly thicker than heavy cream. If it’s still too thick, add water one teaspoon at a time until you reach pourable consistency. Remember: cashew butter varies by brand. Some are oilier than others, so adjust accordingly.
Step 3: Cook Your Grains and Prepare Your Vegetables
If you haven’t already cooked your 2 cups of white quinoa, do that now according to package directions. Quinoa takes about 15 minutes. While that’s happening, prepare your vegetables. This is mise en place—having everything ready before assembly.
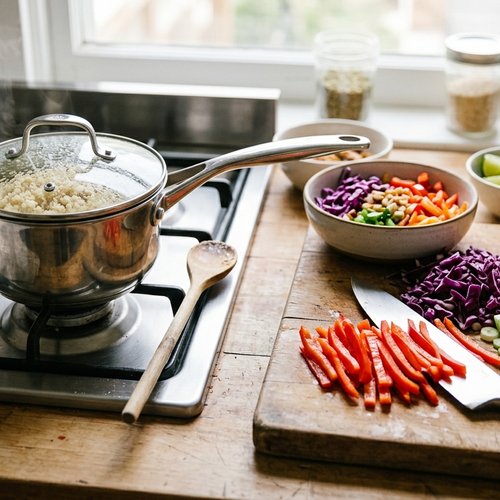
Cut your 2 cups of carrots into matchstick pieces (a mandoline makes this faster, but a sharp knife works too). Slice your 2 cups of cucumbers into half-moons rather than rounds—it’s a subtle technique that increases surface area for dressing absorption. Slice your 2 cups of sugar snap peas on the bias (at an angle). These bias cuts are technique details that matter: they look more refined and catch dressing better. Thinly slice your ½ cup of red onion and mince your cilantro, mint, and green onions. Having everything prepped means your assembly is fast and your vegetables don’t have time to wilt.
Step 4: Combine Your Base Components
In a large mixing bowl, combine your 2 cups of cooked quinoa, 2 cups of shelled edamame, all your prepared vegetables (carrots, cucumbers, snap peas, red onion), and most of your fresh herbs (reserve a little cilantro for garnish). Toss everything together gently but thoroughly. This is where you get comfortable with your ingredients—understanding their textures and how they interact.
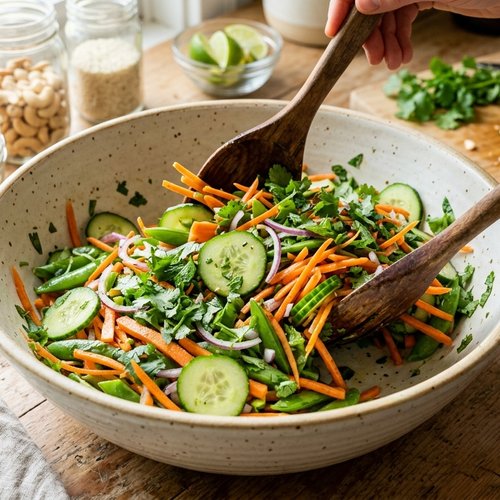
Sprinkle your ½ teaspoon of fine sea salt over everything and toss again. Taste a piece of cucumber or edamame. The vegetables should taste seasoned on their own, not bland. This is foundational technique: season in layers, not all at the end. This builds flavor depth.
Step 5: Dress and Finish Your Salad Masterpiece
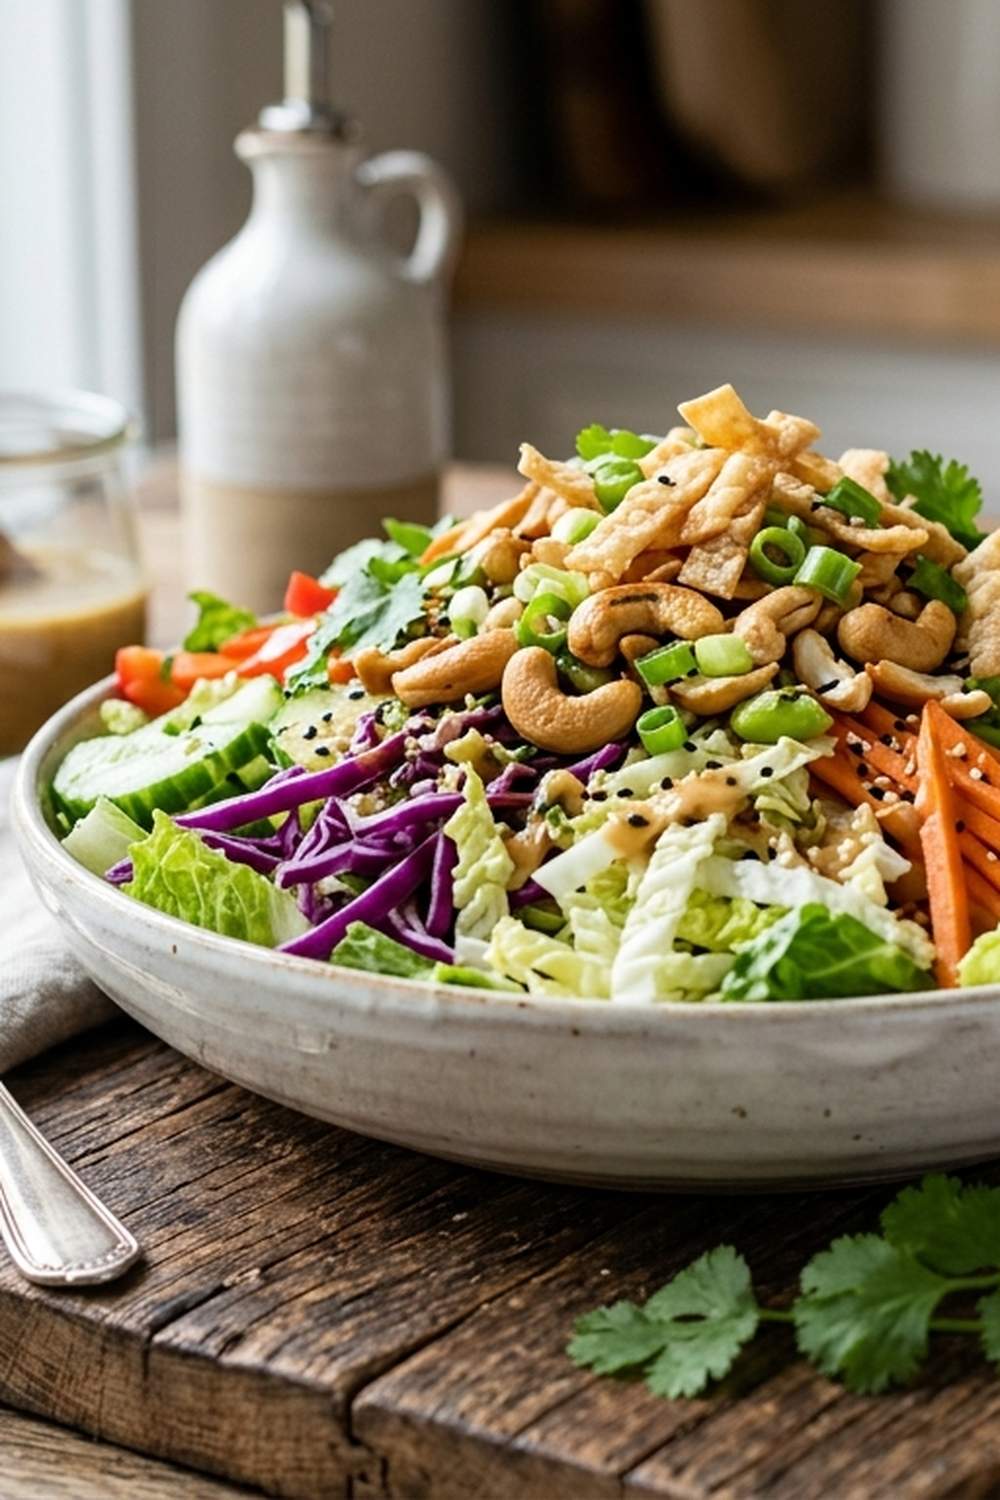
Pour your creamy emulsified dressing over the salad base and toss with a large spoon or tongs until everything is evenly coated. You should see the dressing cling to each component. The way it coats the vegetables without pooling at the bottom is a sign your emulsification worked. This is your visual confirmation of technique mastery.
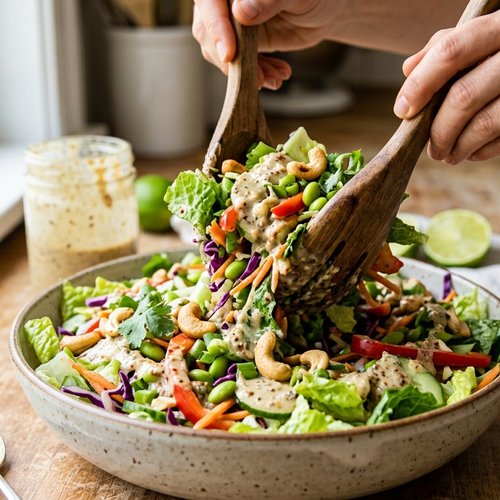
Now add your cooled spiced cashews and toss gently one more time. The gentle toss protects those precious crunchy pieces from getting crushed. Scatter your reserved fresh cilantro on top. Taste a bite. You should notice: nutty richness from the cashew butter, bright acid from the vinegar and lime, umami depth from the soy and fish sauce, herbaceous freshness from the cilantro and mint, and that satisfying textural contrast from the crunchy toasted nuts. Every element has a purpose.
How to Know You’ve Mastered the Technique
Mastery isn’t about perfection. It’s about recognition. When you truly understand emulsification, you’ll notice specific things that confirm you nailed it:
- Your dressing is silky and clings to vegetables – it should coat everything without pooling at the bottom of the bowl, and it should feel luxurious on your tongue without any graininess or separation
- The cashews stay crunchy even when sitting in dressing – this means your emulsification is stable enough that it doesn’t break down the cashew structure over time, and it won’t become soggy if you eat this the next day
- You can taste all the flavors distinctly – the emulsified dressing doesn’t overwhelm delicate vegetables; instead, it enhances them while maintaining balance between acid, fat, and umami
- The dressing tastes like one cohesive flavor, not separate components – when emulsification is complete, you won’t taste “oil then vinegar then nut butter” separately; instead, you taste one harmonious sauce
Common Technique Mistakes and How to Fix Them
- Your dressing broke and separated into oil on top – you didn’t whisk long enough or hard enough, or your cashew butter had too much added oil; solution: start over with a fresh cashew butter and whisk for the full 3-minute duration, never stopping
- Your dressing tastes gritty or has a curdled appearance – you added ingredients too quickly without proper whisking, or the cashew butter was cold and didn’t incorporate smoothly; solution: make sure your cashew butter is at room temperature, whisk the base dressing completely before adding other ingredients, and whisk between each addition
- Your cashews got soft instead of staying crunchy – you didn’t cool them enough after toasting, or you made the salad too far ahead; solution: freeze the toasted cashews for at least 15 minutes, and add them to the salad just before serving rather than mixing ahead
- Your salad tastes flat or one-dimensional – you didn’t season the vegetables before dressing, or you skipped the fish sauce; solution: always taste and season your base components separately, and trust that tiny amount of fish sauce to add depth without fishiness
Practice Variations to Build Your Skill
Beginner Level: The Straight-Forward Version – Make this exactly as written without any substitutions. Focus entirely on the emulsification technique. Taste the dressing at different stages of whisking so you understand the transformation. This teaches you the foundation.
Intermediate Level: The Substitution Challenge – Keep the emulsification technique identical but substitute vegetables based on the season. Use roasted beets and walnuts in fall, tender spring peas in spring, raw zucchini ribbons in summer. The technique stays the same; the ingredients change. This teaches you that technique is portable.
Advanced Level: The Dressing Variation – Make the same salad base but create three different emulsified dressings: one with almond butter and balsamic, one with tahini and pomegranate vinegar, one with sunflower seed butter and apple cider vinegar. Keep the whisking technique identical across all three. This teaches you that emulsification principles apply to countless variations.
Expert’s Nutritional Tip: Why Cashew Butter Changes Everything
From a registered dietitian perspective, cashew butter in dressing is genius nutrition science disguised as flavor. Most nut butters are roughly 50% fat, but here’s what matters: nearly 75% of that fat is unsaturated, with significant amounts of heart-protective monounsaturated fat (similar to olive oil). When you emulsify cashew butter into your dressing, you’re not just creating creaminess—you’re increasing the bioavailability of fat-soluble vitamins from your vegetables. The lycopene in those carrots? Fat-soluble. The vitamin K in that cilantro? Fat-soluble. The carotenoids throughout? Fat-soluble. That emulsified fat acts as a delivery vehicle. This is why vinaigrette-dressed salads absorb nutrients better than undressed ones. You’re applying nutritional science through technique.
Can I Store Cashew Crunch Salad Recipe?
Yes, but with intention. Store the components separately, not mixed together. This is professional restaurant technique.
The emulsified dressing keeps for 5 days in an airtight container in your refrigerator. It may thicken slightly as it cools. If it does, whisk in water one teaspoon at a time until you reach the right consistency again. The dressing won’t break if stored properly because your emulsification is stable.
The salad base (quinoa, vegetables, edamame, herbs) keeps for 3 days in an airtight container. Keep the vegetables and grains together, but store the fresh herbs separately or they’ll wilt.
The spiced cashews stay crunchy for 7 days in an airtight container at room temperature. Do not store them with the wet ingredients—they’ll absorb moisture and get soft.
To serve: assemble your salad no more than 15 minutes before eating. Combine base, dressing, and cashews just before service for maximum texture contrast. Leftovers can sit for up to 4 hours before the cashews start losing their crunch, but honestly, this is best eaten fresh.
Make-Ahead Guide for Meal Prep Warriors
I do this every Sunday in my own kitchen. Here’s the professional approach:
Friday Evening (if prepping for Saturday service): Cook your quinoa and store it in an airtight container. Make your emulsified dressing and refrigerate it separately. Do not dress the salad yet.
Saturday Morning: Prepare all your vegetables (cut, slice, mince). Store each vegetable type separately in containers with a damp paper towel to maintain crispness. Prep and store the edamame if using frozen (just thaw in the refrigerator overnight). Toast and cool your cashews, then store in an airtight container at room temperature.
Saturday Lunch Time: Assemble by combining quinoa, edamame, and all vegetables in a large container. Store undressed. Keep the cashews in their separate container until you’re ready to eat.
Just Before Eating: Dress your salad base, top with cashews, add fresh herbs. This method lets you prepare a week’s worth of salad components while maintaining texture and flavor integrity. The technique of keeping components separate is what professional kitchens do for consistency.
Nutrition Information
Per serving (based on 4 servings, using USDA FoodData Central values and accounting for all ingredients):
- Calories: 520
- Protein: 18g (excellent for a salad, coming from edamame, quinoa, and cashews)
- Fat: 28g (mostly unsaturated from nuts and seeds)
- Carbohydrates: 52g (primarily from whole grains and vegetables)
- Fiber: 9g (supports digestion and satiety)
- Sugars: 6g (naturally occurring from vegetables and honey)
What makes this nutritionally superior: the combination of complete protein (quinoa + edamame), healthy fats (cashews + nut butter), and vegetable phytonutrients creates a balanced meal that keeps you satisfied for hours. The fiber content promotes digestive health. The micronutrient density (magnesium, zinc, iron, vitamin K) is exceptional for a single dish. This isn’t salad as a side—this is salad as a complete meal.
What to Serve With Cashew Crunch Salad Recipe?
This salad is hearty enough to stand alone, but if you’re serving it as part of a larger meal, here’s what I recommend:
- Grilled protein on the side – think salmon, chicken, or tofu; the salad’s emulsified dressing complements grilled items beautifully without overwhelming them
- Fresh spring rolls – the cool, crisp vegetables in both dishes create a cohesive meal with complementary textures
- Crispy roasted chickpeas – adds another layer of crunch and protein if you’re making this for vegetarian guests
- Warm rice cakes with nut butter – I love pairing this salad with this simple cake for a meal that combines warm and cold elements
- Jasmine tea or a crisp white wine – the acidity and floral notes enhance the salad’s brightness
Cashew Crunch Salad Recipe

Ingredients
For the Spiced Cashews
- 2 teaspoon raw honey helps caramelize and bind the seasoning
- 1.5 cup raw cashews unsalted and whole, not broken pieces
- 1 tablespoon spicy crispy chili oil the one made by Momofuku is exceptional, but any quality brand works
- ½ teaspoon coarse sea salt finishes the toasted nuts beautifully
For the Creamy Emulsified Dressing
- ¼ teaspoon fish sauce (umami booster
- 1.5 teaspoon fresh ginger root, finely grated brightens with aromatic heat
- 2 tablespoon filtered water adjusts consistency and helps emulsification
- 2.5 tablespoon unseasoned rice vinegar mild acid that won't overpower the nuts
- 2 teaspoon low-sodium soy sauce deepens savory notes without overwhelming
- ⅓ cup creamy natural cashew butter (no added oils or stabilizers
- 1 teaspoon garlic chili sauce adds depth and mild spice
- 1.5 tablespoon fresh lime juice brightens the entire dressing with natural acid
For the Salad Base
- 2 cup carrots, cut into matchstick pieces raw adds sweet crunch
- ½ teaspoon fine sea salt season to taste before serving
- 2 cup cucumbers, sliced into half-moons hydrating, refreshing contrast
- 2 cup cooked white quinoa fluffy, nutty grain that holds dressing beautifully
- ¼ cup fresh mint leaves, chopped cooling and refreshing
- 2 cup fresh sugar snap peas, sliced tender-crisp adds sophisticated texture
- ½ cup fresh cilantro leaves, chopped herbaceous and bright
- ½ cup red onion, thinly sliced peppery notes that brighten everything
- 2 cup shelled edamame cooked, adds protein and verdant color
- 2 tablespoon neutral cooking oil optional, adds richness if you want extra body
- 3 green onions, chopped onion notes without the bite of raw red onion
Instructions
Step 1: Toast and Temper Your Cashews for Maximum Flavor
- Place a large skillet over medium heat—not high. This is crucial. Grab those 1.5 cups of raw cashews and add them to the dry pan. Here's where patience teaches you something: stir them constantly for about 2 minutes. You're not just heating them; you're releasing their natural oils and developing deeper nutty flavors through dry-roasting. Listen for the sound to change—it gets quieter as moisture escapes. Smell matters too. When you catch that toasted, almost-popcorn-like aroma, you know they're activating. Now add that tablespoon of spicy crispy chili oil and 2 teaspoons of honey. The oil carries heat and flavor; the honey acts as a binder and helps everything caramelize together. Toss constantly for exactly 2 more minutes. You should see the cashews go from pale to golden-tan. Don't rush this step. Burnt cashews taste bitter and ruin everything downstream. You're looking for even browning, not dark spots. Transfer immediately to a clean plate and sprinkle with that ½ teaspoon of coarse salt while still hot. The salt sticks better to warm food. Now here's the technique secret: refrigerate or freeze them for at least 10 minutes. This stops the cooking process and firms them up, so they stay crunchy instead of getting chewy. This tempering step is why your texture will be superior to most salads.
Step 2: Build Your Emulsified Dressing Through Proper Whisking
- Grab a medium mixing bowl and add your ⅓ cup of creamy natural cashew butter. This is your foundation. Pour in your 2.5 tablespoons of rice vinegar first—the acid comes before the water. Now here's where most people fail: start whisking immediately and whisking hard. The goal is to break down those fat molecules in the cashew butter, creating an even suspension. After about 30 seconds of vigorous whisking, you'll see the mixture look broken and weird—separated and chunky. This is normal. This is actually the moment where emulsification is happening at the molecular level. Keep whisking. Add your 1.5 tablespoons of fresh lime juice and continue. After another 30 seconds, add the 2 tablespoons of water slowly while whisking. You'll watch something magical happen: the dressing will transform from separated chaos into a silky, creamy suspension. This is emulsification in action. You're creating a stable structure where all components coexist peacefully. Now whisk in your 2 teaspoons of soy sauce, ¼ teaspoon of fish sauce (don't skip this—it adds depth without fishiness), 1 teaspoon of garlic chili sauce, and 1.5 teaspoons of freshly grated ginger. Whisk everything for a full 2 minutes. Your arm will feel it. That's the point. You're ensuring complete emulsification. The dressing should be smooth, creamy, and slightly thicker than heavy cream. If it's still too thick, add water one teaspoon at a time until you reach pourable consistency. Remember: cashew butter varies by brand. Some are oilier than others, so adjust accordingly.
Step 3: Cook Your Grains and Prepare Your Vegetables
- If you haven't already cooked your 2 cups of white quinoa, do that now according to package directions. Quinoa takes about 15 minutes. While that's happening, prepare your vegetables. This is mise en place—having everything ready before assembly. Cut your 2 cups of carrots into matchstick pieces (a mandoline makes this faster, but a sharp knife works too). Slice your 2 cups of cucumbers into half-moons rather than rounds—it's a subtle technique that increases surface area for dressing absorption. Slice your 2 cups of sugar snap peas on the bias (at an angle). These bias cuts are technique details that matter: they look more refined and catch dressing better. Thinly slice your ½ cup of red onion and mince your cilantro, mint, and green onions. Having everything prepped means your assembly is fast and your vegetables don't have time to wilt.
Step 4: Combine Your Base Components
- In a large mixing bowl, combine your 2 cups of cooked quinoa, 2 cups of shelled edamame, all your prepared vegetables (carrots, cucumbers, snap peas, red onion), and most of your fresh herbs (reserve a little cilantro for garnish). Toss everything together gently but thoroughly. This is where you get comfortable with your ingredients—understanding their textures and how they interact. Sprinkle your ½ teaspoon of fine sea salt over everything and toss again. Taste a piece of cucumber or edamame. The vegetables should taste seasoned on their own, not bland. This is foundational technique: season in layers, not all at the end. This builds flavor depth.
Step 5: Dress and Finish Your Salad Masterpiece
- Pour your creamy emulsified dressing over the salad base and toss with a large spoon or tongs until everything is evenly coated. You should see the dressing cling to each component. The way it coats the vegetables without pooling at the bottom is a sign your emulsification worked. This is your visual confirmation of technique mastery. Now add your cooled spiced cashews and toss gently one more time. The gentle toss protects those precious crunchy pieces from getting crushed. Scatter your reserved fresh cilantro on top. Taste a bite. You should notice: nutty richness from the cashew butter, bright acid from the vinegar and lime, umami depth from the soy and fish sauce, herbaceous freshness from the cilantro and mint, and that satisfying textural contrast from the crunchy toasted nuts. Every element has a purpose.
Notes
Nutrition
FAQs
Can I use a different nut butter instead of cashew?
Absolutely, but understand that different nut butters have different oil contents, which affects emulsification. Almond butter tends to be slightly less oily than cashew, so you might need to reduce your water slightly. Tahini is oilier, so you might need more water. The technique remains identical—you’re still whisking to create an emulsion—but the ratios shift based on the emulsifier’s natural oil content. Always start with the recipe as written, then adjust your liquid based on what you see during whisking.
What if my dressing is too thick?
Add water one teaspoon at a time while whisking. Don’t dump it in all at once. You want to reach a consistency where the dressing flows easily but still clings to vegetables. Think heavy cream, not milk. If you overshoot and make it too thin, you can’t easily reverse it, so go slowly.
Can I make this salad ahead for meal prep?
Yes, but only if you keep the components separate as I detailed in the Make-Ahead Guide. The dressing can be made 5 days ahead. The vegetable base can be made 3 days ahead. The cashews stay crunchy for 7 days. Assemble just before eating to maintain texture contrast. This is the professional approach that ensures quality.
Is there a non-fish-sauce version?
You can omit it, but I don’t recommend it. That ¼ teaspoon adds umami depth without any fishiness—most people won’t taste it as fish. If you absolutely cannot use it for dietary or ethical reasons, add an extra ¼ teaspoon of soy sauce instead. You’ll lose some complexity, but the salad will still be excellent. This is a case where I encourage you to trust the recipe because the balance of flavors is deliberate.
How do I prevent the cashews from getting soft?
Three keys: (1) Cool them completely in the freezer after toasting, (2) store them separately from wet ingredients, and (3) add them to your salad just before serving, not during assembly. If you’re meal-prepping and eating this the next day, add the cashews immediately before you eat, not when you store it. Texture contrast is achievable with proper technique.
Can I double this recipe?
Completely. Double every ingredient. The technique doesn’t change, but when whisking your dressing, take your time. A larger volume means you’re whisking more mass, so it takes slightly longer to fully emulsify. Whisk for at least 3 minutes. Your arm will definitely feel it with a doubled batch, but that’s the point—you’re building the muscle memory of proper emulsification.
Seasonal Variations: Adapt This Recipe Year-Round
Spring Version: Swap carrots for shredded radishes, add tender pea shoots, use fresh dill instead of some cilantro, and add asparagus shaved thin with a vegetable peeler. Spring demands brightness, so increase your lime juice slightly and add fresh lemon zest to the dressing.
Summer Version: Use heirloom tomatoes cut into chunks, add fresh corn kernels, use basil instead of cilantro, and add diced zucchini. The ripe tomatoes bring natural sweetness, so reduce your honey in the cashew toasting slightly.
Fall Version: Add roasted beets and butternut squash cubes, swap edamame for roasted chickpeas, use pumpkin seeds instead of cashews, and add crispy sage leaves. Reduce the lime juice and add apple cider vinegar instead for deeper notes.
Winter Version: Use shredded raw brussels sprouts, add pomegranate seeds, use walnuts toasted with pomegranate molasses instead of the spiced cashews, and add thinly sliced persimmons or apples. The dressing stays the same because emulsification is technique, not seasonal.
More Recipes Using This Technique
- Almond Baked Oats Recipe – demonstrates how nut butters create creamy textures through a different cooking method while maintaining the same emulsification principle
- Air Fryer Honey Salmon Bites Recipe – shows how the honey-based glaze uses similar coating and emulsification techniques
- This Homemade Juan Recipe – Worth adding to your recipe collection.
- This Homemade Texas Recipe – Worth adding to your recipe collection.
- This Homemade Zaxby’S Recipe – Worth adding to your recipe collection.
- This Homemade Texas Recipe – Worth adding to your recipe collection.
- This Homemade Bojangles Recipe – Worth adding to your recipe collection.
Conclusion: You’ve Just Mastered a Superpower
You’ve learned something today that most home cooks never understand. You now know how to create stable emulsified dressings that taste restaurant-quality. You understand the science behind why proper whisking matters. You recognize that texture contrast—that crunchy-creamy-fresh combination—separates good salads from forgettable ones. More importantly, you’ve learned a technique that applies far beyond this single recipe.
Every time you whisk a dressing going forward, you’ll think about emulsification. Every time you toast nuts, you’ll remember the sensory cues that mean they’re done. Every time you season, you’ll remember to do it in layers. These aren’t just cooking skills—they’re the foundation of culinary thinking. You’re no longer following recipes; you’re understanding why recipes work.
Make this salad this week. Notice how the cashew butter transforms from separated chaos into silky cream. Feel your arm working during that whisking phase. Taste the moment when emulsification is complete. Then make it again next week and do it faster, with more confidence. That’s how technique becomes second nature.
Celebrate your flavorful adventure!