
This post contains affiliate links. As an Amazon Associate I earn from qualifying purchases.
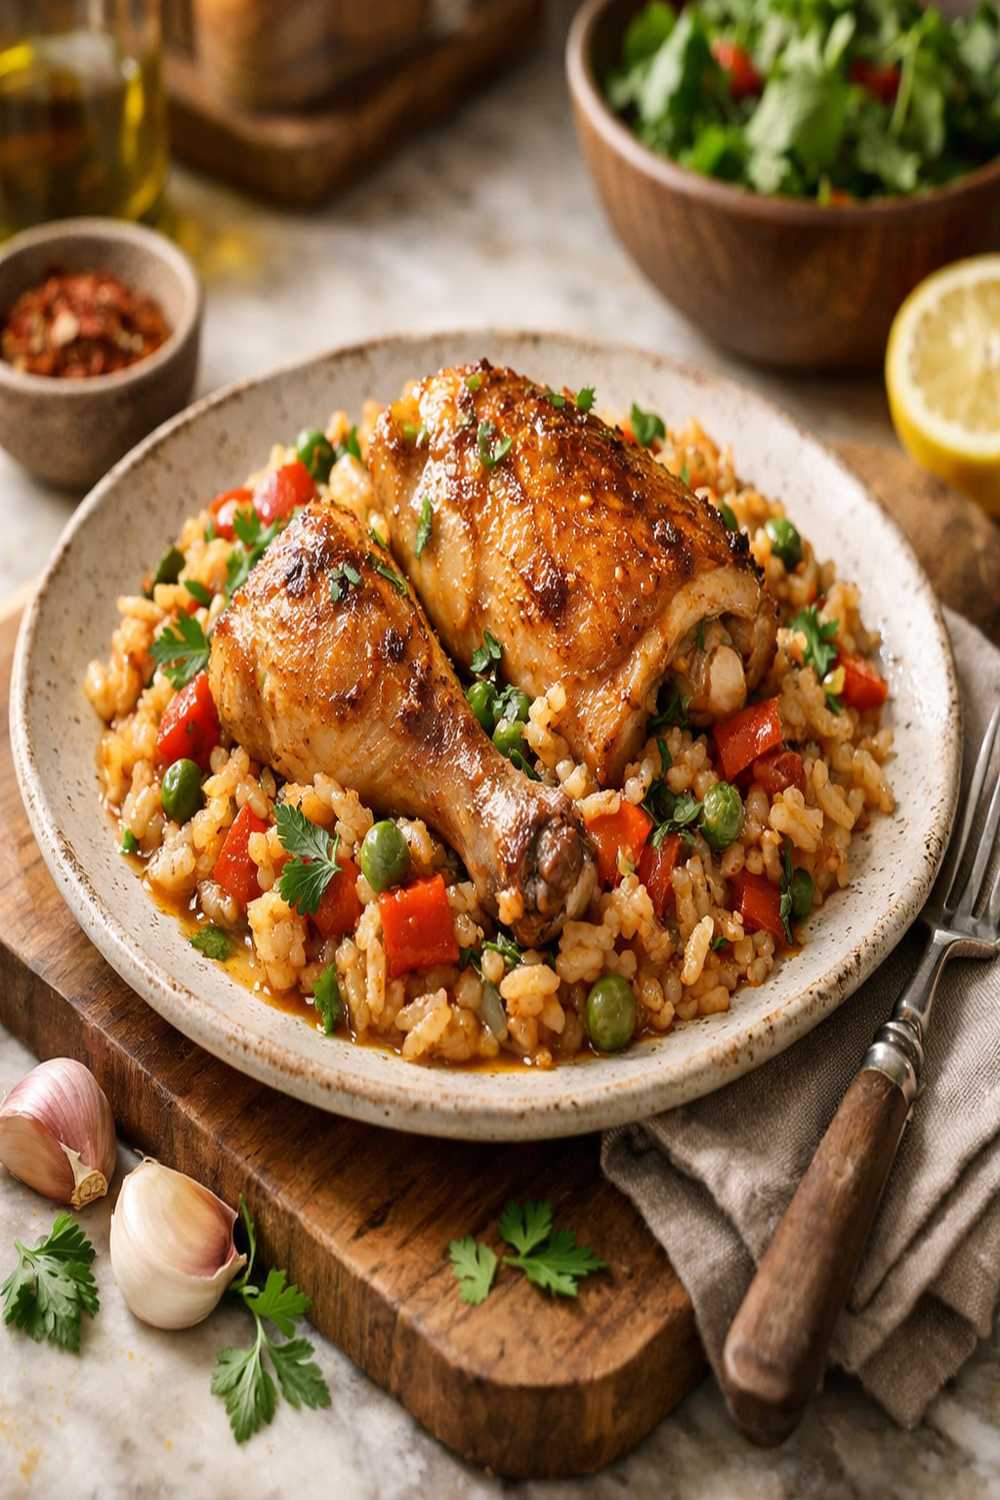
Listen, I get it. You’re exhausted by Sunday night. The last thing you want is to spend an hour cooking dinner every single evening. That’s exactly why I’m obsessed with this braised chicken and rice recipe—make it once on Sunday and eat well all week. One Dutch oven. One oven. One glorious meal that transforms into four completely different dinners without any of the “leftovers” fatigue. This dish holds beautifully in the fridge, tastes even better the next day as flavors deepen, and honestly? It tastes like you spent way more effort than you actually did. That’s the chef-meets-dietitian sweet spot I live for.
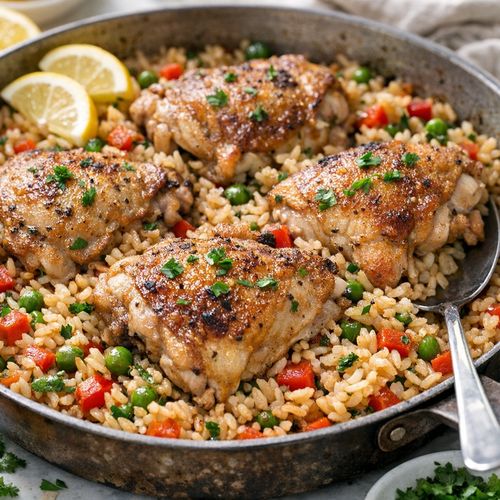
Braised Chicken And Rice Recipe Meal Prep: Cook Once, Eat All Week
I discovered meal prep the hard way. During my first year working as a registered dietitian in NYC, I was running between client consultations, teaching cooking workshops, and honestly starving myself because I’d either skip lunch or hit the deli for the third time that week. One Sunday—I remember it was November, raining, and I was completely unmotivated—I threw together a braised chicken situation that changed everything. I made enough for five dinners. By Wednesday, I wasn’t ordering takeout. By Friday, I was actually excited to eat my own food. That one decision freed up probably eight hours that week and saved me about $80 in delivery fees. More importantly, it restored this sense of control over my nutrition that I’d completely lost.
Meal prep isn’t about punishment or eating the same boring thing five nights straight. It’s about smart cooking. Strategic batching. Understanding that one properly executed Dutch oven braise becomes Monday’s comfort bowl, Wednesday’s deconstructed wrap, and Friday’s “fancy” grain situation when you plate it differently. I built my entire approach to nutrition around this philosophy because I watched so many clients fail at healthy eating simply because they didn’t have food ready when hunger hit.
Why This Recipe Is Perfect for Meal Prep
- One Dutch oven, zero stress – This braise happens entirely in one pot. You’re looking at legitimate 10-minute active prep time on Sunday, then 40 minutes hands-off while your oven does the work. That’s roughly 50 minutes that yields 5-6 dinners. Do the math on time saved throughout your week.
- Flavor deepens with time – Unlike many batch-cooked meals that taste worse on day three, this braise genuinely improves. The chicken becomes more tender, the rice absorbs deeper seasoning notes, and the entire dish develops this beautiful umami complexity that tastes restaurant-quality by midweek.
- Incredible flexibility across meals – Serve it as a bowled dinner Monday. Shred the chicken and use it as a wrap filling Wednesday. Transform it into a rice cakes situation Friday. The same base supports completely different presentations, preventing that meal prep boredom that kills most people’s consistency.
Your Weekly Meal Plan With This Recipe
Here’s exactly how I strategically use one batch across different occasions. Notice how each meal feels totally distinct even though you’re working from the same cooked components. This is how you stay consistent without feeling trapped.
- Monday: The Classic Bowl – Scoop warm rice directly into a bowl, top with a chicken thigh, add extra mushrooms and carrots, finish with fresh parsley and a crack of black pepper. Restaurant energy, minimal effort.
- Wednesday: The Deconstructed Wrap – Shred your chicken thigh (it pulls apart beautifully after three days of braising). Layer it in a whole grain wrap with the rice, some fresh lettuce, avocado if you’re feeling it, and a squeeze of lemon. Totally different eating experience from the same cooked components.
- Friday: The Elevated Situation – Reheat your remaining rice and chicken gently in a skillet to re-crisp the edges. Plate it on something nice. Top with fresh herbs, maybe a drizzle of really good olive oil. Suddenly it looks like dinner you’d order at a restaurant. You’ve actually earned yourself a nice Friday night without cooking.
The Ingredients – Scaled for a Full Week
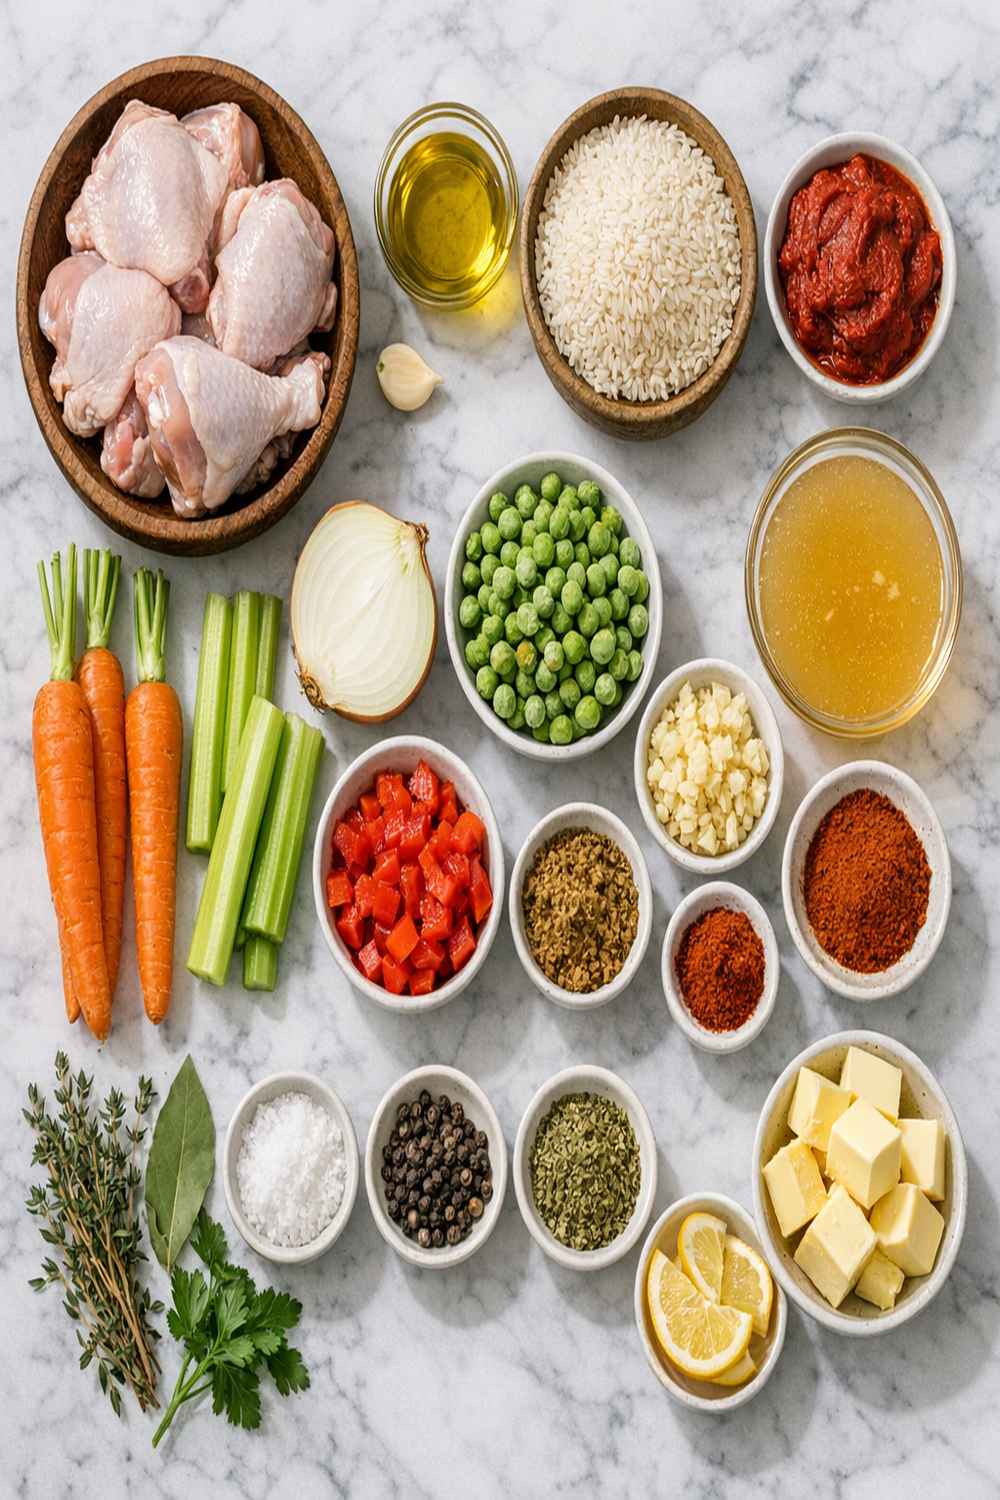
I’m scaling this to yield roughly 5-6 substantial dinner servings, which is your actual meal prep sweet spot. You want enough to skip cooking 4-5 nights, but not so much that you’re eating the same thing when it’s legitimately past its prime. These ingredient amounts assume you’re cooking once on Sunday for the entire week ahead.
- ¼ teaspoon freshly ground black pepper (fresh-ground, always—pre-ground tastes like dust)
- 2 cups white basmati rice (jasmine works too; white rice absorbs braising liquid better than brown for this application)
- 4 medium carrots, minced (the carbohydrates in carrots caramelize slightly during braising, adding natural sweetness)
- ½ teaspoon fine sea salt (adjust to taste; depends on your broth saltiness)
- 3 tablespoons Worcestershire sauce (adds saltiness and umami complexity that you absolutely taste)
- 8 ounces mushrooms, diced (cremini, button, or oyster all work; they break down slightly during the braise and create umami depth)
- 4 large garlic cloves, minced (or 8 medium cloves—garlic mellows and becomes sweet during braising)
- 1 teaspoon onion powder (complements the fresh garlic and onion beautifully)
- 1 medium yellow onion, minced (stores beautifully for a full week when cooked into liquid)
- 1 teaspoon smoked paprika, optional but I recommend it (adds subtle smokiness that elevates the whole dish)
- 4 tablespoons unsalted butter (adds richness to the braising liquid and helps build deeper flavor)
- 6 tablespoons homemade chicken seasoning blend (I mix garlic powder, onion powder, smoked paprika, and dried thyme—store-bought blends work but homemade is fresher)
- 1 cup frozen peas (added at the end; they stay bright and don’t overcook)
- 2 bay leaves (remove before serving; they flavor the liquid without becoming part of it)
- 4.5 cups low-sodium chicken broth (I always use homemade if I have it; store-bought is fine but watch sodium)
- 5 tablespoons extra virgin olive oil, divided (quality oil matters here; you’ll taste it)
- ½ cup fresh parsley, roughly chopped (for garnish; adds brightness to counteract the richness)
- 4 pounds bone-in, skin-on chicken thighs (thighs stay moist during braising—breasts dry out, trust me on this)
- 2 teaspoons garlic powder (double check you’re not using garlic salt by mistake)
The Meal Prep Process: How to Make Braised Chicken And Rice Recipe in Bulk
Here’s my exact system for Sunday meal prep. I’m going to break this into discrete steps because efficiency matters. You’re essentially searing protein, building aromatics and rice in one vessel, then letting your oven do 90% of the work while you catch your breath. This is not complicated cooking. It’s smart cooking.
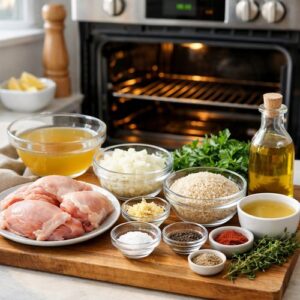
Step 1: Prep Your Station and Preheat
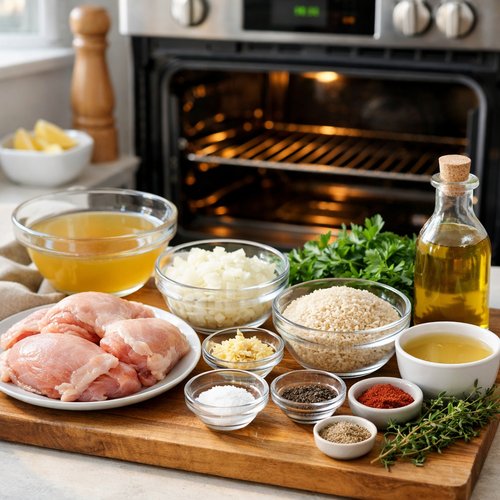
Move your oven rack to the center position and preheat to 375°F. This takes about 10 minutes while you handle everything else. I always prep before I start cooking—it’s a French cooking technique called mise en place, and it eliminates the scrambling. Line a cutting board with parchment paper for your chicken, have another clean board for vegetables. Grab your largest Dutch oven (5-6 quart capacity) and set it nearby.
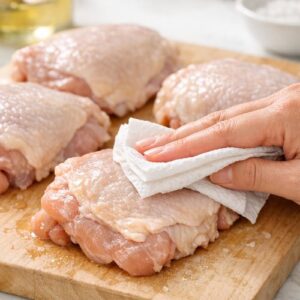
Step 2: Season Your Chicken Thighs
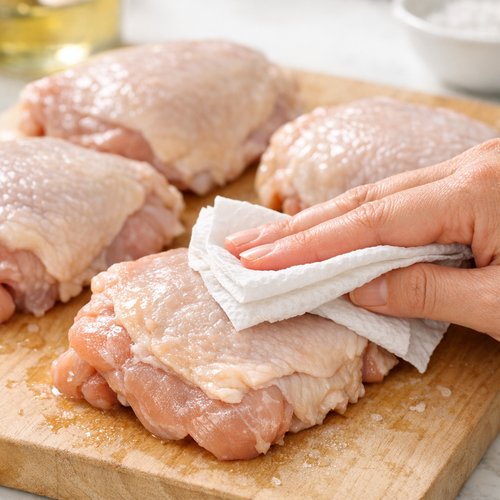
Remove your chicken thighs from the package and pat them completely dry with paper towels. This is non-negotiable if you want a good sear. Moisture prevents browning. Arrange them skin-side up on your prepared board and generously season both sides with your chicken seasoning blend. Don’t be shy—you want a visible coating. Let them sit while you work on vegetables; this allows seasoning to set slightly into the meat.
Step 3: Build Your Sear
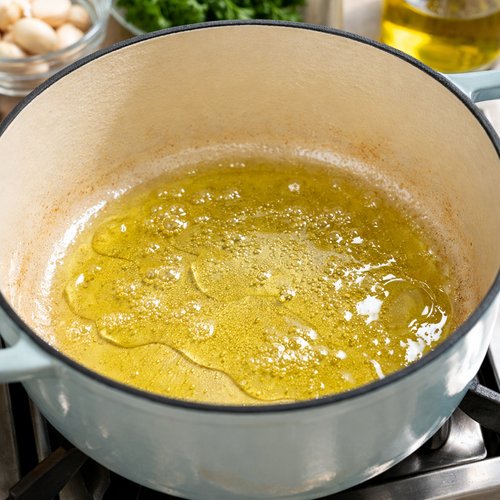
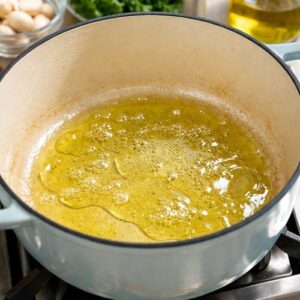
Heat 3 tablespoons of olive oil in your Dutch oven over medium-high heat until it’s shimmering and fragrant—about 2 minutes. You want it hot enough that a piece of chicken immediately sizzles when it touches the surface. Working in batches if necessary (don’t crowd the pan), place chicken thighs skin-side down first. Don’t move them for exactly 2 minutes—this is how you build a proper golden-brown crust. Flip and sear the other side for another minute or so. You’re not cooking them through; you’re creating flavor through the Maillard reaction.
This is the step that separates restaurant-quality braised chicken from boring boiled chicken. The brown bits stuck to your pan’s bottom? That’s liquid gold. Don’t wash it off.
Step 4: Remove Chicken and Build Your Aromatics Base
Transfer your seared chicken thighs to a clean plate. Now, in that same Dutch oven with all those beautiful brown bits stuck to the bottom, add 2 tablespoons of butter and your remaining 2 tablespoons of olive oil over medium heat. Once the butter is melted and foaming, use a wooden spoon to scrape the bottom vigorously for about 30 seconds. You’re deglazing—extracting all that concentrated flavor into your fat. This is non-negotiable for depth.
Step 5: Sauté Your Vegetables
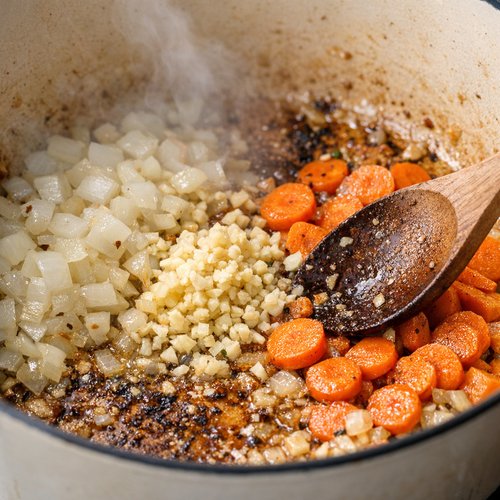
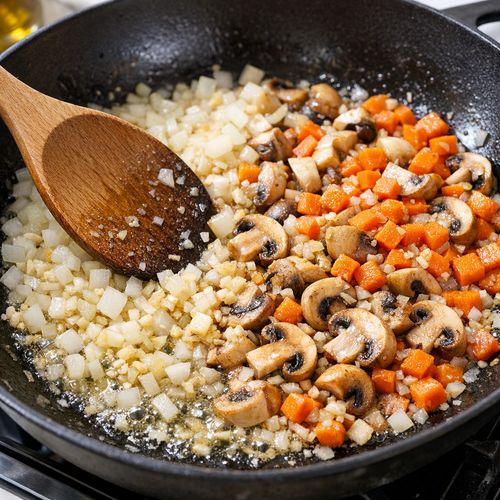
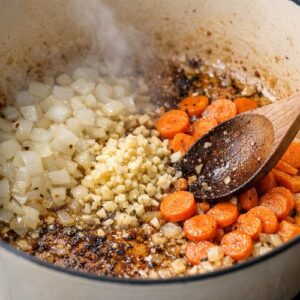
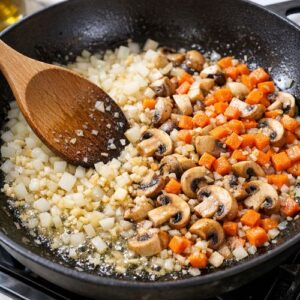
Add your minced onion, garlic, mushrooms, and carrots to the oil-butter mixture. Sauté for exactly 2-3 minutes—you want them to soften slightly but not brown. This is aromatic building, not caramelizing. Sprinkle a tiny pinch of salt over the vegetables; it helps them release moisture and cook more evenly. Stir constantly to distribute heat.
Step 6: Add Your Rice and Broth
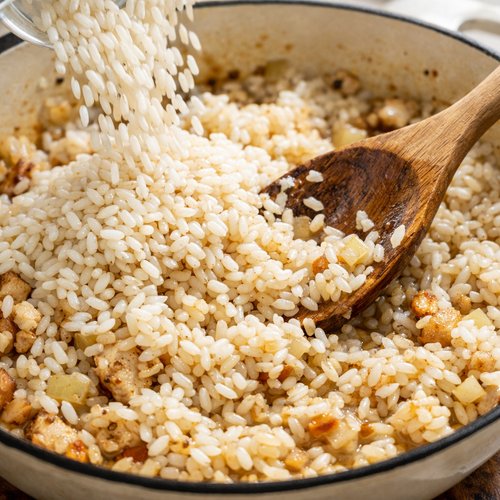
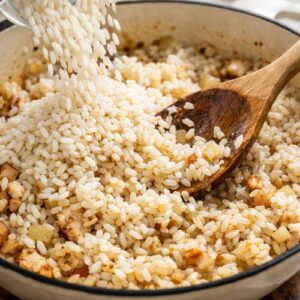
Pour in your 2 cups of uncooked rice and stir constantly for about 1 minute. You’re coating each grain in the fat and building nutty flavor. This prevents the rice from becoming gummy later. Now add your 4.5 cups of chicken broth, the 1 cup of frozen peas, Worcestershire sauce, salt, pepper, garlic powder, onion powder, and bay leaves. Stir everything together until completely combined. The mixture should look like a loose risotto-style situation.
Turn the heat to high and let it come to a rolling boil—this takes about 3-4 minutes. You’ll see big bubbles breaking the surface. The moment it boils, remove it from heat immediately. Don’t let it boil longer; you’re not cooking the rice here.
Step 7: Return Chicken and Cover
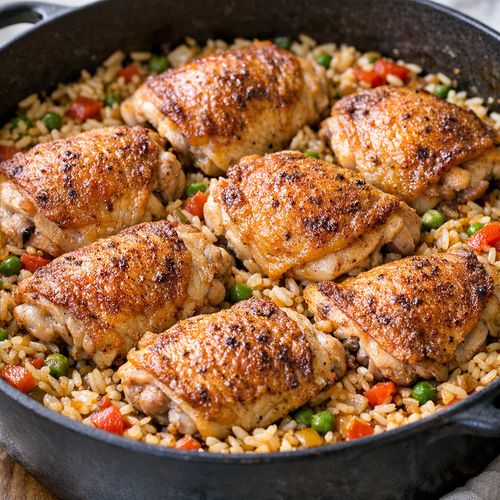
Arrange your seared chicken thighs directly on top of the rice mixture, skin-side up. The chicken should nestle into the rice slightly but mostly sit on top. Clamp your Dutch oven’s lid on firmly. If your lid doesn’t seal well, cover with foil first, then place the lid on top for an extra-sealed environment.
Step 8: Braise in the Oven
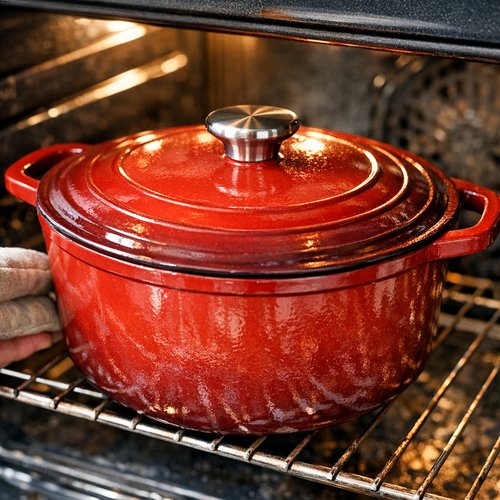
Transfer your covered Dutch oven to your preheated 375°F oven. Set a timer for 35 minutes. Do not open it during cooking. I know the urge is there. Resist it. Opening releases steam and disrupts the cooking process. In 35 minutes, your kitchen will smell absolutely incredible—that’s how you know it’s working.
Step 9: Check for Doneness
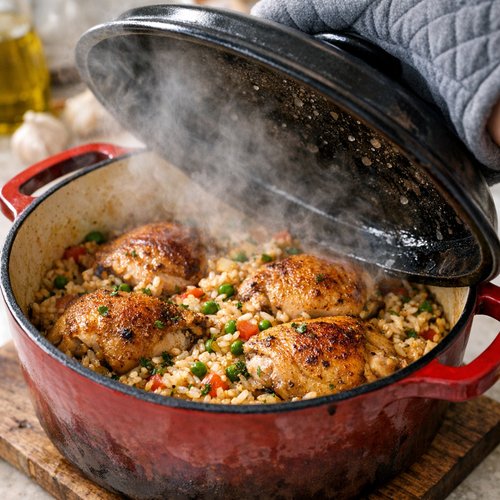
After 35 minutes, carefully remove the Dutch oven from the oven (use an oven mitt—the handle is screaming hot). Remove the lid slowly, tilting away from your face to avoid the steam. The rice should have absorbed almost all the liquid. Check your chicken’s internal temperature with a meat thermometer—it must read 165°F for food safety. Insert the thermometer into the thickest part of the thigh without touching bone.
If the rice still looks wet, place the lid back on and return to the oven for 5-10 minutes. If the chicken isn’t at temperature, another 5-10 minutes with the lid on will get you there.
Step 10: Optional Final Sear (The Restaurant Touch)
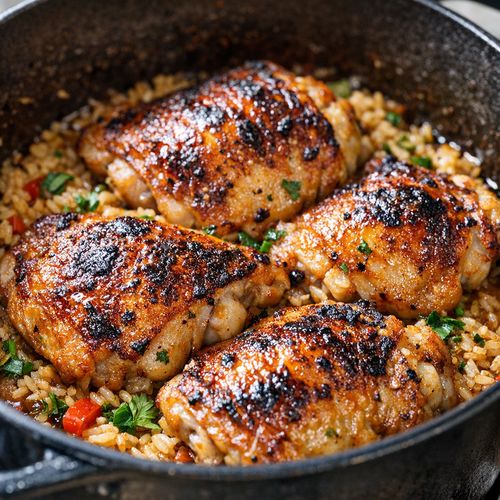
If you want that crispy, golden-brown skin that looks fancy, preheat your broiler to high. Transfer your Dutch oven to the top oven rack for 1-2 minutes. Watch it constantly—broilers move fast. You’re not cooking it further; you’re just crisping the skin for visual appeal. Remove it the moment the skin turns deep golden.
Step 11: Rest, Garnish, and Portion
Let the entire dish rest, uncovered, for 5 minutes. This allows residual heat to distribute and the rice to firm up slightly. Remove your bay leaves. Top the entire braise with your fresh chopped parsley. This bright green garnish does something magical—it makes the dish look intentional and restaurant-quality while cutting through the richness with fresh herb flavor.
Now divide into your meal prep containers. I recommend portioning into about 5-6 separate containers depending on your appetite and how many dinners you want to cover.
Storage and Organization System
- Glass containers with locking lids – I use Pyrex or similar glass containers because they don’t absorb flavors or odors, they’re dishwasher safe, and you can see exactly what’s inside without opening. Divide your braise into 5-6 portions. Each portion should include chicken, rice, vegetables, and broth. Never store dry rice without the braising liquid; it dries out within 24 hours.
- Portioning strategy for maximum freshness – Cool your braise completely to room temperature before storing. This takes about 30-45 minutes. Never put hot food directly into the fridge; the temperature spike can cause bacterial growth and cook surrounding foods. Portion immediately after cooling to prevent the rice from absorbing all the liquid and becoming mushy by day three.
- Labeling system that saves you Wednesday stress – Use a permanent marker to write the date and contents directly on your containers. I write “Braised Chicken + Rice – Sunday 1/15” on the lid. Include what day you cooked it so you know exactly how old it is. This takes 30 seconds and prevents the “Is this still good?” panic that kills meal prep consistency.
How to Reheat Without Losing Quality
This is where most meal preppers fail. They reheat poorly and the entire dish suffers. Here’s my system for maintaining quality across the week.
Monday and Tuesday (Days 1-2) – Your braise is still warm and needs minimal reheating. Scoop your portion into a microwave-safe bowl, cover it loosely with a damp paper towel (prevents moisture loss), and microwave at 50% power for 2-3 minutes, stirring halfway through. The low power setting prevents the rice from overcooking and the chicken from drying out. Alternatively, reheat in a skillet over medium heat with a splash of water, covered, for about 3 minutes until heated through.
Wednesday and Thursday (Days 3-4) – By midweek, your braise has developed deeper flavor but the rice might be slightly denser. Use the skillet method: add your portion to a non-stick skillet over medium heat, add 2-3 tablespoons of water, cover, and heat for 4-5 minutes until warmed through. This method re-steams the rice slightly without making it mushy. Stir occasionally.
Friday (Day 5) – If you’re serving this as your elevated plate dinner, reheat the same skillet method but don’t cover. Let some of the rice’s edges crisp slightly in the dry heat—this creates texture contrast that actually improves the dish by Friday. Takes about 5-6 minutes, stirring occasionally.
Never use maximum microwave power for reheating braises. The heat is too aggressive and dries everything out. Low and slow is your motto.
Can I Freeze Braised Chicken And Rice Recipe?
Absolutely, and this is a game-changer for anyone who wants to meal prep beyond a week. This braise actually freezes beautifully because of the high liquid content; the rice and chicken don’t dry out like some dishes do.
Freezing window: Up to 3 months is safe, but I recommend eating within 2 months for optimal flavor. After that, the spices can become slightly muted.
Cool your braise completely, then portion into freezer-safe containers or heavy-duty freezer bags. If using bags, I lay them flat to freeze, which saves space and allows them to stack like files. Label with the date and contents. Leave about ½ inch of headspace if using rigid containers; the liquid expands slightly as it freezes.
Thawing strategy – Remove from the freezer the night before you want to eat it and place in the refrigerator. This thaws slowly without temperature shock. It will thaw in about 12-18 hours depending on portion size. Alternatively, thaw in a sealed bag in cold running water for about 1-2 hours. Never thaw at room temperature; bacteria growth risk.
Reheating from frozen – You can reheat directly from frozen if necessary. Use the skillet method over medium-low heat, covered, for 10-12 minutes. Stir occasionally to ensure even heating. It takes longer than fresh, but it works in a pinch.
Nutrition Information
Each serving (one chicken thigh with rice and vegetables) contains approximately 520 calories, 32 grams of protein, 54 grams of carbohydrates, and 16 grams of fat. Based on USDA standards, one serving also provides about 8 grams of fiber, 450mg of potassium, and meaningful amounts of B vitamins from the chicken and mushrooms.
Here’s what excites me as a registered dietitian: this meal prep approach provides sustainable protein intake across your entire week. Most people skip lunch, crash at 3pm, then overeat at dinner. When you have portions of braised chicken and rice ready, you’re not scrambling. You’re eating roughly 30 grams of protein per meal, which is the sweet spot for satiety and muscle preservation. The combination of protein plus fiber from vegetables plus complex carbohydrates from rice creates stable blood sugar all week.
Over the course of five meals, you’re consuming approximately 2,600 calories and 160 grams of protein. That’s a genuinely balanced nutrition framework—not restrictive, not excessive, just steady fuel that supports energy and performance.
What to Pair With Braised Chicken And Rice Recipe Throughout the Week
Here’s where meal prep gets exciting. Don’t serve this the exact same way five nights straight. That’s punishment. Instead, rotate your sides strategically. Same base, completely different eating experience each night.
- Monday: Fresh green salad with lemon vinaigrette – Serve your braised chicken and rice in a bowl with a side of crisp mixed greens, shredded carrots, and red onion dressed in lemon juice and olive oil. The acidity cuts through the richness perfectly.
- Tuesday: Simple roasted vegetables – Toss some broccoli, Brussels sprouts, or zucchini with olive oil and roast at 425°F while your braise reheats. 20 minutes. Serve alongside for added texture and nutrients.
- Wednesday: The wrap situation I mentioned – Use the reheating methods described above, but serve shredded chicken inside whole grain wraps. Look at Air Fryer Asian Chicken Recipe for inspiration on how versatile chicken can really be across different flavor profiles and presentations.
- Thursday: Crusty bread and butter – Let your braising liquid shine. Serve your portion with a thick slice of toasted crusty bread for soaking. There’s something deeply satisfying about this simple approach that makes the braise feel special.
- Friday: The elegant plated situation – Reheat as described, plate on something nice, add fresh herbs and maybe a drizzle of really good olive oil. Add a side of sautéed spinach or asparagus. Suddenly it looks like dinner you paid $22 for.
Expert’s Nutritional Insight: Why Chicken Thighs Win for Meal Prep
Here’s something most recipes don’t tell you that genuinely matters for meal prep success. Chicken thighs contain significantly more collagen than chicken breasts. During the 35-minute braise, that collagen converts to gelatin, which is why thighs stay moist and tender through day four while breasts would be dry and disappointing by Wednesday.
Additionally, thighs contain more myoglobin—that’s the iron-containing protein that makes meat red. This contributes to deeper flavor development and means your meal prep is providing more bioavailable iron than breast-based recipes. As a dietitian, I appreciate that you’re not just cooking something delicious; you’re creating nutritionally superior meals for your week.
The skin itself is basically pure collagen and fat. When you sear it and eventually broil it, you’re creating a crispy shell that adds textural interest and keeps people engaged with their meals beyond day two. This engagement—this sense that your food is intentional and delicious—is honestly what determines whether you stay consistent with meal prep or eventually revert to takeout.
Common Mistakes to Avoid on Your First Attempt
Mistake 1: Skipping the sear – I understand the temptation to skip searing and save 5 minutes. Don’t. That sear creates the flavor foundation for your entire week of meals. The Maillard reaction happens at high heat when protein and amino acids combine. Boiling chicken directly in broth creates a completely different (much less interesting) result. The sear takes 5 minutes and changes everything.
Mistake 2: Opening the lid constantly – I know you want to check on it. I know your kitchen smells incredible and the curiosity is killing you. But every time you open the lid, you release steam that’s actively cooking your rice and chicken. You’re essentially restarting the process. Leave it alone for 35 minutes. Trust your timer.
Mistake 3: Not cooling completely before storing – Hot food in the refrigerator creates steam, which can cause condensation inside your containers, which can then lead to texture changes in your rice and faster bacterial growth. Cool on your counter for at least 45 minutes before portioning. This 45 minutes of patience saves you from opening containers Wednesday and finding mushy rice.
Mistake 4: Using chicken breast instead of thighs – I mentioned this in the nutrition section, but it deserves its own warning. Breast meat is leaner and tougher in a braise. By Wednesday, it’s genuinely unpleasant. Thighs are meal prep magic. Don’t try to optimize for lower calories; optimize for staying consistent with food that tastes good all week.
Seasonal Variations to Keep Things Fresh
Spring variation – Add fresh peas, asparagus pieces, and lemon zest instead of the frozen peas and standard seasonings. Use fresh tarragon instead of dried herbs. The brightness is perfect for spring appetite shifts.
Summer variation – Add diced tomatoes and fresh basil. Use chicken broth mixed with a splash of white wine. Serve cold or at room temperature on hot days. Yes, braised chicken and rice can work as a cold salad when you reimagine it.
Fall variation – Add apple pieces, dried thyme, and a splash of apple cider vinegar. This transforms the entire flavor profile into something warming and autumnal. The slight sweetness from apples is genuinely special.
Winter variation – Add more root vegetables—parsnips, turnips, sweet potato pieces. Use beef broth instead of chicken. Add rosemary. This becomes your cozy, warming meal that feels appropriate for cold weather.
Make-Ahead Guide: Getting Even More Strategic
You can prep elements of this braise the night before if Sunday feels overwhelming, which removes the stress factor entirely.
Friday night prep (optional) – Pat your chicken dry and season it. Store covered in the fridge. Mince all your vegetables and store in separate containers. Measure out your rice and spices into a bowl. This takes maybe 15 minutes and means Sunday is literally just cooking, no prep work.
Sunday morning option – If you’re someone who prefers splitting the work, sear your chicken in the morning, let it cool, store it covered. Then in the evening, build your aromatics, rice, and broth, combine everything, and braise. This makes the evening portion feel less overwhelming.
The beauty of this braise is flexibility. You can tackle it however fits your actual life, not some Instagram version of meal prep that requires hours of uninterrupted focus.
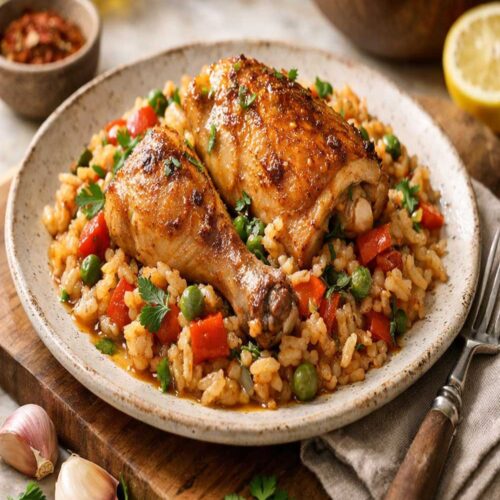
Braised Chicken And Rice Recipe

Ingredients
- ¼ teaspoon freshly ground black pepper (fresh-ground, always
- 2 cup white basmati rice jasmine works too; white rice absorbs braising liquid better than brown for this application
- 4 medium carrots, minced the carbohydrates in carrots caramelize slightly during braising, adding natural sweetness
- ½ teaspoon fine sea salt adjust to taste; depends on your broth saltiness
- 3 tablespoon Worcestershire sauce adds saltiness and umami complexity that you absolutely taste
- 8 ounce mushrooms, diced cremini, button, or oyster all work; they break down slightly during the braise and create umami depth
- 4 large garlic cloves, minced (or 8 medium cloves
- 1 teaspoon onion powder complements the fresh garlic and onion beautifully
- 1 medium yellow onion, minced stores beautifully for a full week when cooked into liquid
- 1 teaspoon smoked paprika, optional but I recommend it adds subtle smokiness that elevates the whole dish
- 4 tablespoon unsalted butter adds richness to the braising liquid and helps build deeper flavor
- 6 tablespoon homemade chicken seasoning blend (I mix garlic powder, onion powder, smoked paprika, and dried thyme
- 1 cup frozen peas added at the end; they stay bright and don't overcook
- 2 bay leaves remove before serving; they flavor the liquid without becoming part of it
- 4.5 cup low-sodium chicken broth I always use homemade if I have it; store-bought is fine but watch sodium
- 5 tablespoon extra virgin olive oil, divided quality oil matters here; you'll taste it
- ½ cup fresh parsley, roughly chopped for garnish; adds brightness to counteract the richness
- 4 pound bone-in, skin-on chicken thighs (thighs stay moist during braising
- 2 teaspoon garlic powder double check you're not using garlic salt by mistake
Instructions
Step 1: Prep Your Station and Preheat
- Move your oven rack to the center position and preheat to 375°F. This takes about 10 minutes while you handle everything else. I always prep before I start cooking—it's a French cooking technique called mise en place, and it eliminates the scrambling. Line a cutting board with parchment paper for your chicken, have another clean board for vegetables. Grab your largest Dutch oven (5-6 quart capacity) and set it nearby.
Step 2: Season Your Chicken Thighs
- Remove your chicken thighs from the package and pat them completely dry with paper towels. This is non-negotiable if you want a good sear. Moisture prevents browning. Arrange them skin-side up on your prepared board and generously season both sides with your chicken seasoning blend. Don't be shy—you want a visible coating. Let them sit while you work on vegetables; this allows seasoning to set slightly into the meat.
Step 3: Build Your Sear
- Heat 3 tablespoons of olive oil in your Dutch oven over medium-high heat until it's shimmering and fragrant—about 2 minutes. You want it hot enough that a piece of chicken immediately sizzles when it touches the surface. Working in batches if necessary (don't crowd the pan), place chicken thighs skin-side down first. Don't move them for exactly 2 minutes—this is how you build a proper golden-brown crust. Flip and sear the other side for another minute or so. You're not cooking them through; you're creating flavor through the Maillard reaction. This is the step that separates restaurant-quality braised chicken from boring boiled chicken. The brown bits stuck to your pan's bottom? That's liquid gold. Don't wash it off.
Step 4: Remove Chicken and Build Your Aromatics Base
- Transfer your seared chicken thighs to a clean plate. Now, in that same Dutch oven with all those beautiful brown bits stuck to the bottom, add 2 tablespoons of butter and your remaining 2 tablespoons of olive oil over medium heat. Once the butter is melted and foaming, use a wooden spoon to scrape the bottom vigorously for about 30 seconds. You're deglazing—extracting all that concentrated flavor into your fat. This is non-negotiable for depth.
Step 5: Sauté Your Vegetables
- Add your minced onion, garlic, mushrooms, and carrots to the oil-butter mixture. Sauté for exactly 2-3 minutes—you want them to soften slightly but not brown. This is aromatic building, not caramelizing. Sprinkle a tiny pinch of salt over the vegetables; it helps them release moisture and cook more evenly. Stir constantly to distribute heat.
Step 6: Add Your Rice and Broth
- Pour in your 2 cups of uncooked rice and stir constantly for about 1 minute. You're coating each grain in the fat and building nutty flavor. This prevents the rice from becoming gummy later. Now add your 4.5 cups of chicken broth, the 1 cup of frozen peas, Worcestershire sauce, salt, pepper, garlic powder, onion powder, and bay leaves. Stir everything together until completely combined. The mixture should look like a loose risotto-style situation. Turn the heat to high and let it come to a rolling boil—this takes about 3-4 minutes. You'll see big bubbles breaking the surface. The moment it boils, remove it from heat immediately. Don't let it boil longer; you're not cooking the rice here.
Step 7: Return Chicken and Cover
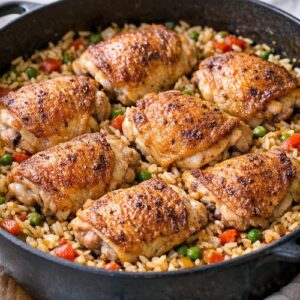
- Arrange your seared chicken thighs directly on top of the rice mixture, skin-side up. The chicken should nestle into the rice slightly but mostly sit on top. Clamp your Dutch oven's lid on firmly. If your lid doesn't seal well, cover with foil first, then place the lid on top for an extra-sealed environment.
Step 8: Braise in the Oven
- Transfer your covered Dutch oven to your preheated 375°F oven. Set a timer for 35 minutes. Do not open it during cooking. I know the urge is there. Resist it. Opening releases steam and disrupts the cooking process. In 35 minutes, your kitchen will smell absolutely incredible—that's how you know it's working.
Step 9: Check for Doneness
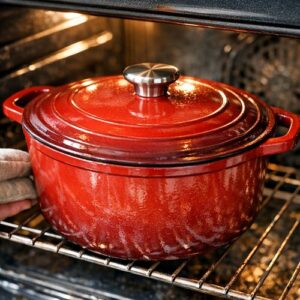
- After 35 minutes, carefully remove the Dutch oven from the oven (use an oven mitt—the handle is screaming hot). Remove the lid slowly, tilting away from your face to avoid the steam. The rice should have absorbed almost all the liquid. Check your chicken's internal temperature with a meat thermometer—it must read 165°F for food safety. Insert the thermometer into the thickest part of the thigh without touching bone. If the rice still looks wet, place the lid back on and return to the oven for 5-10 minutes. If the chicken isn't at temperature, another 5-10 minutes with the lid on will get you there.

Step 10: Optional Final Sear (The Restaurant Touch)
- If you want that crispy, golden-brown skin that looks fancy, preheat your broiler to high. Transfer your Dutch oven to the top oven rack for 1-2 minutes. Watch it constantly—broilers move fast. You're not cooking it further; you're just crisping the skin for visual appeal. Remove it the moment the skin turns deep golden.
Step 11: Rest, Garnish, and Portion
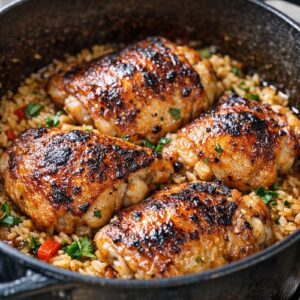
- Let the entire dish rest, uncovered, for 5 minutes. This allows residual heat to distribute and the rice to firm up slightly. Remove your bay leaves. Top the entire braise with your fresh chopped parsley. This bright green garnish does something magical—it makes the dish look intentional and restaurant-quality while cutting through the richness with fresh herb flavor. Now divide into your meal prep containers. I recommend portioning into about 5-6 separate containers depending on your appetite and how many dinners you want to cover.

Nutrition
FAQs
Can I use boneless, skinless chicken thighs instead?
You can, and they’ll still be better than breasts for meal prep purposes. However, boneless, skinless thighs lose that crispy-skin element and the bone marrow that contributes to braising depth. They’ll cook slightly faster—probably 30 minutes instead of 35. Check internal temperature at 30 minutes to adjust. They’re a fine swap if that’s what your budget allows, but bone-in skin-on is genuinely superior for this application.
What if my rice still looks wet after 35 minutes?
First, check that your oven’s temperature is actually 375°F using an oven thermometer. Many home ovens run cold. If it’s accurate and rice is still wet, your broth ratio might need adjusting (different rice brands absorb differently). Return the covered Dutch oven to the oven for 5-10 minutes and check again. In the future, reduce broth by ¼ cup if you know your rice absorbs slowly. This is the kind of thing you adjust on your second batch based on what you learned from the first.
How does this reheat differently if I freeze it first?
Frozen braises take longer to reheat because you’re thawing and heating simultaneously. From frozen, use low oven heat (300°F) for 20-25 minutes, covered, rather than stovetop reheating. The slower method prevents the rice from overcooking on the edges while the center stays cold. Thawed portions reheat much faster—5-6 minutes on the stovetop or 2-3 minutes in the microwave at 50% power.
Can I make this without a Dutch oven?
You technically can using a large regular pot with an oven-safe lid and foil covering, or a covered baking dish. The advantage of Dutch oven is the even heat distribution and the lid’s seal. If using alternatives, just ensure your lid seals reasonably well to keep steam inside. The results might vary slightly—baking dishes don’t distribute heat as evenly—but it’ll work in a pinch.
What’s the difference between this braise and a rice cooker version?
The Dutch oven searing step creates flavor depth a rice cooker can’t replicate. You could theoretically cook this in a large rice cooker, but you’d skip the crucial searing step. The rice cooker method would be faster but produce a noticeably blander result. The oven braise is worth the extra 40 minutes for the flavor difference. That flavor difference is literally what keeps you eating this meal prep all week instead of abandoning it Wednesday for takeout.
More Meal Prep Recipes You’ll Love
- Air Fryer Honey Salmon Bites Recipe – Protein-packed meal prep option with completely different flavor profile for rotating your week
- Air Fry Steak Bites Recipe – Another versatile protein base that works beautifully in meal prep applications with minimal active cooking
Your Week Just Got Significantly Better
You just learned how to cook once on Sunday and eat well for the entire week. That’s not a small thing. That’s actually the foundation of sustainable nutrition—not extreme restriction, not perfect eating, just consistent access to food that tastes good and fuels your body appropriately.
By Wednesday, you won’t be scrambling through the 3pm energy crash wondering what to eat. By Friday, you’ll realize you’ve saved hours of cooking time and probably $60-80 that would’ve gone to delivery apps. More importantly, you’ve created mental space by removing daily “what should I eat?” decisions. That freedom is genuinely one of the biggest overlooked benefits of meal prep.
Start with this braise. Get comfortable with the process. Then rotate seasonal variations. Build a library of one-pot meals. Before long, you’re not someone who “does meal prep”—you’re someone who has your nutrition strategy completely handled, which means you actually have energy for the things that matter.
More Recipes You Will Love
- This Easy Chicken Dinner – Worth adding to your recipe collection.
Celebrate your flavorful adventure!