
Braised Chicken And Rice Recipe

Listen, I get it. You're exhausted by Sunday night. The last thing you want is to spend an hour cooking dinner every single evening. That's exactly why I'm obsessed with this braised chicken and rice recipe—make it once on Sunday and eat well all week. One Dutch oven. One oven. One glorious meal that transforms into four completely different dinners without any of the "leftovers" fatigue. This dish holds beautifully in the fridge, tastes even better the next day as flavors deepen, and honestly? It tastes like you spent way more effort than you actually did. That's the chef-meets-dietitian sweet spot I live for.
Ingredients
- ¼ teaspoon freshly ground black pepper (fresh-ground, always
- 2 cup white basmati rice jasmine works too; white rice absorbs braising liquid better than brown for this application
- 4 medium carrots, minced the carbohydrates in carrots caramelize slightly during braising, adding natural sweetness
- ½ teaspoon fine sea salt adjust to taste; depends on your broth saltiness
- 3 tablespoon Worcestershire sauce adds saltiness and umami complexity that you absolutely taste
- 8 ounce mushrooms, diced cremini, button, or oyster all work; they break down slightly during the braise and create umami depth
- 4 large garlic cloves, minced (or 8 medium cloves
- 1 teaspoon onion powder complements the fresh garlic and onion beautifully
- 1 medium yellow onion, minced stores beautifully for a full week when cooked into liquid
- 1 teaspoon smoked paprika, optional but I recommend it adds subtle smokiness that elevates the whole dish
- 4 tablespoon unsalted butter adds richness to the braising liquid and helps build deeper flavor
- 6 tablespoon homemade chicken seasoning blend (I mix garlic powder, onion powder, smoked paprika, and dried thyme
- 1 cup frozen peas added at the end; they stay bright and don't overcook
- 2 bay leaves remove before serving; they flavor the liquid without becoming part of it
- 4.5 cup low-sodium chicken broth I always use homemade if I have it; store-bought is fine but watch sodium
- 5 tablespoon extra virgin olive oil, divided quality oil matters here; you'll taste it
- ½ cup fresh parsley, roughly chopped for garnish; adds brightness to counteract the richness
- 4 pound bone-in, skin-on chicken thighs (thighs stay moist during braising
- 2 teaspoon garlic powder double check you're not using garlic salt by mistake
Instructions
Step 1: Prep Your Station and Preheat
- Move your oven rack to the center position and preheat to 375°F. This takes about 10 minutes while you handle everything else. I always prep before I start cooking—it's a French cooking technique called mise en place, and it eliminates the scrambling. Line a cutting board with parchment paper for your chicken, have another clean board for vegetables. Grab your largest Dutch oven (5-6 quart capacity) and set it nearby.

Step 2: Season Your Chicken Thighs
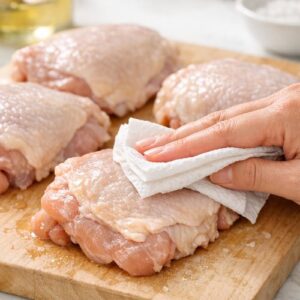
- Remove your chicken thighs from the package and pat them completely dry with paper towels. This is non-negotiable if you want a good sear. Moisture prevents browning. Arrange them skin-side up on your prepared board and generously season both sides with your chicken seasoning blend. Don't be shy—you want a visible coating. Let them sit while you work on vegetables; this allows seasoning to set slightly into the meat.
Step 3: Build Your Sear
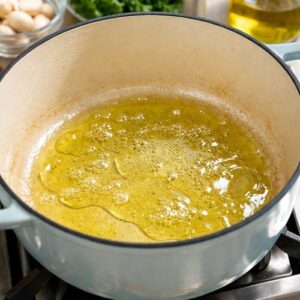
- Heat 3 tablespoons of olive oil in your Dutch oven over medium-high heat until it's shimmering and fragrant—about 2 minutes. You want it hot enough that a piece of chicken immediately sizzles when it touches the surface. Working in batches if necessary (don't crowd the pan), place chicken thighs skin-side down first. Don't move them for exactly 2 minutes—this is how you build a proper golden-brown crust. Flip and sear the other side for another minute or so. You're not cooking them through; you're creating flavor through the Maillard reaction. This is the step that separates restaurant-quality braised chicken from boring boiled chicken. The brown bits stuck to your pan's bottom? That's liquid gold. Don't wash it off.
Step 4: Remove Chicken and Build Your Aromatics Base
- Transfer your seared chicken thighs to a clean plate. Now, in that same Dutch oven with all those beautiful brown bits stuck to the bottom, add 2 tablespoons of butter and your remaining 2 tablespoons of olive oil over medium heat. Once the butter is melted and foaming, use a wooden spoon to scrape the bottom vigorously for about 30 seconds. You're deglazing—extracting all that concentrated flavor into your fat. This is non-negotiable for depth.
Step 5: Sauté Your Vegetables
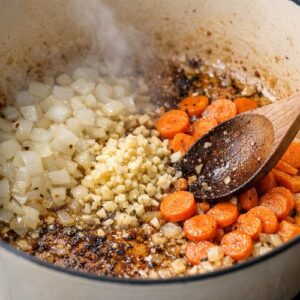
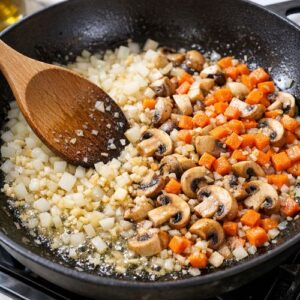
- Add your minced onion, garlic, mushrooms, and carrots to the oil-butter mixture. Sauté for exactly 2-3 minutes—you want them to soften slightly but not brown. This is aromatic building, not caramelizing. Sprinkle a tiny pinch of salt over the vegetables; it helps them release moisture and cook more evenly. Stir constantly to distribute heat.
Step 6: Add Your Rice and Broth
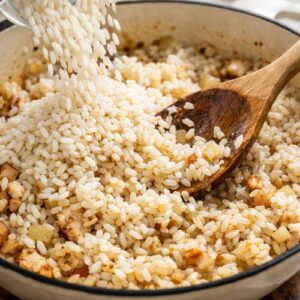
- Pour in your 2 cups of uncooked rice and stir constantly for about 1 minute. You're coating each grain in the fat and building nutty flavor. This prevents the rice from becoming gummy later. Now add your 4.5 cups of chicken broth, the 1 cup of frozen peas, Worcestershire sauce, salt, pepper, garlic powder, onion powder, and bay leaves. Stir everything together until completely combined. The mixture should look like a loose risotto-style situation. Turn the heat to high and let it come to a rolling boil—this takes about 3-4 minutes. You'll see big bubbles breaking the surface. The moment it boils, remove it from heat immediately. Don't let it boil longer; you're not cooking the rice here.
Step 7: Return Chicken and Cover
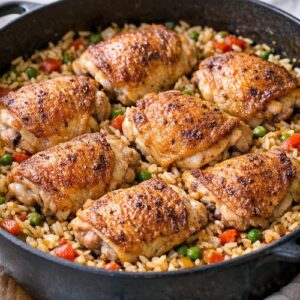
- Arrange your seared chicken thighs directly on top of the rice mixture, skin-side up. The chicken should nestle into the rice slightly but mostly sit on top. Clamp your Dutch oven's lid on firmly. If your lid doesn't seal well, cover with foil first, then place the lid on top for an extra-sealed environment.
Step 8: Braise in the Oven
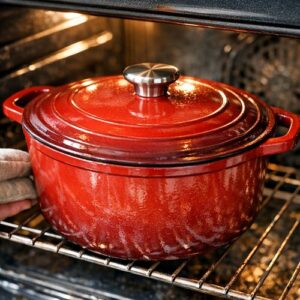
- Transfer your covered Dutch oven to your preheated 375°F oven. Set a timer for 35 minutes. Do not open it during cooking. I know the urge is there. Resist it. Opening releases steam and disrupts the cooking process. In 35 minutes, your kitchen will smell absolutely incredible—that's how you know it's working.
Step 9: Check for Doneness
- After 35 minutes, carefully remove the Dutch oven from the oven (use an oven mitt—the handle is screaming hot). Remove the lid slowly, tilting away from your face to avoid the steam. The rice should have absorbed almost all the liquid. Check your chicken's internal temperature with a meat thermometer—it must read 165°F for food safety. Insert the thermometer into the thickest part of the thigh without touching bone. If the rice still looks wet, place the lid back on and return to the oven for 5-10 minutes. If the chicken isn't at temperature, another 5-10 minutes with the lid on will get you there.

Step 10: Optional Final Sear (The Restaurant Touch)
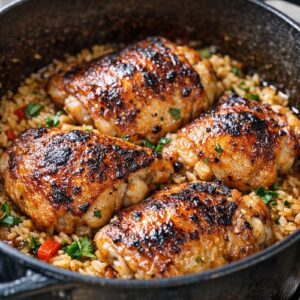
- If you want that crispy, golden-brown skin that looks fancy, preheat your broiler to high. Transfer your Dutch oven to the top oven rack for 1-2 minutes. Watch it constantly—broilers move fast. You're not cooking it further; you're just crisping the skin for visual appeal. Remove it the moment the skin turns deep golden.
Step 11: Rest, Garnish, and Portion
- Let the entire dish rest, uncovered, for 5 minutes. This allows residual heat to distribute and the rice to firm up slightly. Remove your bay leaves. Top the entire braise with your fresh chopped parsley. This bright green garnish does something magical—it makes the dish look intentional and restaurant-quality while cutting through the richness with fresh herb flavor. Now divide into your meal prep containers. I recommend portioning into about 5-6 separate containers depending on your appetite and how many dinners you want to cover.

Nutrition
Calories: 536kcalCarbohydrates: 34gProtein: 43gFat: 24gFiber: 4gSugar: 3g
Tried this recipe?Let us know how it was!