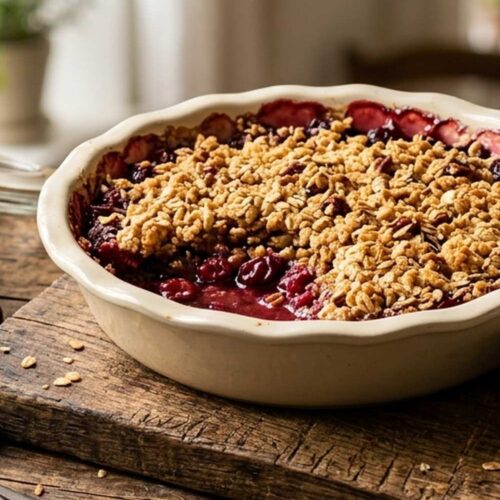
Cherry Crumble Fresh Cherries Recipe

You know that cherry crumble from your favorite brunch spot? The one with the perfectly crispy topping and the burst of tart-sweet cherries that keeps you coming back? I've been obsessed with recreating that magic at home—and after months of testing, I've finally cracked the code. Here's how to make a cherry crumble that's actually better than the restaurant version, costs a fraction of the price, and tastes like you hired a pastry chef. Whether you're looking to impress at your next dinner party or simply want to turn fresh summer cherries into something unforgettable, this recipe delivers every single time.
Ingredients
For the Cherry Filling
- 5 cup fresh cherries pitted and halved, about 2½ pounds of whole cherries
- ¼ cup all-purpose flour thickens filling slightly without creating cornstarch cloudiness
- 1 tablespoon fresh lemon zest adds aromatic brightness and complexity
- 1 tablespoon fresh lemon juice prevents the filling from becoming overly sweet and syrupy
- ½ cup granulated sugar balances tartness without overwhelming
For the Crumb Topping
- ½ cup light brown sugar packed tightly, creates chewier crumbs between crispy bits
- 2 tablespoon sliced almonds adds nutty crunch and visual appeal
- 6 tablespoon all-purpose flour provides structure to the crumb
- ½ teaspoon ground cardamom (optional but genuinely essential
- 4 tablespoon unsalted butter cold and cut into small pieces, creates distinct butter pockets
- pinch of sea salt about 1/8 teaspoon, enhances all flavors and balances sweetness
- 1 teaspoon ground cinnamon warm spice base
- ½ cup old-fashioned rolled oats adds texture and toasted flavor
- 1 tablespoon honey optional drizzle on finished crumble for extra shine and flavor depth
Instructions
Step 1: Prep Your Oven and Baking Dish
- Start by preheating your oven to 375°F (190°C). This specific temperature is crucial—it's lower than most home recipes call for, which means your topping won't brown too quickly while the filling is still cooking. Meanwhile, lightly coat a 1.5-quart baking dish (roughly 9x7 inches) with a thin layer of butter or cooking spray. This prevents sticking and helps create those beautiful caramelized edges.
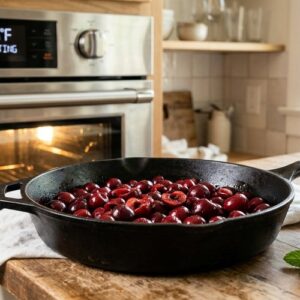
Step 2: Build the Cherry Filling
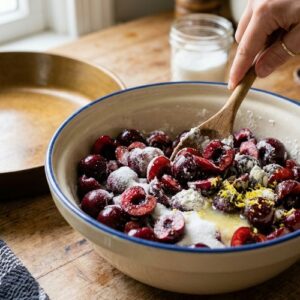
- In a medium mixing bowl, combine your 5 cups of halved fresh cherries with the ½ cup granulated sugar and ¼ cup flour. Add the fresh lemon juice and zest. Here's the professional secret: gently fold these ingredients together using a silicone spatula, not a spoon. Why? A spoon tends to crush the cherries as you mix, releasing too much juice too early. A spatula lets you combine everything while keeping the fruit mostly intact. This is what restaurants do—they want distinct cherry pieces in the filling, not cherry mush. Let this mixture sit for 2-3 minutes while you prepare the topping. This resting time allows the sugar to start dissolving and the lemon juice to begin breaking down the cell walls of the cherries, which helps them release their juice gradually during baking rather than all at once. Pour the filling into your prepared baking dish, spreading it into an even layer. Don't press down—let gravity and the oven's heat do the work.
Step 3: Create the Signature Crumb Topping
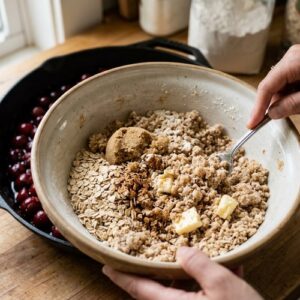
- In a separate bowl, combine 6 tablespoons flour, ½ cup old-fashioned oats (not instant—the texture matters), ½ cup packed light brown sugar, 1 teaspoon cinnamon, ½ teaspoon cardamom, and your pinch of salt. Whisk these dry ingredients together until they're evenly combined. This step is easy to skip, but don't—mixing the spices throughout ensures every bite of topping has flavor. Now comes the magic: add your 4 tablespoons of cold butter (cut into small cubes about the size of peas) to the dry mixture. Here's where most home bakers go wrong. They either use a pastry blender and overwork it, creating a paste, or they use their fingertips but warm up the butter too much. The restaurant approach? Use a pastry blender with quick, light pressure, or if you don't have one, use two forks in a crisscross motion to break up the butter into distinct pieces. You want the mixture to look like coarse, irregular crumbs with visible butter pieces throughout. This is crucial. When those butter pieces hit the hot oven, they create steam pockets that separate the flour and oats, resulting in that shatteringly crisp texture. Mix until you have mostly pea-sized pieces with some slightly larger chunks—about 1-2 minutes of work.
Step 4: Top and Bake to Golden Perfection
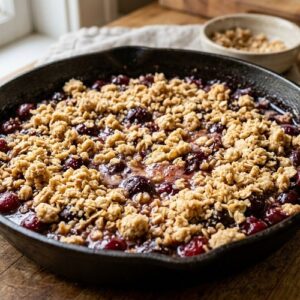
- Sprinkle the crumb topping evenly over your cherry filling, gently spreading it to cover the surface while leaving some gaps (don't pack it down—air pockets create crispness). If you have sliced almonds on hand, scatter them across the top for extra texture and visual appeal. Place your baking dish in the preheated 375°F oven and bake for 40-45 minutes. You'll know it's done when the filling is visibly bubbling around the edges and the topping is golden brown with some deeper caramelization on the higher peaks. The fruit juices should be breaking through in a few spots, showing that glossy, jammy filling underneath. This timing range accounts for variation in your oven and the exact size of your fruit pieces. Start checking at 38 minutes—every oven runs differently.
Step 5: Cool and Set
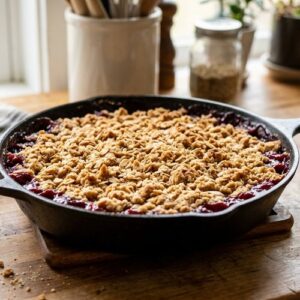
- Here's the step everyone wants to skip: let it cool for 10 minutes before serving. I know you're excited, but this matters. During those 10 minutes, the filling is setting up—the flour is fully hydrating, the pectin in the cherries is gelling, and the whole dish is becoming structurally sound. If you dig in immediately, you'll get a runny, soggy mess. After 10 minutes, you get a spoonable filling with distinct cherries and a topping that stays crispy against the warm fruit.
Notes
- Using too much flour in the filling: I've seen recipes call for ½ cup flour, which creates a paste rather than a jammy filling. Stick with ¼ cup. The filling should be noticeably liquid before it goes in the oven—it will set up during baking.
- Over-mixing the crumb topping: The moment your mixture starts holding together when you squeeze it, stop. You've gone too far. You want visible butter pieces. If you continue mixing, you're creating a paste that becomes dense and cakey rather than crispy and crumbly.
- Using butter straight from the counter: Room temperature butter won't create the pockets you need. Cold butter is essential for crispness. If your butter is soft, return it to the fridge for 10 minutes before cutting it up.
- Skipping the cardamom because you're "not sure about it": Trust the recipe. This is where the magic lives. If you're genuinely concerned, start with ¼ teaspoon instead of ½ teaspoon, but do include it. The difference between crumbles with and without it is genuinely noticeable to anyone eating it.
- Baking at 425°F because you want it done faster: This is how you end up with a burnt topping and an undercooked filling. The lower temperature exists for a reason. Patience rewards you here.
Nutrition
Calories: 379kcalCarbohydrates: 74gProtein: 4gFat: 9gSaturated Fat: 5gCholesterol: 21mgSodium: 7mgFiber: 4gSugar: 49g
Tried this recipe?Let us know how it was!