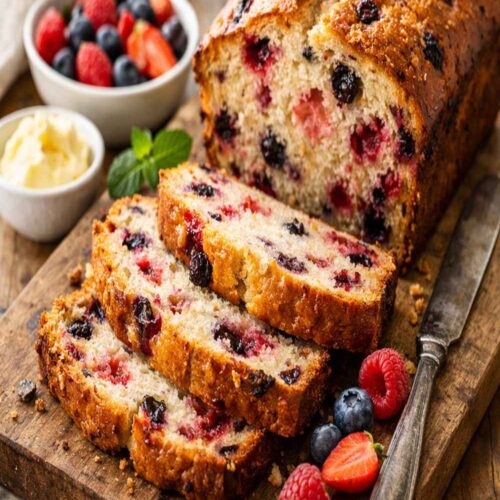
Berry Bread Recipe
Learning to make berry bread isn't just about this dish—it's about mastering a technique that unlocks dozens of other recipes. I'm talking about the gentle fold, the move that separates bakery-quality loaves from dense, heavy brick-like results. When I was training in culinary school, I watched a pastry chef incorporate fresh blueberries into batter using nothing but a spatula and patience. The result? Evenly distributed berries, a tender crumb, and absolutely no purple streaks. That moment changed how I approach every mixed-berry recipe. And here's the beautiful part: once you nail this technique, you'll use it for muffins, quick breads, pancakes, and even incorporating delicate add-ins into batters for banana pancake muffins.
Ingredients
For the Bread Base
- ½ teaspoon fine sea salt enhances flavor and strengthens gluten structure
- 1½ cup all-purpose flour (spooned and leveled, never packed
- 1 large egg, room temperature acts as a binder and adds richness to the crumb
- 2 teaspoon baking powder (the primary leavening agent that creates lift
- ½ cup granulated sugar adds structure and moisture, helps create an open crumb
- ½ teaspoon pure vanilla extract (enhances flavor subtly
- ¼ cup neutral oil like canola or light olive oil creates moisture and tenderness without the heaviness of butter
- ¾ cup whole milk full-fat creates a tender, moist texture better than low-fat options
For the Berries and Finish
- 1 teaspoon cornstarch (coats berries to prevent juice release
- 1½ cup fresh blueberries, washed and completely dried moisture on the surface causes bruising and uneven distribution
- 1 tablespoon coarse sugar for topping adds texture and visual appeal, won't dissolve into the bread
Instructions
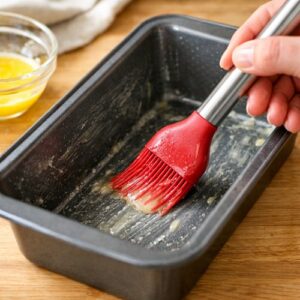
Step 1: Prepare Your Pan and Oven With Precision
- Preheat your oven to 350°F (175°C). While it heats, grease your 8½ x 4½-inch loaf pan thoroughly—I use a silicone pastry brush with melted butter, making sure to coat every corner, edge, and crevice. Then lightly dust the entire interior with flour, shaking out any excess. This two-step coating prevents sticking while keeping your bread's edges clean and defined. This pan size matters—if you use a larger pan, your bread will be too shallow and overbake; smaller means it stays underbaked in the center. Your oven temperature is critical too. At 350°F, you achieve gentle, even baking that cooks the center without browning the exterior too aggressively.
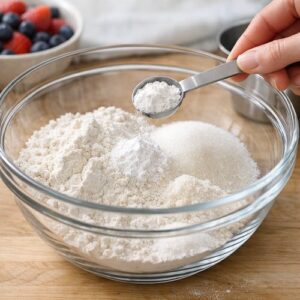
Step 2: Build Your Dry Mixture With the Precision of a Chemist
- In a large mixing bowl (I prefer glass so I can see through it), combine your flour, sugar, baking powder, and salt. Here's the technique moment: use a whisk, not a spoon. Whisking aerates your dry ingredients—it incorporates tiny air pockets throughout. These air pockets act as nucleation sites when leavening agents activate in the oven. More air now means more lift later. Whisk for about 20 seconds, making sure you break up any lumps of baking powder or sugar. You're not looking for a perfectly uniform color—just ensure no streaks of baking powder remain visible.
Step 3: Create Your Wet Mixture (This Is Where Emulsification Happens)
- In a separate medium bowl, whisk together your milk, oil, egg, and vanilla extract. This combination creates an emulsion—oil and water don't naturally mix, but the egg yolk acts as an emulsifier, coating oil droplets in a protective layer that allows them to suspend in milk. This emulsion is what creates a tender crumb. As the egg protein denatures in the oven, it stabilizes this mixture, preventing greasiness. Whisk this wet mixture for about 15 seconds until the color is uniform and slightly lighter—you're incorporating a tiny amount of air here too. If your egg was cold from the refrigerator, your mixture might look slightly curdled. That's fine—it'll smooth out during the next step.
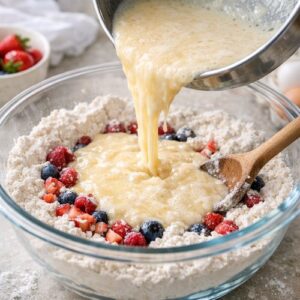
Step 4: The Most Critical Step—Combining Wet and Dry (Gluten Development)
- Pour your wet mixture into your dry mixture. Now here's what separates home bakers from skilled ones: mix just until the ingredients are barely combined. I'm talking about 10-12 gentle folds with a spatula. You should still see streaks of flour. Your batter should look lumpy and underdeveloped. Why? Flour contains gluten proteins. The more you mix after adding liquid, the more you develop gluten. Developed gluten creates chewy, dense bread. Underdeveloped gluten creates tender, crumbly bread. In sweet quick breads like this one, you want minimal gluten development. The lumps will smooth out during baking as proteins hydrate. This is the mistake most home bakers make—they mix until the batter looks smooth and uniform. Resist that instinct. Lumpy batter equals tender bread.
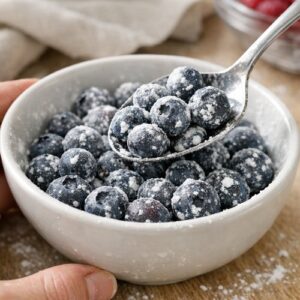
Step 5: The Fold-and-Coat Method for Perfect Berry Distribution
- Pat your blueberries completely dry with paper towels—any surface moisture causes bruising. In a small bowl, gently toss your berries with cornstarch using a light hand. I use my fingers, rotating the berries in the cornstarch rather than stirring. The cornstarch creates an invisible protective coating. Now comes the signature move: fold the berries into the batter using the under-and-over motion. Spatula down through the center of the batter, along the bottom, then up and over the top. Rotate your bowl a quarter turn. Repeat. Do this 12-15 times until berries are evenly distributed. You'll see them suspended throughout rather than sitting on top or sinking to the bottom. This distribution happens because you're folding gently—you're not breaking berries apart, and you're moving slowly enough to maintain batter consistency. Here's what you should see: individual berries throughout the batter, no clusters, no bare patches. The batter should still look slightly lumpy—that's perfect.
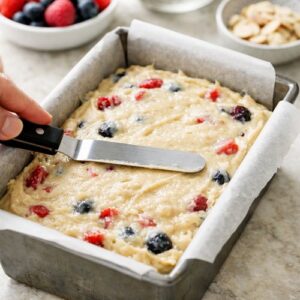
Step 6: Transfer and Top With Intention
- Pour your batter into your prepared loaf pan, smoothing the top gently with an offset spatula. Don't press or compact—just level it. Now sprinkle your coarse sugar over the top in an even layer. This topping serves two purposes: visual appeal and textural contrast. The sugar won't dissolve completely into the bread; it'll create a subtle crunch that provides eating experience beyond just flavor.
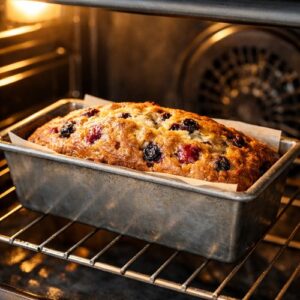
Step 7: Bake With Patience and Trust
- Slide your pan into your preheated oven. Set a timer for 60 minutes. Do not open the oven door before 50 minutes—opening it drops the temperature suddenly and can create a dense, gummy center. At 60 minutes, check your bread with a wooden toothpick inserted into the center. If it emerges clean or with just a few moist crumbs (not wet batter), you're done. If it comes out with wet batter, bake another 5-10 minutes and recheck. The berry bread should be deep golden brown on top, and the edges should be slightly pulling away from the pan. Total baking time is usually 60-70 minutes, depending on your oven's accuracy. Every oven bakes differently—some run hot, some run cold. Over time, you'll learn your oven's personality.
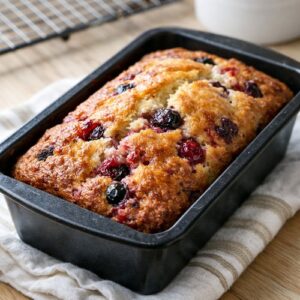
Step 8: Cool Properly to Set the Crumb
- Remove your bread from the oven and let it rest in the pan for 15 minutes. This resting period is crucial—it allows the crumb to set and firm up slightly. If you try to turn it out of the pan immediately, it'll fall apart. After 15 minutes, run a small knife around the edges and turn the bread out onto a cooling rack. Let it cool completely—at least 2 hours—before slicing. If you slice it while warm, you'll see it's still gummy inside. The crumb continues to set as it cools. Patience creates better texture.
Notes
- Mistake: Sunken berries clustered at the bottom - This happens when berries aren't coated (they're too moist and heavy) or when you mix them into the batter with a spoon instead of folding. Fix: dry your berries completely before coating, use cornstarch instead of flour for the coating, and commit to the folding motion—down, across the bottom, up and over.
- Mistake: Dense, gummy crumb throughout the entire loaf - This indicates overmixing, which developed too much gluten. It can also mean your batter was too wet. Fix: next time, mix your wet and dry ingredients until you see obvious lumps, then stop. Don't stir. Also, ensure your berries are dry—excess berry juice adds moisture and creates gumminess.
- Mistake: Purple or red streaks throughout the batter - Berry juice is staining your batter, which means berries released liquid during mixing. Fix: pat berries completely dry, coat them with cornstarch (which absorbs moisture better than flour), and fold them in gently with minimal motion. If you're folding 25 times, you're mixing too much.
- Mistake: Bread tastes bitter or has a metallic flavor - This is from imitation vanilla extract or from baking powder past its expiration date. Fix: splurge on real vanilla extract—the flavor difference is worth it. Replace your baking powder every 6-8 months since it loses potency over time.
- Mistake: Uneven baking—golden brown on top but pale and underbaked on the sides - Your oven likely runs hot, or your oven rack position is too high. Fix: position your rack in the middle of the oven, not the upper third. If baking still seems uneven, tent the top with foil after 40 minutes to prevent overbrowning while the center catches up.
Nutrition
Calories: 233kcalCarbohydrates: 37gProtein: 3gFat: 8gSaturated Fat: 6gCholesterol: 21mgSodium: 161mgFiber: 1gSugar: 17g
Tried this recipe?Let us know how it was!