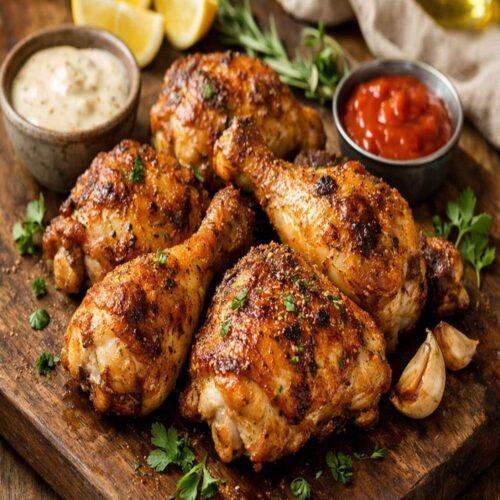
Air Fry Chicken Legs And Thighs Recipe
I'm obsessed with how the air fryer transforms chicken legs and thighs into something that tastes like it came from a rotisserie counter, except it's sitting on my weeknight dinner table. Pair this with crispy baked potatoes wrapped in foil or a bright green salad, and you've got a meal that feels indulgent but actually fuels your body right.
Ingredients
- ½ cup fresh cilantro or parsley chopped finely, for bright finish and visual appeal
- 1 teaspoon kosher salt Diamond Crystal preferred, as it's less dense than table salt
- ½ teaspoon ground black pepper freshly cracked if you have a grinder
- 1 teaspoon garlic powder optional but recommended, adds savory depth
- 8 to 10 bone-in, skin-on chicken legs with drumsticks attached approximately 2¼ pounds total, which yields 4 servings
- ½ teaspoon dry mustard powder adds pungent heat and helps develop crust
- 1 tablespoon extra-virgin olive oil just enough to help the spice rub adhere and aid in browning
- 2 teaspoon smoked paprika the foundation of this rub, adding depth and that wood-fired flavor
- ¼ teaspoon ground cayenne pepper optional heat; adjust to your spice tolerance
- 1 tablespoon dark brown sugar packed, for caramelization and subtle sweetness
- 2 teaspoon fresh lemon zest optional, adds brightness that cuts through the richness
Instructions
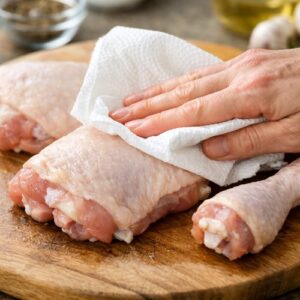
Step 1: Prep Your Chicken Right
- Start by patting your chicken pieces completely dry using paper towels. This is non-negotiable if you want crispy skin. Any moisture clinging to the surface will steam off instead of browning, and you'll end up with pale, flabby skin instead of the crackling texture we're after. Once they're dry, place all the pieces in a large mixing bowl. Drizzle the olive oil evenly across the chicken, using your hands to coat each piece lightly. The oil is your vehicle—it helps the dry rub stick to the skin and ensures even browning throughout the cooking process.
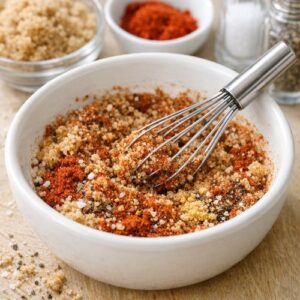
Step 2: Build Your Signature Rub
- In a separate small bowl, whisk together the brown sugar, smoked paprika, salt, pepper, mustard powder, and cayenne. This is where the magic starts. The brown sugar should break up any lumps so the mixture is uniform and fine. Take a moment to smell this combination—that's what you're about to taste in about 15 minutes. Sprinkle this entire mixture over your oiled chicken pieces in the large bowl. Now, here's the technique: toss everything together using your hands, making sure every single piece gets evenly coated. I spend about two minutes doing this, turning each leg and thigh to ensure the rub covers the skin completely, even the bottoms and crevices.
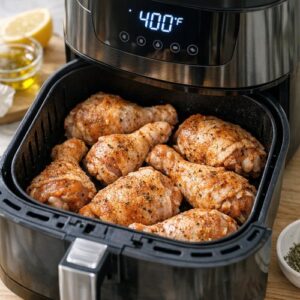
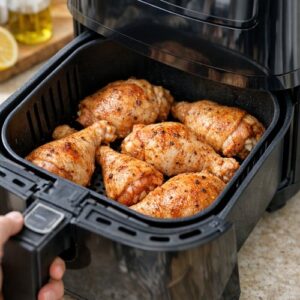
Step 3: Preheat and Arrange
- Preheat your air fryer to 400 degrees Fahrenheit. Consult your air fryer's manual for specific preheating instructions—some models heat faster than others. This usually takes about 3-5 minutes. While it preheats, arrange your seasoned chicken pieces in a single layer in the air fryer basket. This is crucial: don't overcrowd the basket. The chicken pieces should sit with a little space between them so the hot air circulates on all sides. If they're touching, you'll steam them slightly instead of achieving that crispy exterior. If your batch is too large, work in two batches. I'd rather have perfectly cooked chicken twice than mediocre chicken once.
Step 4: First Cook Cycle
- Once your air fryer reaches temperature and your chicken is arranged, place the basket in the fryer and set the timer for 10 minutes. Don't peek constantly—the air fryer works best when you give it consistent heat. Set a phone timer if you're forgetful like me on busy evenings. During these first 10 minutes, the exterior is browning and the skin is starting to render. You'll smell that incredible poultry aroma filling your kitchen. That's the Maillard reaction happening—proteins and sugars bonding at high heat to create hundreds of flavor compounds. Science is delicious.
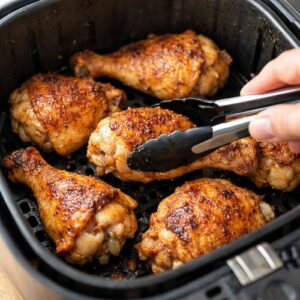
Step 5: Flip and Finish
- When the timer sounds, carefully slide the basket out and flip each piece of chicken so the other side can crisp up. This ensures even browning and prevents any pale spots. The skin should already be taking on a deep golden color—you're not looking for charring, but you should see a nice caramel-brown hue developing. Return the basket to the air fryer and cook for another 8 minutes. This second phase finishes cooking the interior and ensures the skin on the bottom side reaches full crispiness. Again, resist the urge to open and check constantly.
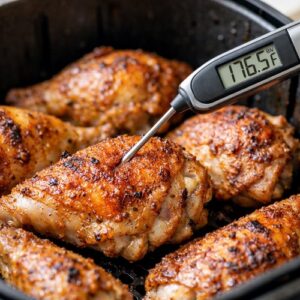
Step 6: Temperature Check and Rest
- After 18 total minutes of cooking, insert an instant-read meat thermometer into the thickest part of the thigh without touching bone. You're looking for 165 degrees Fahrenheit minimum for food safety. However—and this is my professional tip—I typically pull mine out around 190 degrees Fahrenheit for maximum juiciness. This might sound counterintuitive, but chicken thighs and legs are forgiving dark meat. The higher fat content keeps them moist even at these temperatures, while the collagen in the skin and connective tissue breaks down more completely, creating that restaurant-quality texture. Transfer the cooked pieces to a clean plate and let them rest for 5 minutes. This allows the internal juices to redistribute throughout the meat rather than running onto your plate when you cut in. I know waiting feels impossible when it smells this good, but trust the science.
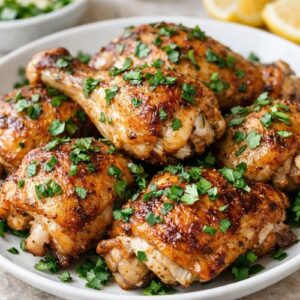
Step 7: Finish and Serve
- Just before serving, sprinkle your rested chicken pieces generously with the fresh chopped cilantro or parsley. The bright color contrasts beautifully with the mahogany-brown chicken, and the fresh herb notes cut through the richness of the skin in a way that feels sophisticated and complete. Serve immediately while the skin is still crackling. This dish is best enjoyed hot, but it reheats exceptionally well for meal prep situations—just give it a 5-minute spin in the air fryer at 350 degrees to restore crispiness.
Notes
- Pat dry like your life depends on it - Seriously, extra moisture is the enemy of crispy skin. Use paper towels generously and don't rush this step. Some chefs even pat, let sit uncovered in the fridge for an hour, then pat again. That's professional-level technique right there.
- Don't skip the oil coating - The air fryer doesn't add oil like traditional frying. That light coating of olive oil is essential for browning, crisping, and flavor development. It's not making this "fried"—it's making it actually taste good.
- Customize your heat level - If you don't enjoy spicy food, reduce the cayenne to ⅛ teaspoon or omit it entirely. If you like heat, add ½ teaspoon more. This is your kitchen; flavor should make you happy.
- Try different finishing herbs - Cilantro is fresh and bright, but basil, oregano, or even crushed red pepper flakes work beautifully here. I change mine seasonally based on what's thriving in my garden.
- Mix your spices fresh each time - Pre-mixed spice rubs oxidize and lose potency. Mixing fresh takes 60 seconds and makes a noticeable difference in flavor intensity and complexity.
- Know your air fryer's personality - Every model runs slightly different. If your chicken isn't as crispy as you'd like, increase the temperature to 410 degrees next time. If it's cooking too fast, drop to 390 degrees. One or two trial runs and you'll have it dialed in perfectly.
Nutrition
Calories: 359kcalCarbohydrates: 4gProtein: 24gFat: 27gSaturated Fat: 7gCholesterol: 135mgFiber: 1gSugar: 3g
Tried this recipe?Let us know how it was!